
 myCSUSM


Installing Zoom - The Web Conferencing System
Installing Zoom
Why use this?
Zoom is a cloud-based meeting tool that lets you schedule and hold real-time online meetings. Instructors can use them for live classes, department meetings, collaborating with peers, or creating microlectures. Students can use it to participate in live classes, collaborate with their peers, or chat with friends/family. Staff can use it to collaborate with their peers, participate in department meetings, or meet with colleagues. The options are limitless.
You can have video or audio meetings, share screens to display a desktop to view documents, website, or videos. Zoom meetings can be recorded in the cloud (you will receive a link) or saved to your computer and uploaded to YouTube or other sites, allowing you and your team to create and share group presentations.
Requirements for PC, MAC, and Linux
- Hardware
- Computer, Phone, Tablet
- Built-in or plug-in speakers
- Built-in or wireless microphone
- Built-in or external USB webcam (optional)
- Internet
An internet connection – broadband wired or wireless (3G or 4G/LTE) - System Requirements
- Bandwidth
The bandwidth used by Zoom will be optimized for the best experience based on the participants’ network. It will automatically adjust for 3G, WiFi or Wired environments.
Installing Zoom
This will create an icon on your desktop you can use to launch Zoom.
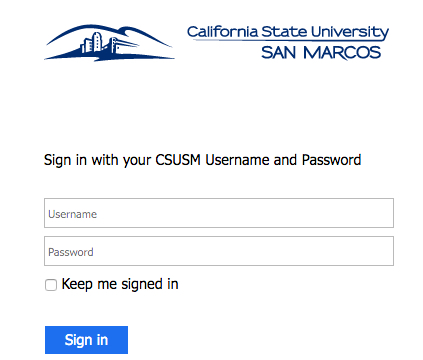
1. Go to https://csusm.zoom.us/
2. In the upper right, click the "Login to Host a Meeting" link

3. Enter your campus username and password, and then select Sign in
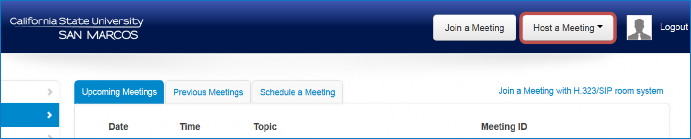
4. . Select Host a Meeting.
5. Choose a Video Meeting. Note, at this point you are just installing the software.
6. Select Start Meeting.
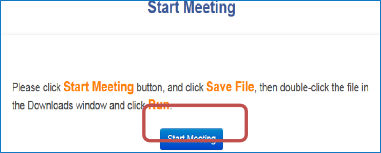
7. Select Save File.
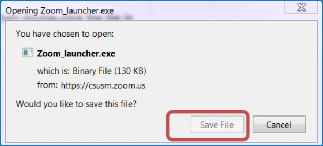
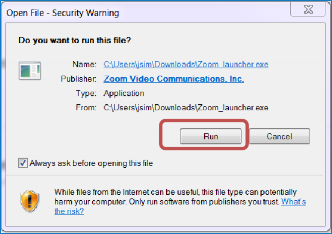
8. Locate and open the Zoom launcher file from your downloads.
9. Select Run
10. Once the program is installed, the Zoom launcher should appear on your desktop.
