
 myCSUSM


Editing a Page in OU Campus
Welcome to OU Campus, the campus’s web editor.
- See all guides: OU Guides
Jump to:
Logging into OU
There are two methods available for users to make web edits on campus:
Login Process Video:
Footer Link Access - Direct Page Edit:
Following this method will bring you directly to the edit view of the page you were on and promotes fast and easy content updates.
- Navigate to the web page on the live site (example: www.csusm.edu/web/).
- Scroll to the bottom of the page to the footer.
- Right click anywhere in the page’s footer that is not a link. On the far left-hand side of the page, an "Edit this Page" link will appear.
- Select the Edit this Page link.
- Log into OU Campus using your campus single sign on.
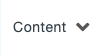
- The page will load in the preview; select the
 button to edit your content.
For Advanced Users - OU Dashboard:
The OU Dashboard method lets you navigate through the campus site structure to pages needing edits. This is more time consuming than the direct page edit method and is similar to how Cascade was set up.
- Log into OU campus by going to https://oucampus.csusm.edu/10/#oucampus/csusm/www and logging in with your campus credentials.
- You will be taken to your OU Dashboard.
- Select the
 tab in the blue bar; a column will load on the left side.
 - Navigate to the site needing updating through the folder structure.
- Once a page that needs updating has been located, select on the page in the file structure.
- The page will load in the preview; select the button to edit your content.
Editing Pages
Once you have navigated to the page needing edits:
- The page will load in the preview; select the button.
- Make the page edits as needed in the boxed in area.
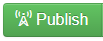
- Select the
 button (far left in toolbar) – this will save your changes as a development draft.
 - Select
 if the edits are ready to go live.
 - Continue editing pages as needed.
Please note: If you do not publish your changes after saving, your page will be "checked out" and lock the page
from future edits from other users. To check in content and allow other people to edit the content you will need to click
the ![]() button.
button.
Adding Files to OU Campus
There are a few extra steps necessary before hosting documents (pdf, word, powerpoint, etc) online. View the Accessibility Guides to learn how to process your documents or fill out the Accessibility Drop Box Form.
- Select in top blue bar and then Pages in the drop down.
- In the main content area the site folders will show.
- Locate the folder of the site you need to add files to.
- Select the sub-folder (such as “documents” or “images”) that you want to add to.
- Select the
 button and add your file(s) to the pop-up window.
 - Select
 when ready.
Important: Make sure file name has no spaces, capitalization, or special characters. Rename the file if needed.