

 myCSUSM






Duplicate Quiz or Exam and Restrict Access
If you have a student who needs extra time, or needs to take a quiz/exam at a different time, use our guide "Allow Additional Time for One or More Students."
These instructions are use to duplicate a quiz/exam when useing Respondus LockDown Browser & Monitor and you need to use Zoom to live proctor the quiz/exam for one or more students.
Duplicate quiz/exam
- In Cougar Courses, go to the topic where the quiz/exam is located.
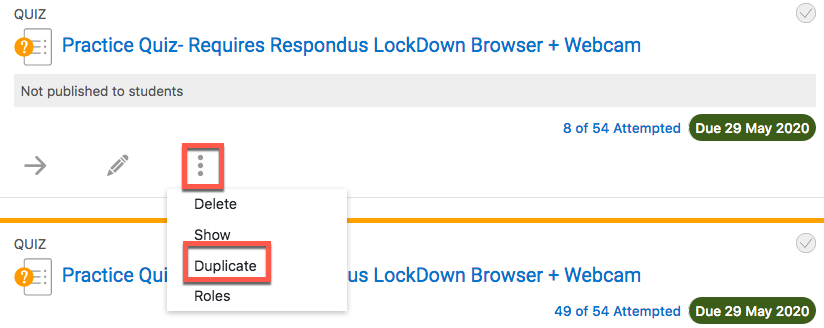
- Select the three dots below the title of the quiz/exam and choose Duplicate from the menu.
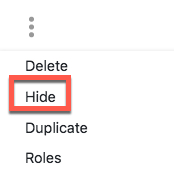
- Select the three dots again and select Hide to prevent access while you are making
modifications.
Restrict Access
User restriction by email
- Click on the quiz or exam link title.
- On the upper right, select the gauge in the upper right corner, then select the Edit Settings link.
- Scroll down to the Restrict Access section.
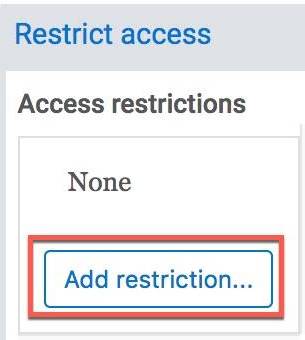
- Select the Add restriction button.
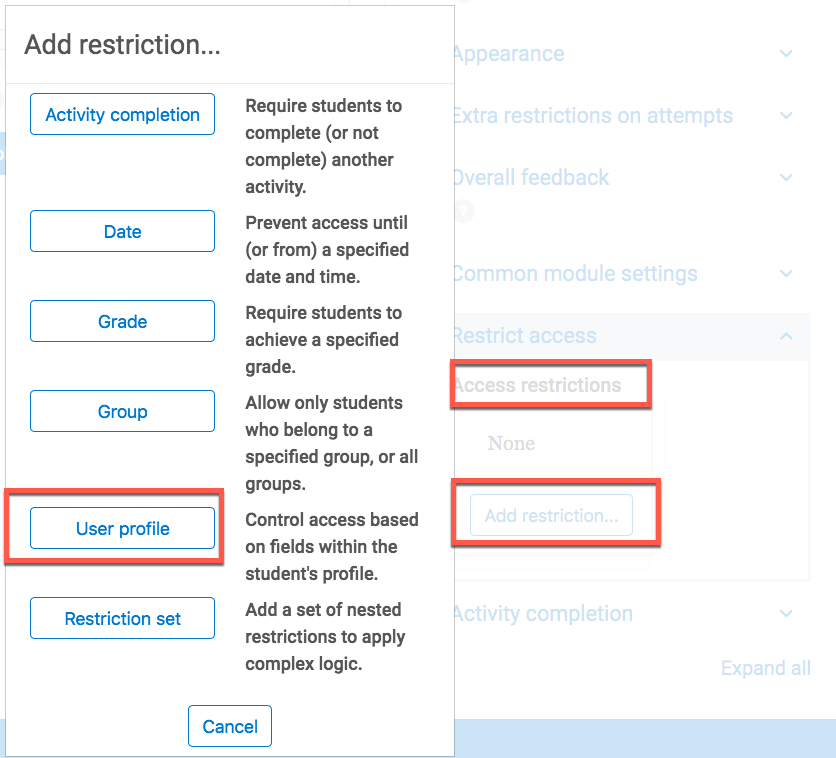
- Select the User profile button.
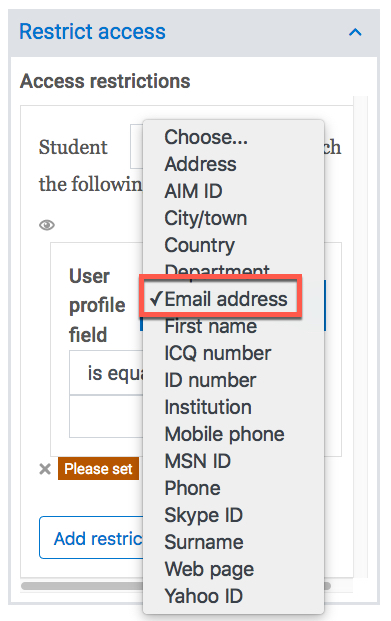
- In the drop down menu for Choose... select Email address
- Leave it at "is equal to"
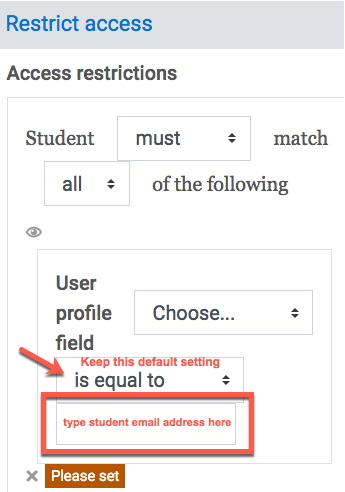
- Add the student email address in the box.
- Select the "save and return to course" button on the left under the Description box.
User restriction by date
- Click on the quiz or exam link title.
- On the upper right, select the gauge in the upper right corner, then select the Edit Settings link.
- Scroll down to the Restrict Access section.
- Select the Add restriction button.
- Select the Date button.
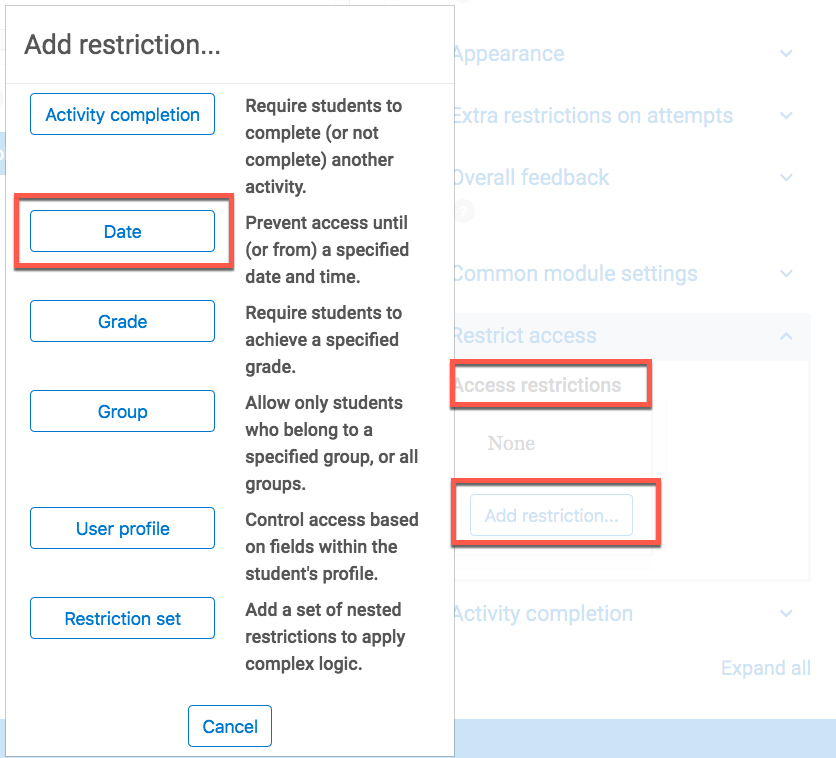
- Set the start date and time. (the from settings)
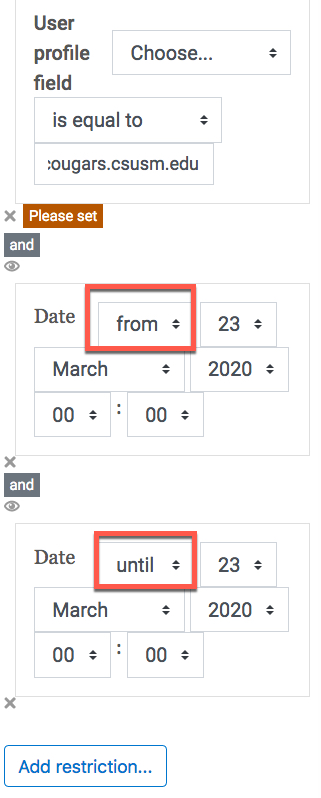
- Select the Add restriction button again and choose Date.
- In the second date, click the drop down icon next to "From" and choose "until"
- Set the end date and time.
- Select the "save and return to course" button on the left under the Description box.