
 myCSUSM


Import Course Content
Why do this?
You can easily copy content from Community container to another.
Once you have finished importing content, please see our help guide "Checklist for Updating an Imported/Restored Course" for next steps.
To Import
- Go into the course you want to bring content into (your new course). Note: If you are using the Weekly Format or want to keep the same dates from the course you are copying from you will want to change the course start date before importing. For more information, please see our help guide "Set Course Start/End Date." If not, proceed to step 2.
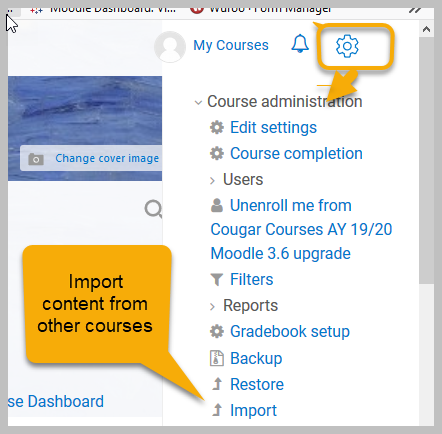
- When ready to import: click the gear icon in the upper right to open the Course Administration. From the dropdown, select Import.
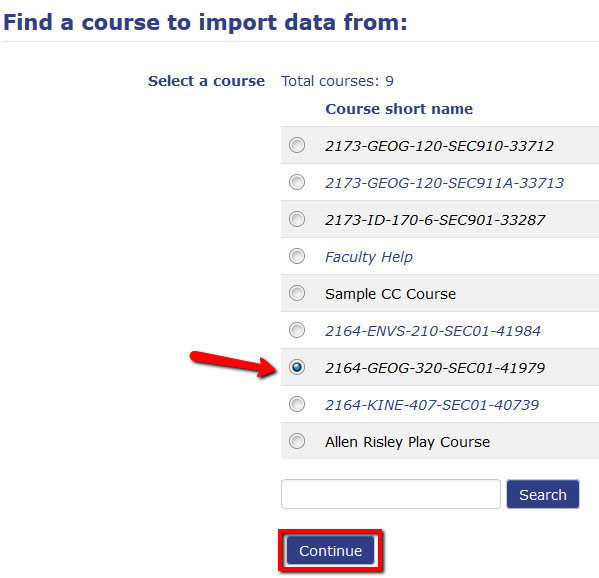
- Click the radio button in front of the course you wish to import (the course that has the content that you want). Then click Continue. Note: If you don't see the course, type the course name (ex. ENVS 210) in the search box and press Search to locate it.
- If you wish to bring over all of the content, click the "Jump to final step" button at the bottom. If you do so, the import will begin immediately. Once the import is complete click Continue to complete the process. Once you have finished importing content, please see our help guide "Checklist for Updating an Imported/Restored Course" for next steps. If you only want to bring over a select number of items, instead click Next and proceed to steps 5 through 8.

- On the Schema Settings page, review your course content. By default, all items will be selected. Click the checkboxes to deselect any topics/modules or content you do not want to import into your new course. To bring over an item you must have the box for that topic/module checked as well.
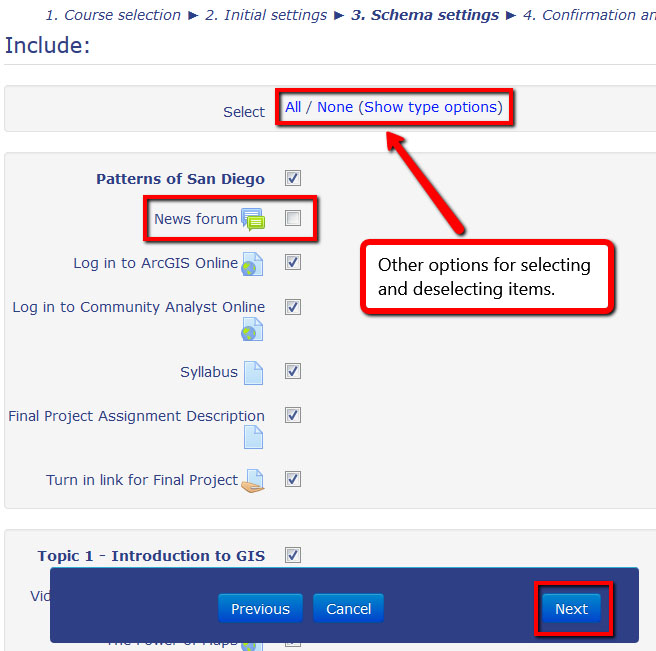
- When finished, scroll to the bottom and click Next.
- On the Confirmation and Review page, review the list of included items (identified with a check mark). To edit your selections, click Previous.
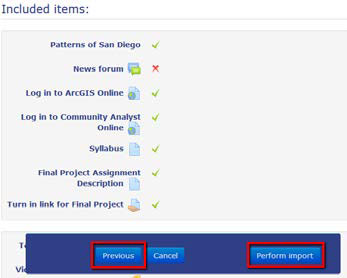
- When ready, at the bottom of the screen click Perform import. Time to import will vary according to your course size. Once the import is complete, click Continue.

Once you have finished importing content, please see our help guide "Checklist for Updating an Imported/Restored Course" for next steps.
Note: Imported items will be placed in the corresponding module (by location, not by name). For example, if your imported content was in the third module in the original course, it will be in the third module in the new course (regardless of the module name).