
 myCSUSM


Workshop for Peer Reviews
Why Use This
Workshop is a powerful peer (and self) assessment activity. Students submit their own work, either files or online text, and then receive a number of submissions from other students which they must assess according to the instructor’s specifications. If enabled, they may also assess their own work. The instructor can decide whether to show or hide the identities of those being assessed (the identities of the reviewers are hidden by default). Students can be given two grades in the gradebook: a grade for the student's own submission and a grade for the quality of their assessments. The instructor can provide example submissions for students to practice assessing at the beginning of the Workshop, and can choose to publish specific student submissions to highlight student work at the end of the Workshop.
Overview
Workshop has five phases. The instructor controls the switch from one phase to the next, and can move forward or back between phases. After the initial Workshop setup screen, you will see the phases screen. The current phase will be highlighted green. Clicking on the “Switch to the…” link underneath the phase name will move the Workshop into that phase.
- Setup Phase: Instructor sets up the Workshop and creates the assessment form.
- Submission Phase: Students submit their work. The instructor sets how the submissions will be allocated.
- Assessment Phase: Students assess their assigned submissions.
- Grading Evaluation Phase: Instructor reviews submissions and assessments, provides feedback, and can override grades
- Closed: Students can now see their grades and the feedback provided for their submission.
Setting Up Your Workshop
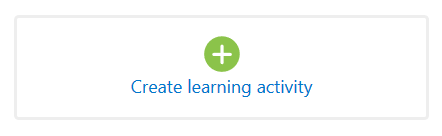
- In the section/module where you want your workshop, scroll to the bottom and click on the Create Learning Activity link.
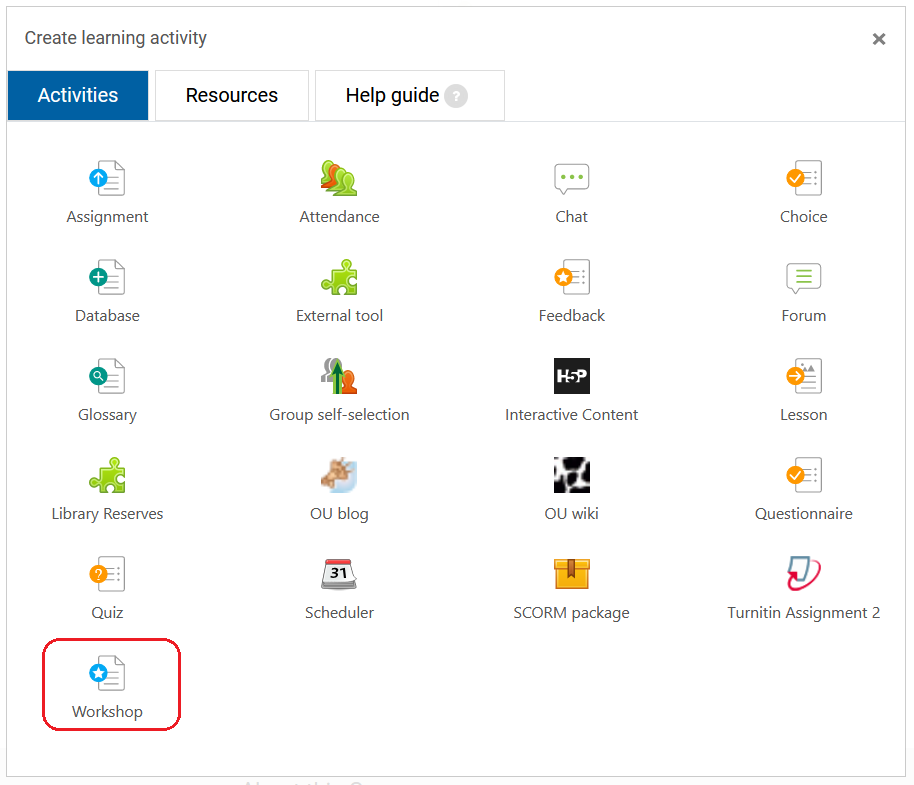
- In the pop-up window choose Workshop.
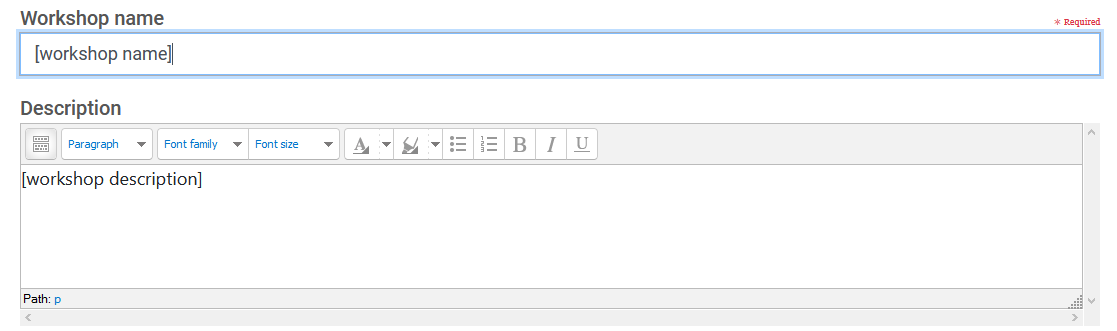
- Give it a name and a description.
- Set the Grading Strategy:
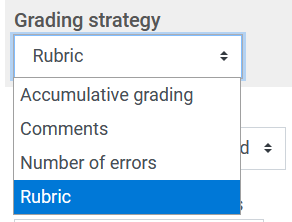
- Accumulative grading: comments and a grade are given regarding specified aspects
- Comments: comments, but no grade, are given regarding specific aspects
- Number of errors: comments and a yes/no assessment are given regarding specified assertions
- Rubric: a level assessment is given regarding specified criteria.
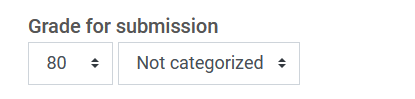
- Set the Grade for the submission. If you use categories in your gradebook, set the appropriate category.
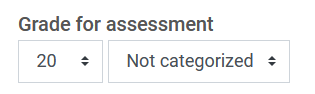
- Set the Grade for the assessment (reviews). If you use categories in your gradebook, set the appropriate category.
- Submission settings:
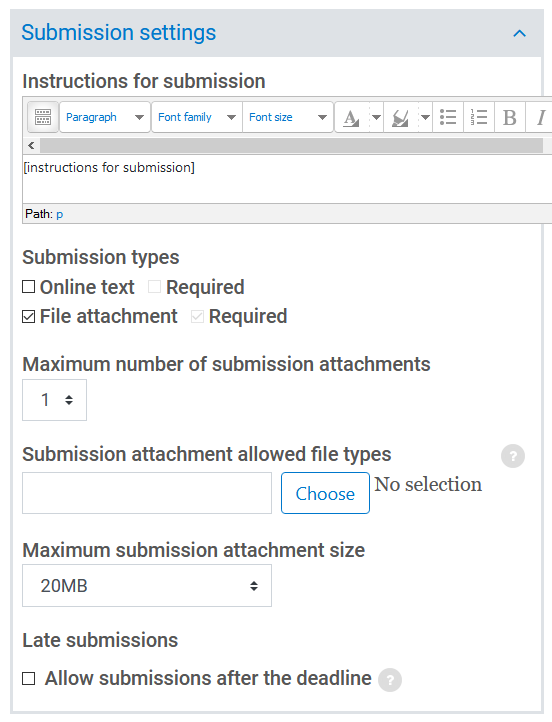
- Enter any instructions for submission for students
- Choose whether students are submitting online text or file attachments
- If allowing file attachments, set the maximum number of submission attachments
- Select whether or not to allow submissions after the deadline
- Assessment settings:
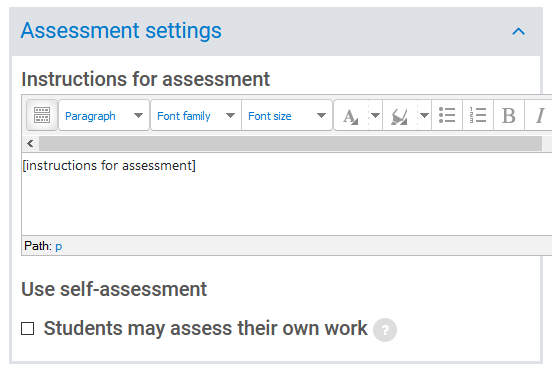
- Enter any instructions for assessment for students
- Choose whether or not students may assess their own work
- Feedback:
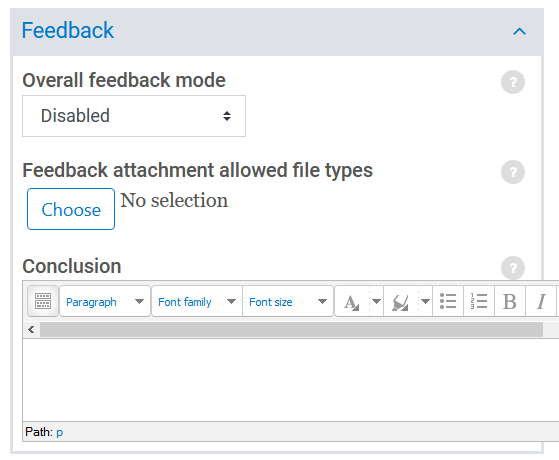
- Overall feedback mode: if enabled there will be an overall feedback text box at the bottom of the assessment form where the reviewer can enter overall feedback. Choose whether enabled and required, enabled and optional, or disabled.
- If you want reviewers to be uploading feedback attachments, set the maximum number of feedback attachments.
- Conclusion: Enter a message you would like displayed to students when the workshop has closed.
- Example Submissions:
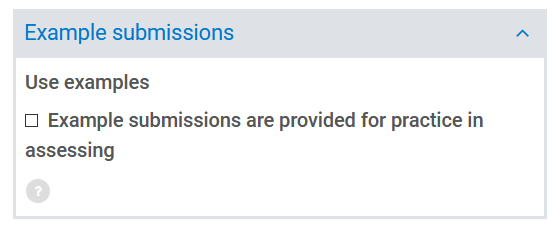
- You can provide sample submissions to provide students practice in assessing. If you will not be providing examples, uncheck the box. If you will provide examples, check the box and then choose the mode of examples assessment (voluntary, required before submission, or required before assessment).
- Availability:
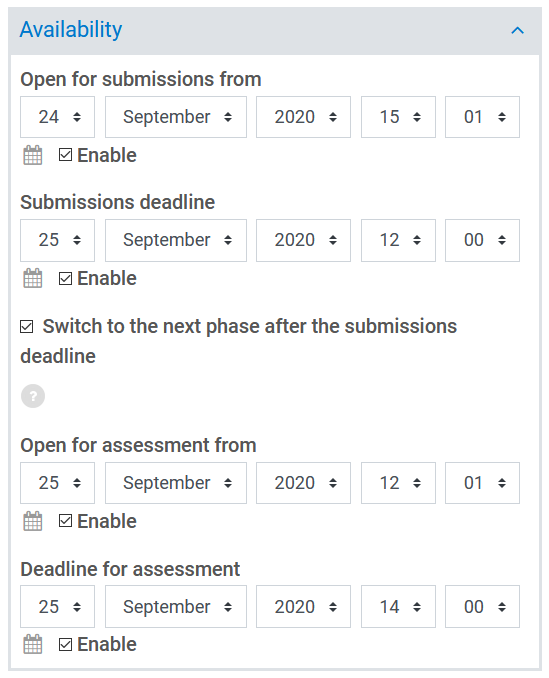
- Set when the workshop is open for submissions, and when submissions are due. If you want the system to automatically move from the submission phase to the assessment phase, check the box for “Switch to the next phase after the submissions deadline.” Then, set when the submissions are available for assessment, and when assessments are due. If you do check the box to have it move automatically from the submission phase to the assessment phase you will want to use Scheduled Allocation (see below) to allocate submissions.
- Common Module Settings:
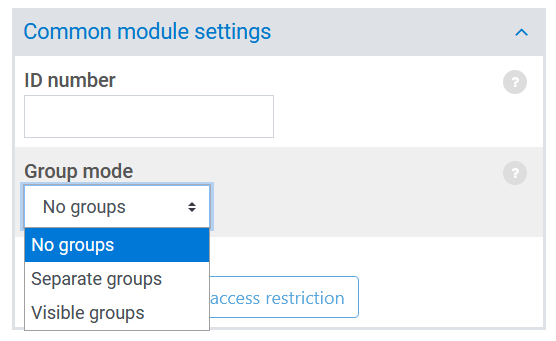
- Group Mode: Choose Visible Groups if you want submissions distributed between members of different groups (each group member must submit). Choose Separate Groups if you want submissions distributed between members of the same group.
- Restrict Access: Optional: see the faculty help guide on Restrict Access for more information.
- Activity Completion: Optional: see the faculty help guide on Activity Completion for more information.
- When finished, scroll up and on the left click “Save and display.”

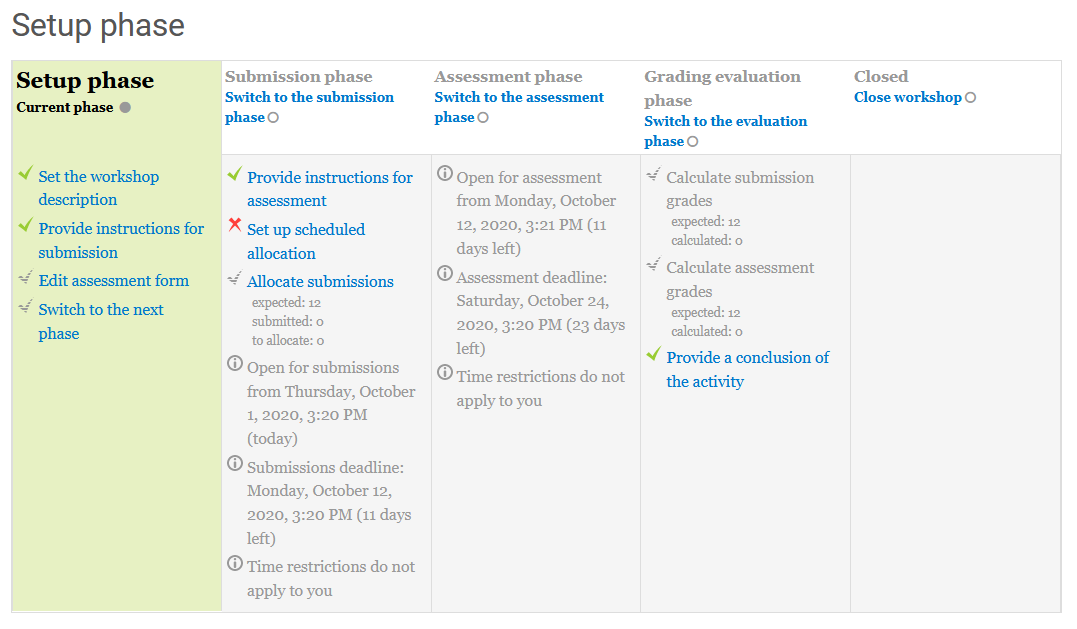
Workshop Phases
Once saved, you will see the Workshop displayed like this:
Setup Phase
- Click Edit assessment form to provide detailed grading criteria for your students to use. See the section Edit Assessment Form section below for more information.
- When finished, all checkmarks on the Setup phase should be green.
- You are then ready to switch to the Submission phase, which lets students submit their work when it opens for submissions. Under Submission Phase, click “Switch to the submission phase.” The Workshop must be manually moved to the Submission phase in order for students to submit, it will not automatically move on its own. Don't worry about moving to this phase too soon, submissions will not be accepted until the date and time it is open for submissions.
Submission Phase
- Students will now be able to submit their work until the deadline you specified in the settings (unless you allowed late submissions).
- During this phase you can see how many students have submitted and how many still need to submit in the Workshop Submissions Report below the phases area.
- If you set in the Availability Settings to switch automatically from the submission phase to the assessment phase, click "Set up scheduled allocation." If you are using Manual Allocation or Random Allocation, that can only be set after the students have submitted. See the section Allocate Submissions below for more information.
- If you do not want the reviewers to know whose submission they are assessing you will need to edit the Workshop Permissions. See the Anonymous Reviews section below for more information. Otherwise students will be able to see the whose submission they are assessing. The identities of the reviewers are hidden by default when students view the feedback given on their submission when the workshop is closed.
- If you set in the Availability Settings to switch automatically from the submission phase to the assessment phase, you do not need to do anything else. If you did not, when you are ready to move to the next phase click “Switch to the assessment phase” link underneath Assessment Phase. This phase will be highlighted.
Assessment Phase
- Students will now be able to assess the work of their peers according to the instructions and form you provided for them.
- You can monitor their progress by looking at the Workshop Grades Report underneath the phases area. The reviews not yet completed will be in red.
- If you would like to assess a submission, in the Workshop Grades Report click on the title of the submission. Under the submission click the Assess button. Fill out the assessment form and when finished click Save and close.
- When you are ready, under Grading Evaluation phase click the “Switch to the evaluation phase” link. This phase will be highlighted. The Workshop will not move to this phase automatically, you must click the link.
Grading Evaluation Phase
- In this phase the system calculates the final grades for each student for their submission and for their assessments. The Moodle help page Workshop Grading gives more information on how the grades are determined.
- Above the Workshop Grades Report set the Grade Evaluation Method and the Comparison of Assessments. If you are not sure what to set for the comparison, leave it as the default Fair. Once set, click the Re-calculate Grades button.
- You can recalculate the grades as many times as you would like to see how changes to the grade evaluation method and comparison of assessments would affect the grades.
- If you would like to assess a submission, in the Workshop Grades Report click on the title of the submission. Under the submission click the Assess button. Fill out the assessment form and when finished click Save and close.
- Along with adding your own assessment, you can choose to override submission and assessment grades. To override a submission grade, click on the title of the submission. Scroll down and for the setting "Override Grade for Submission" choose the new submission grade. If desired, provide any feedback for the submission author. Click "Save and close." To override an assessment grade, click on the link for the assessment you wish to override. Scroll down to the setting "Override Assessment Grade" and choose the new assessment grade. If desired, provide any feedback for the reviewer. Click "Save and close." When finished, don't forget to click Re-calculate Grades again.
- You can publish specific submissions to highlight student work to the class. Click on the submission title in the Workshop Grades Report and then scroll down to the "Feedback for the author" section. Check the box for Publish Submission. Scroll down and click Save and close. Students will see this submission once the workshop is closed.
Closed Phase
When you are satisfied with the grading, click “Close workshop” link underneath Closed. The Workshop will not automatically move to this phase, you must click the link. The Closed phase will then be highlighted and students will then be able to see their grades, reviews/feedback, any published submissions, and a conclusion (if you added one). To view their submission feedback, students need to click on the title of their submission.
Edit Assessment Form
Accumulative grading form:
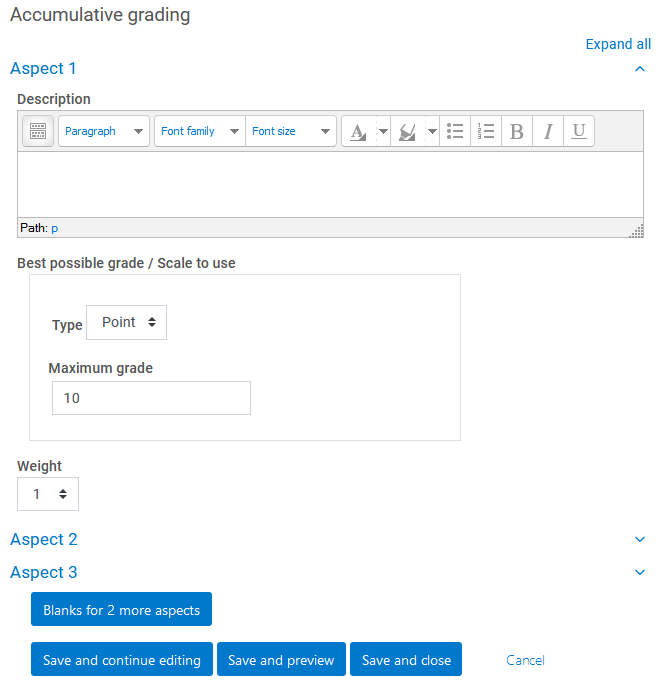
- Enter the description for the first aspect to be assessed.
- Set the maximum grade for this aspect.
- Set the weight for this aspect.
- Repeat 1-3 for all desired aspects. If more than 3 aspects, click the button “Blanks for 2 more aspects” to add more.
- When finished, click Save and close.
Comments form:
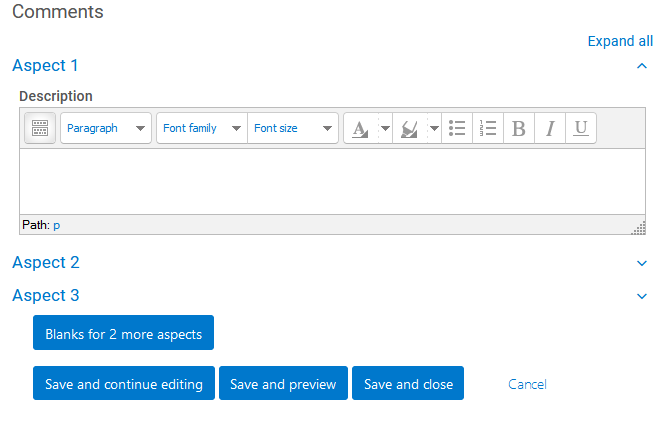
- Enter the description for the first aspect to be assessed.
- Repeat for all desired aspects. If more than 3 aspects, click the button “Blanks for 2 more aspects” to add more.
- When finished, click Save and close.
Number of errors form:
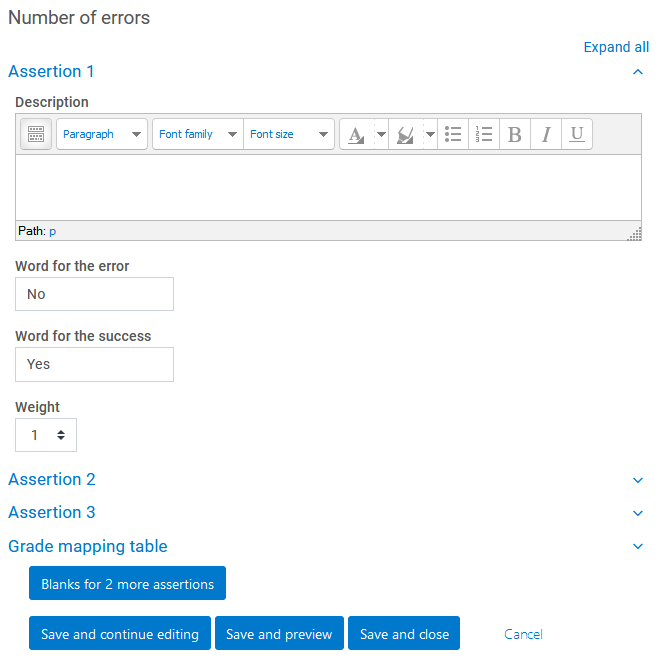
- Enter the first assertion. An assertion is a statement or question that can be answered by the reviewer as either passed or failed. For example “Has less than three spelling errors,” or “Meets length requirements,” etc.
- Enter the Word for the Error and the Word for the Success. For example, No/Yes, Present/Missing, Good/Poor, etc.
- Enter the weight for this assertion.
- Repeat 1-3 for all desired assertions. If more than 3 assertions, click the button for “Blanks for 2 more assertions” to add more.
- Click “save and continue editing” to see the filled-out Grade Mapping Table. This will show, based on the weight of the assertions, the grade for the submission based on the number of errors. Make any desired changes.
- When finished, click Save and close.
Rubric form:

- Enter the description for the first criterion.
- Set the level grade and definition for each level.
- Repeat 1-2 for each criterion. If more than 3 criterion, click the button for “Blanks for 2 more criteria” to add more.
- Choose the rubric layout.
- When finished, click Save and close.
Allocate Submissions
There are three ways to allocate submissions:
- Scheduled allocation: The system will automatically allocate (randomly) the submissions to be assessed once the deadline for submissions has been reached.
- Manual allocation: you manually assign reviewers and reviewees.
- Random allocation: the system will randomly assign reviewers based on set options.
Scheduled allocation
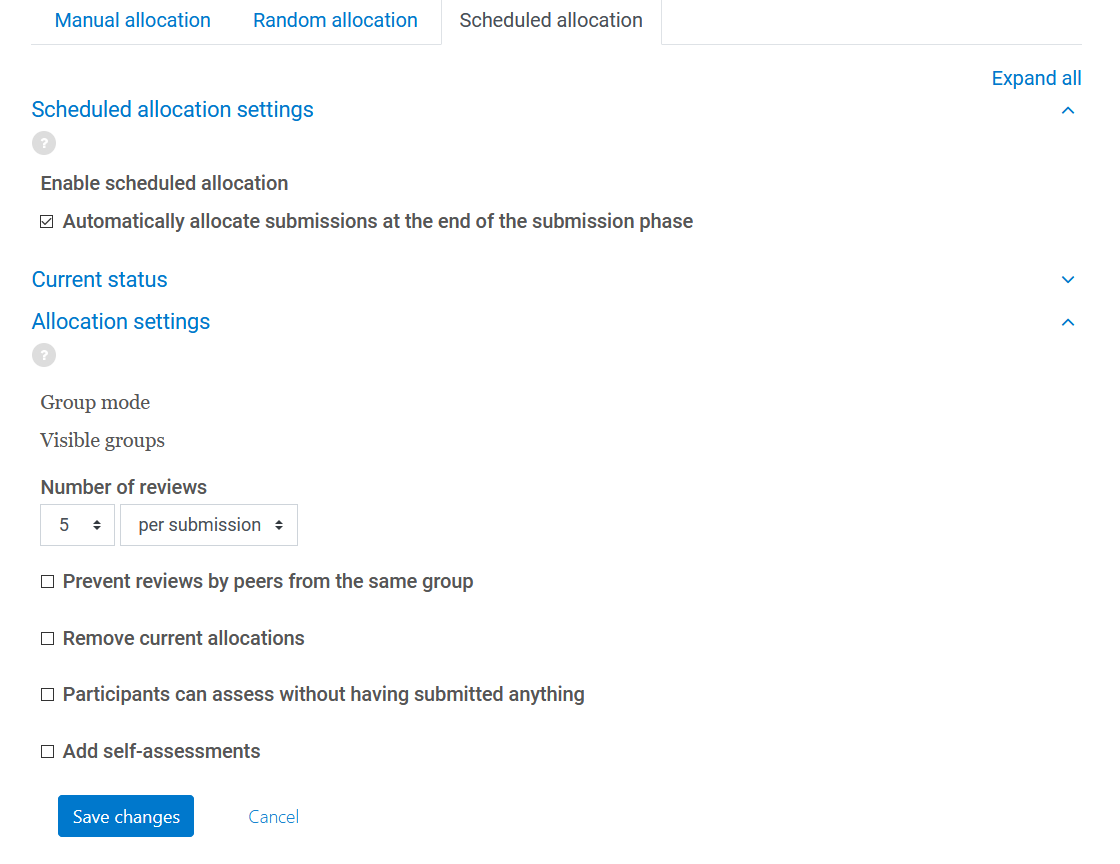
- In the Submissions phase click “Set up scheduled allocation”. If you do not see it that means in the Availability Settings you did not check the box to switch automatically from the submission phase to the assessment phase. You will want to do so and then return.
- Check the box for “Automatically allocate submissions at the end of the submission phase.”
- Click on Allocation Settings to expand that section.
- Set either the number of reviews per submission or per reviewer.
- If in the settings of the workshop you set the Group Mode to Visible Groups, check the box for “Prevent reviews by peers from the same group” if you want students to not be reviewed by members of their own group.
- If you already allocated reviews but want to re-do, check the box for “Remove current allocations”
- If you would like students to be able to assess submissions even if they had not submitted anything, check that box.
- If in the settings of the Workshop you checked the box to allow self-assessment and you want students to also assess their own submission, check the box for “Add self-assessments.”
- When finished, click the Save changes button at the bottom.
Manual allocation
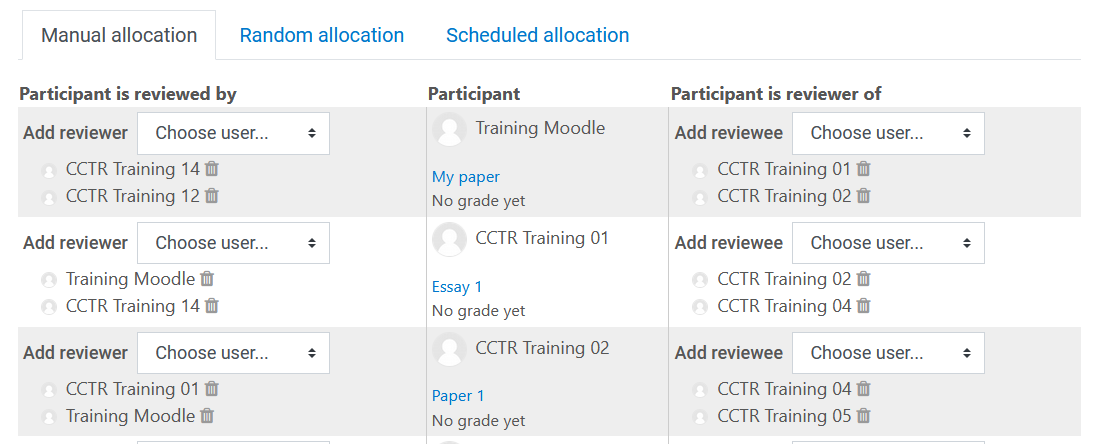
- When all students have submitted, in the Submission phase click “Allocate submissions.”
- Your students (and their submissions) will be in the center. To the left of the students who have submitted, one at a time you can select students to review each submission. To the right of each student, one at a time you can select who that student will review (of those who have submitted). If you have set your Workshop to either Visible or Separate Groups at the top you can filter the table by group enrollment.
- Once you add either a reviewer or reviewee, you will be taken to a page with just those two students in the table with your selection indicated.
- Finish your selections between these students, if any, and click the “Show all participants” button in the lower left to go back to the updated list of all students.
- Repeat until you are happy with the allocations.
- If you wish to remove an allocation, click the trashcan icon to the right of reviewer/reviewee’s name.
Random allocation
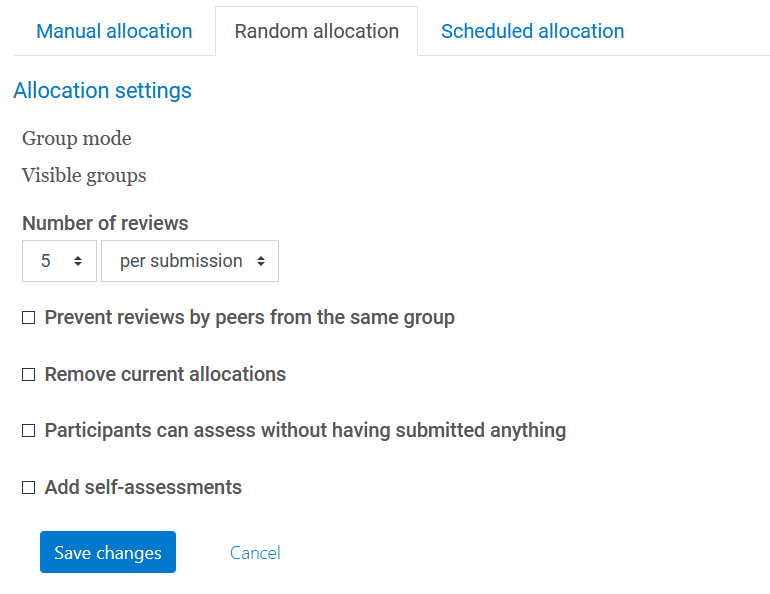
You would only need to use Random allocation if you did not have a set schedule for your Workshop. If you do have a set schedule, we recommend using Scheduled allocation.
- When all students have submitted, in the Submission phase click “Allocate submissions”
- Click on the Random allocation tab.
- Set either the number of reviews per submission or per reviewer.
- If in the settings of the Workshop you set the Group Mode to Visible Groups, check the box for “Prevent reviews by peers from the same group” if you want students to not be reviewed by members of their own group.
- If you already allocated reviews but want to re-do, check the box for “Remove current allocations”
- If you would like students to be able to assess submissions even if they have not submitted anything, check that box.
- If in the settings of the Workshop you checked the box to allow self-assessment and you want students to also assess their own submission, check the box for “Add self-assessments.”
- When finished, click the Save changes button at the bottom.
Anonymous Reviews
If you want the reviewees to remain anonymous to the reviewers, you will need to edit the Workshop permissions.
- While viewing the Workshop, click the gear icon in the upper right to open Workshop Administration. Then, click on Permissions.
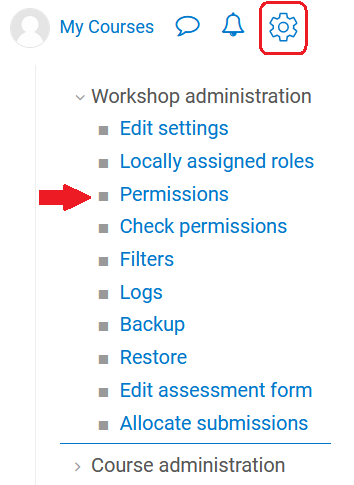
- Scroll down to Activity: Workshop and for the setting “View author names” click the trashcan to the right of Student and Student With Access to Hidden Course.

- Scroll to the very bottom and click the link “Back to Workshop…”
