
 myCSUSM


Restrict Access to Activities/Resources
Why Do This?
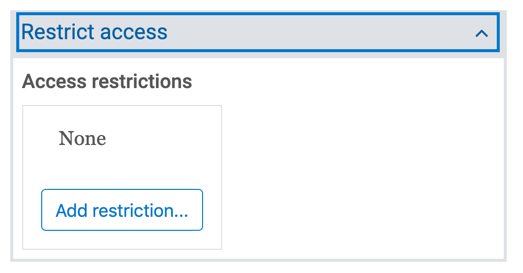
Restrict Access is a section in the settings of an activity/resource that allows you to set who can access and item or when it can be accessed. You can restrict access based on date, group enrollment, completion status of another course item, and/or grade on another course item. You can use restrict access in many different situations. For example, if you want to prevent students from accessing a file before (or after) a certain date and time. Or if you want to provide files just for specific groups. You could also use it to ensure students have read a document, completed preparatory work, or have demonstrated understanding or mastery of concepts, procedures, principles, etc., before they move on to the next activity.
Overview
- To restrict access by date
- To restrict access by group
- To restrict access by previous activity completion or grade
- Student view
To restrict access by date
You do not need to restrict access by date for most activities as they have open and close/due dates already in the settings that prevent students from accessing too early or too late. However, you might want to prevent students from viewing a module/week or resource (file, URL, page, etc.) before a certain date and time.
- In the settings of the module/item go to the Restrict Access section.
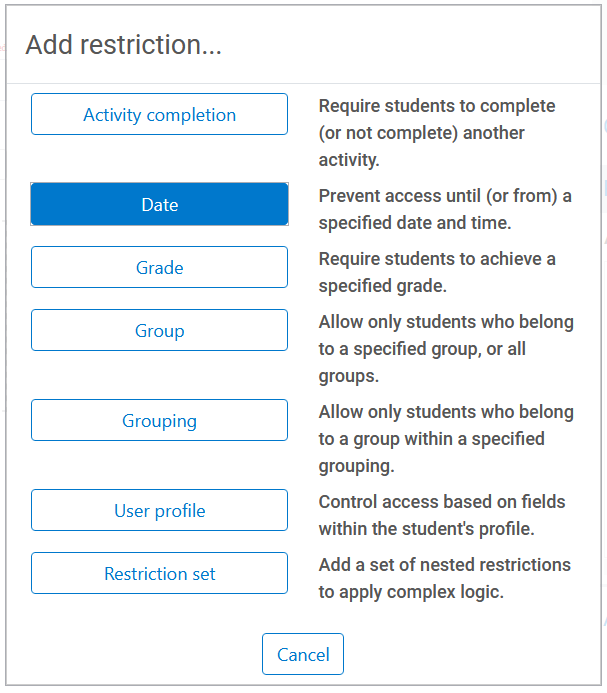
- Click the Add restriction button.
- From the pop-up window select Date.
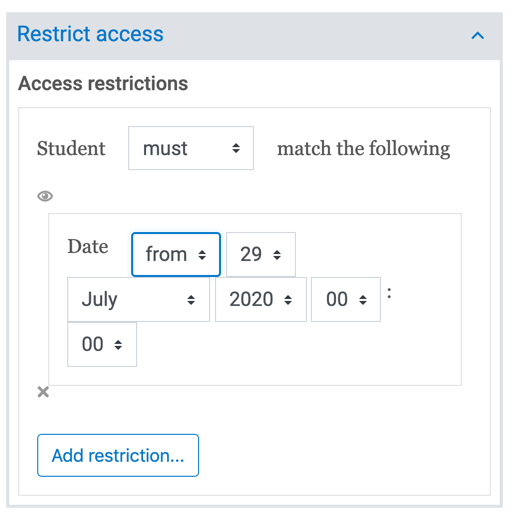
- Set the date and time condition. For example, if you want students to be able to access
the item starting July 29th, you would use “from” and select July 29. If you want
students to be able to access the item only before July 29th, choose “until” and select July 29.
- If you want the item to be completely hidden from students outside of the set date
and time condition, click the eye icon above the date to close it (
 ). If you leave the eye icon open (
 ) students will see the item listed on the course homepage but will be unable to click
on it/open it outside of the date and time condition set.
) students will see the item listed on the course homepage but will be unable to click
on it/open it outside of the date and time condition set. - Repeat steps 2-5 as needed.
- Click the “Save and return to course” button when finished.
To restrict access by group
You might want to restrict access to items to certain groups. For example, if you have a group project you might want to provide different resources for the different groups. You do not need to restrict access by group for most activities like Assignment or Forum as they allow for all groups to submit/interact within the one activity. However, there might be times when you want students in different groups to take different quizzes or fill out different surveys.
- In the settings of the module/item go to the Restrict Access section.
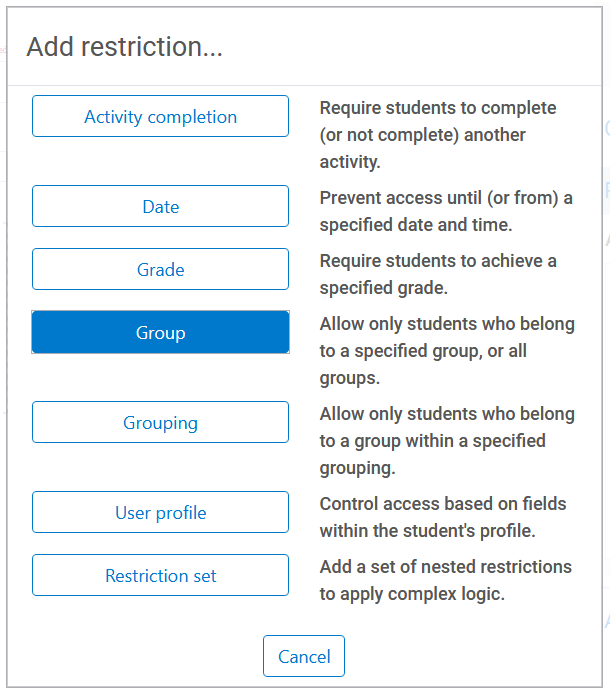
- Click the Add restriction button.
- From the pop-up window select Group.
- Choose the group.
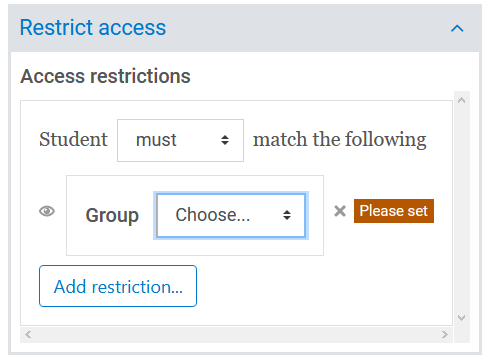
- If you want the item to be completely hidden from students in other groups, click
the eye icon to the left of the group to close it (). If you leave the eye icon open () students will see the item listed on the course homepage but will be unable to click
on it/open it if they are not in that group.
- Repeat steps 2-5 to add additional groups.
- Click the “Save and return to course” button when finished.
To restrict access by previous activity completion or grade
If you want to use Restrict Access to ensure students have read a document, completed preparatory work, or have demonstrated understanding or mastery of concepts, procedures, principles, etc., before they move on to the next activity, then there are a few extra steps you will need to take before setting up the access restriction.
- Create a plan. Determine which activities/resources you want to restrict access to and how you will restrict access (activity completion or grade).
- Set the activity completion conditions in activities/resources that must be completed before a student can move on.
- Set the restrict access conditions for the activities/resources.
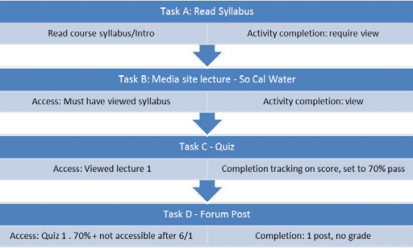
Step 1: Plan
When planning which activities you want to restrict access to and how you will restrict access, it might be easier to visual by creating a diagram or flow chart indicating the path you want the students to take. Example: The Instructor wants to ensure that the students read the syllabus. She sets the activity completion on Task A to “completed when the student has viewed it”. She then adds the Microsoft SharePoint/OneDrive or YouTube lecture link (Task B), and restricts access by setting the conditions “syllabus” and “must be marked as complete.” And so on.
Step 2: Set the activity completion conditions
See our help guide on Activity Completion for more information.
Step 3: Set the restrict access conditions
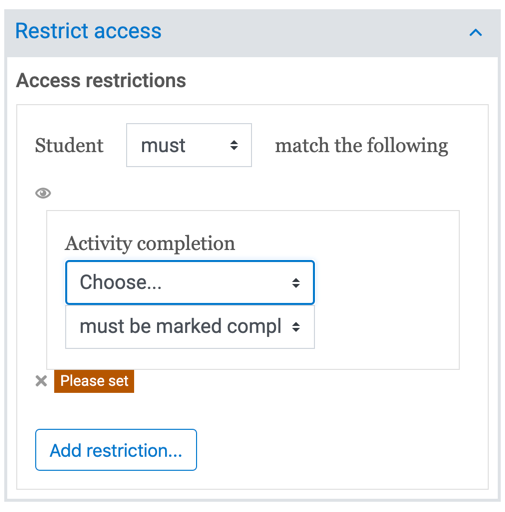
- In the settings of the module/item go to the Restrict Access section.
- Click the Add restriction button.
- From the pop-up window select Activity completion or Grade.
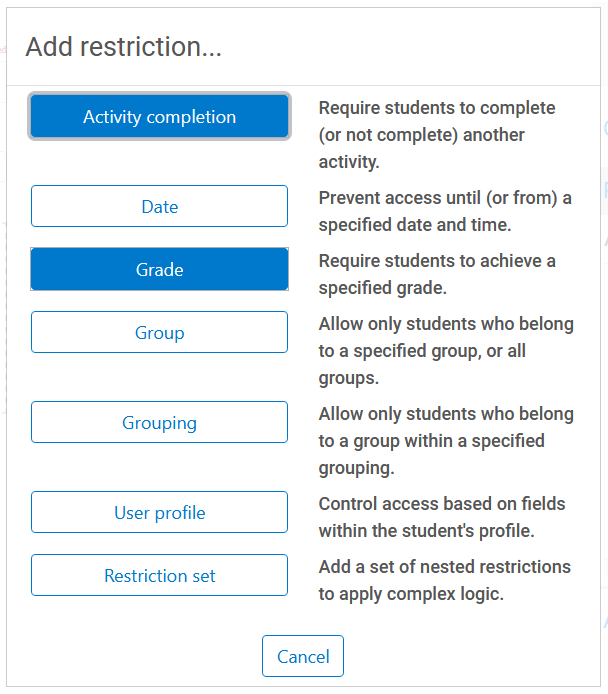
- Select the activity or grade and set the condition or grade range.
 or
or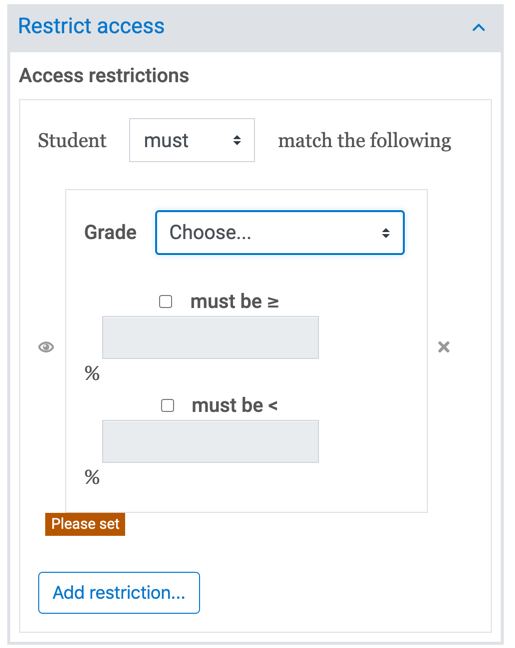
- If you want the item to be completely hidden from students if the condition is not
met, click the eye icon to the left of condition to close it (). If you leave the eye icon open () students will see the item listed on the course homepage but will be unable to click
on it/open it if they haven't met the condition.
- Click the “Save and return to course” button when finished.
Student view
On the course homepage a resource/activity that has an access restriction that has not yet been met will have a lock icon in the upper right. Click on the lock icon and the access conditions will be displayed. If the student does not meet the condition, they will not be able to access/open the item. If the student does meet the condition, the lock will not be displayed and they will be able to access/open the item.
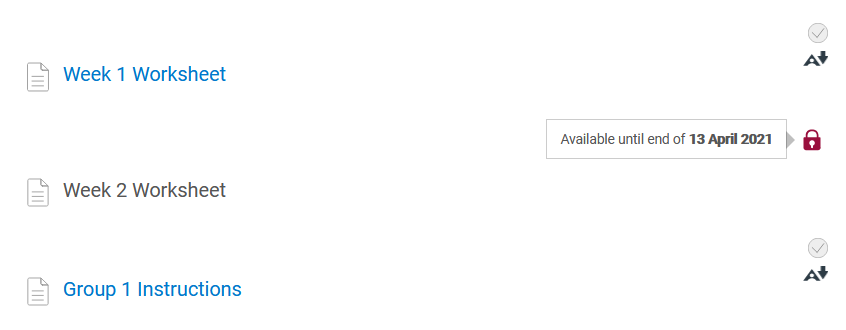
If the student does not meet the condition and you closed the eye icon, the item will be completely hidden from the student.