
 myCSUSM


Customize Blocks Layout
Why do this?
Blocks are now located on the Course Dashboard. From the Course Dashboard you can add, move, hide, and delete blocks.
Add a Block
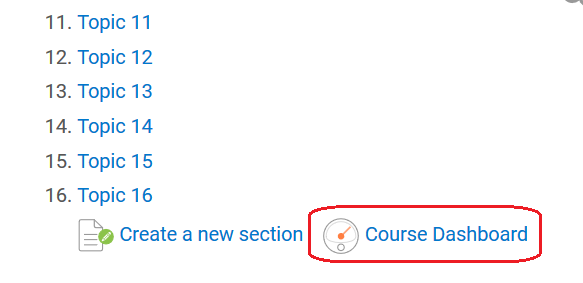
- Click on Course Dashboard underneath your Contents area.
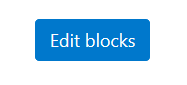
- Click the Edit Blocks button.
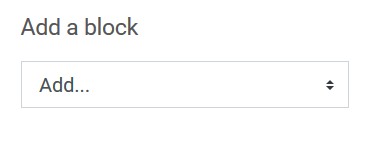
- From the “Add a block” dropdown, choose the block you wish to add to your Course Dashboard. Once you select it, it will automatically be added to your Course Dashboard.
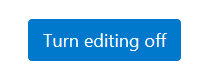
- When finished, click the “Turn editing off” button.
Move a Block
- Click on Course Dashboard underneath your Contents area.
- Click the Edit Blocks button.
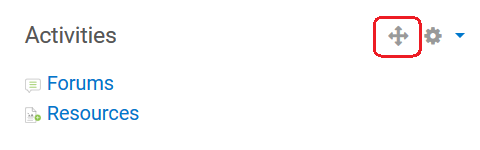
- Go to the block you wish to move and in the upper right of the block click and hold the arrows icon. Drag the block to where you want it on the Course Dashboard.
- When finished, click the “Turn editing off” button.
Hide or Delete a Block
- Click on Course Dashboard underneath your Contents area.
- Click the Edit Blocks button.
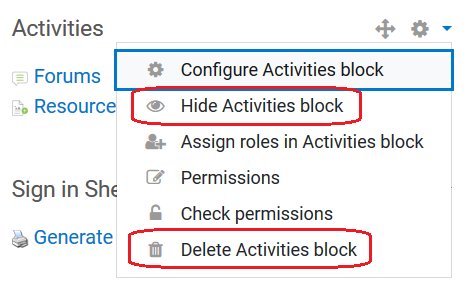
- Go to the block you wish to move and in the upper right of the block click the gear symbol. Choose "Hide..." to hide the block from students, or choose "Delete..." to delete the block completely from the Course Dashboard (you can always add it back).
- When finished, click the “Turn editing off” button.