
 myCSUSM


Create an Essay Question
Why use this?
Essay questions allow students to submit text responses or files within a quiz. When creating an essay question you can create a response template, which will display in the response field when a student goes to answer that question. This allows you to ensure students address all parts of the question, to provide guidance for student answers, or even to provide multiple questions and allow students to choose which one to answer.
Create the Essay Question
- From your course homepage and click on the quiz name.
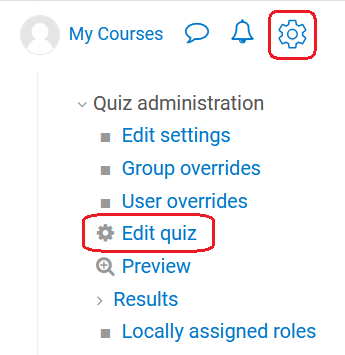
- Click the gear icon in the upper right to open the Quiz Administration block, then click on Edit Quiz.
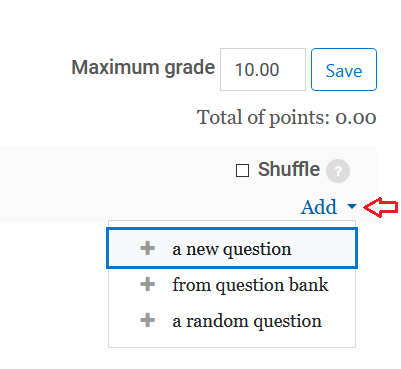
- Click the Add dropdown, then select "a new question."
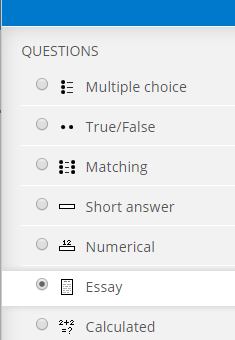
- From the list of Questions choose Essay, then click the Add button in the lower right.
- Enter a Question name and the Question text.
- Set the Default points and General Feedback, if any.
- Set the desired options in the following sections:
Response Options
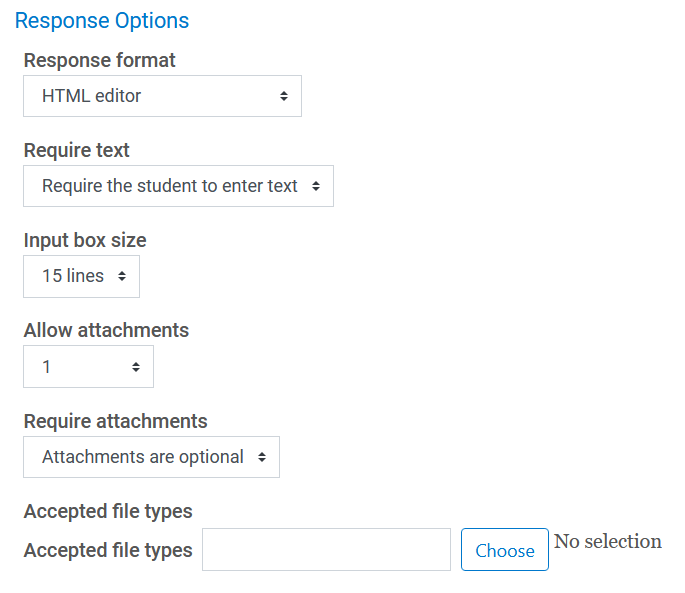
Response format: Choose the format for the response. You will likely use one of these three:
- HTML editor means students will have access to the text editor toolbar (to format text, insert links or images, etc.).
- Plain text means students will not have access to the text editor toolbar. They can only type text.
- No online text means students will not be able to enter text. Use this if you are requiring a file upload instead.
Require text: Select "Require the student to enter text" if a student must enter text when responding. If you are allowing students to either upload a file attachment or enter text, set this to "Text input is optional."
Input box size: Use the dropdown to adjust the size of the response field.
Allow attachments: Choose if you want to allow file attachments.
Require Attachments: If you allow attachments, set whether file attachments or optional or required.
Accepted file types: If you allow attachments, you can choose to only accept selected file types. If you do not set the acceptable file types, all file types will be accepted.
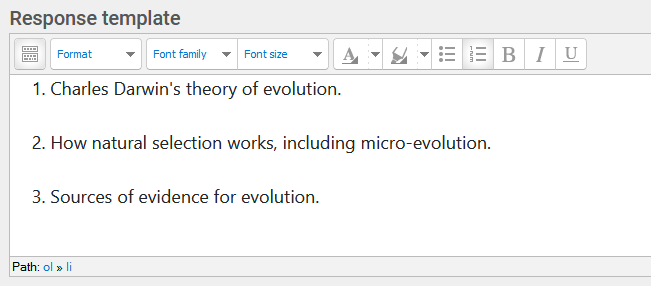
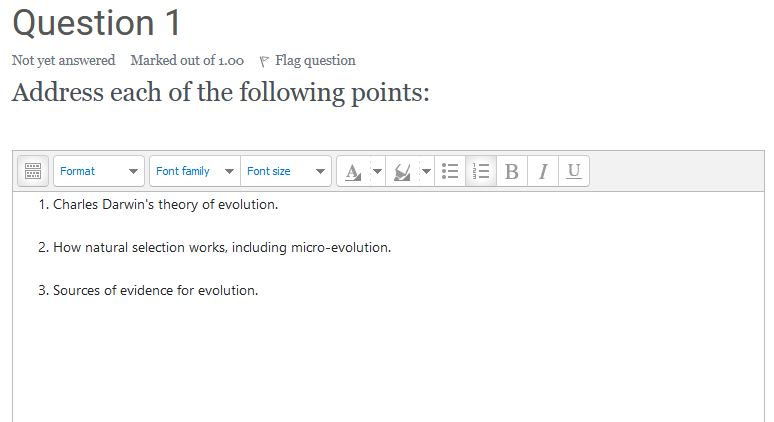
Response Template
Click on Response Template to reveal the Response template box. Enter your text into the Response Template text box. Whatever you type here will show up automatically in the response field when students go to answer. Keep in mind students can choose to delete/edit the provided text when answering the question.
Instructor View
Student View
Grader Information
In the Grader Information box you can include relevant information to use when grading. This information will only be visible to graders when grading and is not visible to students (either before or after the quiz). Since anything added will be displayed when grading, you can enter in a rubric or frequently used comments, which you can then copy into the Comments box when grading a submission.
8. When finished, click Save changes at the bottom.