 myCSUSM
Using OU Wiki
A Wiki allows you to collaboratively create a set of linked pages with your peers. Wiki pages use the same text editor you are familiar with from other Cougar Courses activities, so you can easily add text, tables, images, links, and files. Within a Wiki, you can separate content into separate sections on a page or onto different pages. Each time a person makes changes to a Wiki page, that revision becomes the current version. Older versions are stored and can be viewed, compared, and even restored.
NOTE: Only one person can be editing a page at a time.
Contents
- Creating the Start Page
- Creating Additional Pages
- Adding Sections on a Page
- Editing Pages/Sections
- Hiding Pages
- History, Wiki Changes, and Index
Creating the Start Page
- From your course homepage click on the OU Wiki.

- To create the Start Page (the very first page), click Create page.

- In the Content text box, put in your content for this page. See our guide on the text editor toolbar for help adding text, images, formatting, etc. Add any attachments. Keep in mind your instructor might have enabled an editing time limit. If so, the timer will be above the Content box on the right. Make sure to save or cancel before time runs out.
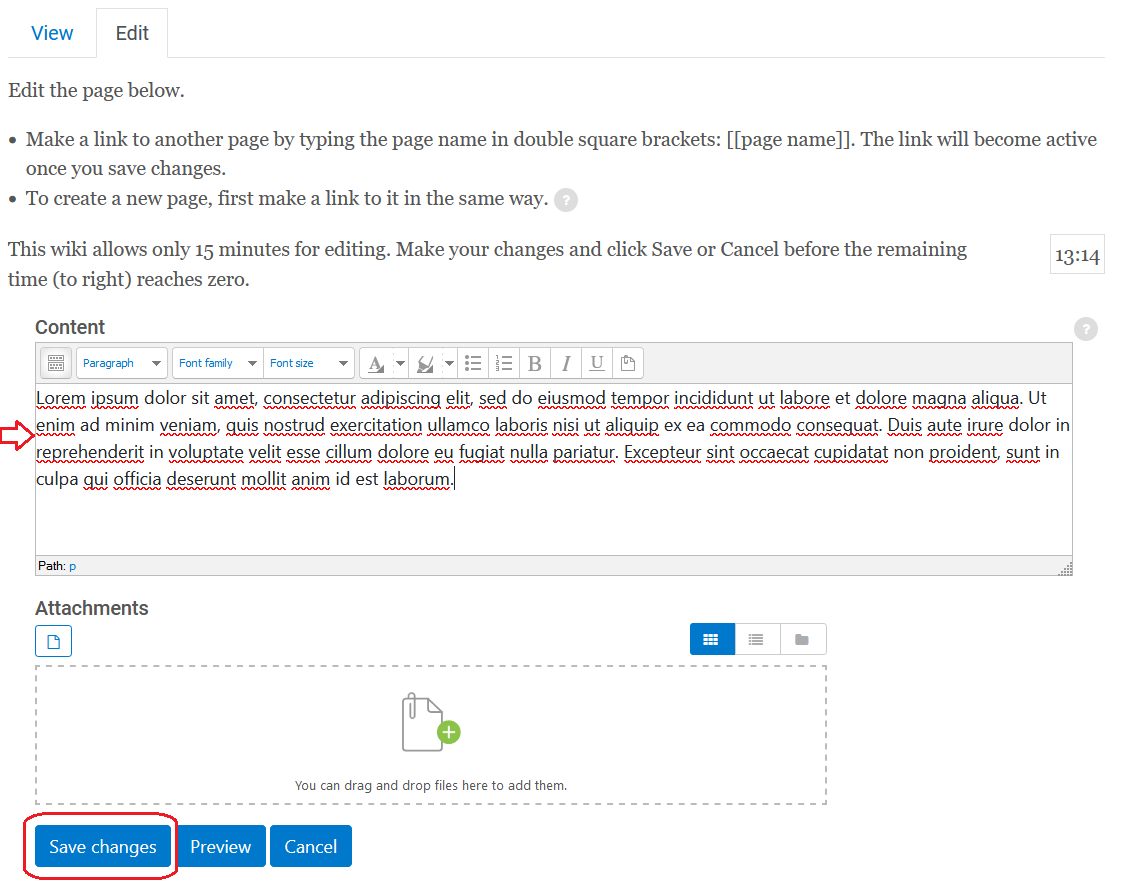
- When finished, click Save changes at the bottom.
Creating Additional Pages
Note: It is currently not possible to delete or rename a page within the wiki, so plan before you start.
There are two ways to add a new page: while viewing a page or while editing a page.
While viewing a page:
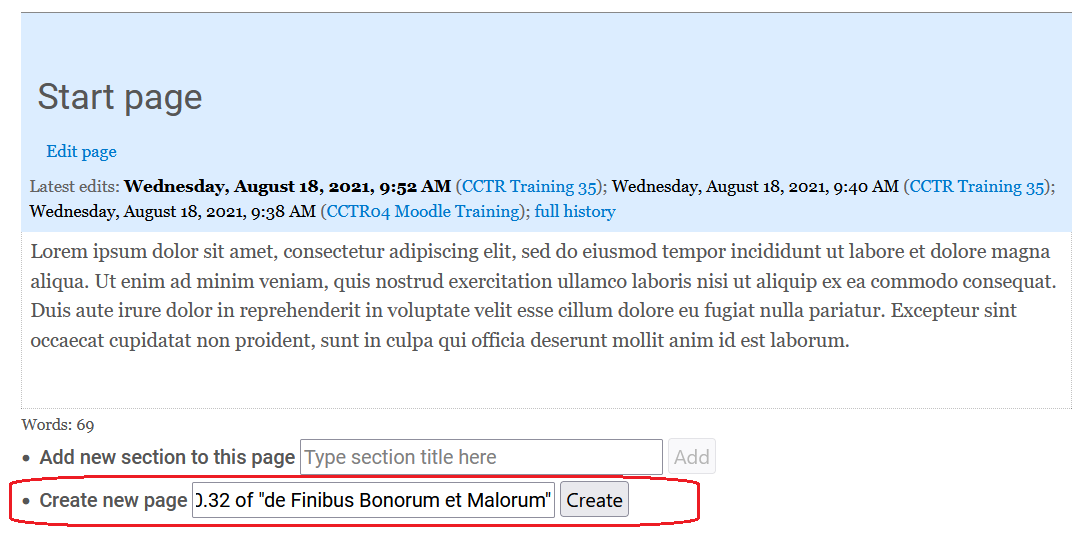
- At the bottom of the current page for “Create new page” type the new page name, and then click Create.
- In the Content text box, put in your content for this page. See our guide on the text editor toolbar for help adding text, images, formatting, etc. Add any attachments. Keep in mind your instructor might have enabled an editing time limit. If so, the timer will be above the Content box on the right. Make sure to save or cancel before time runs out.
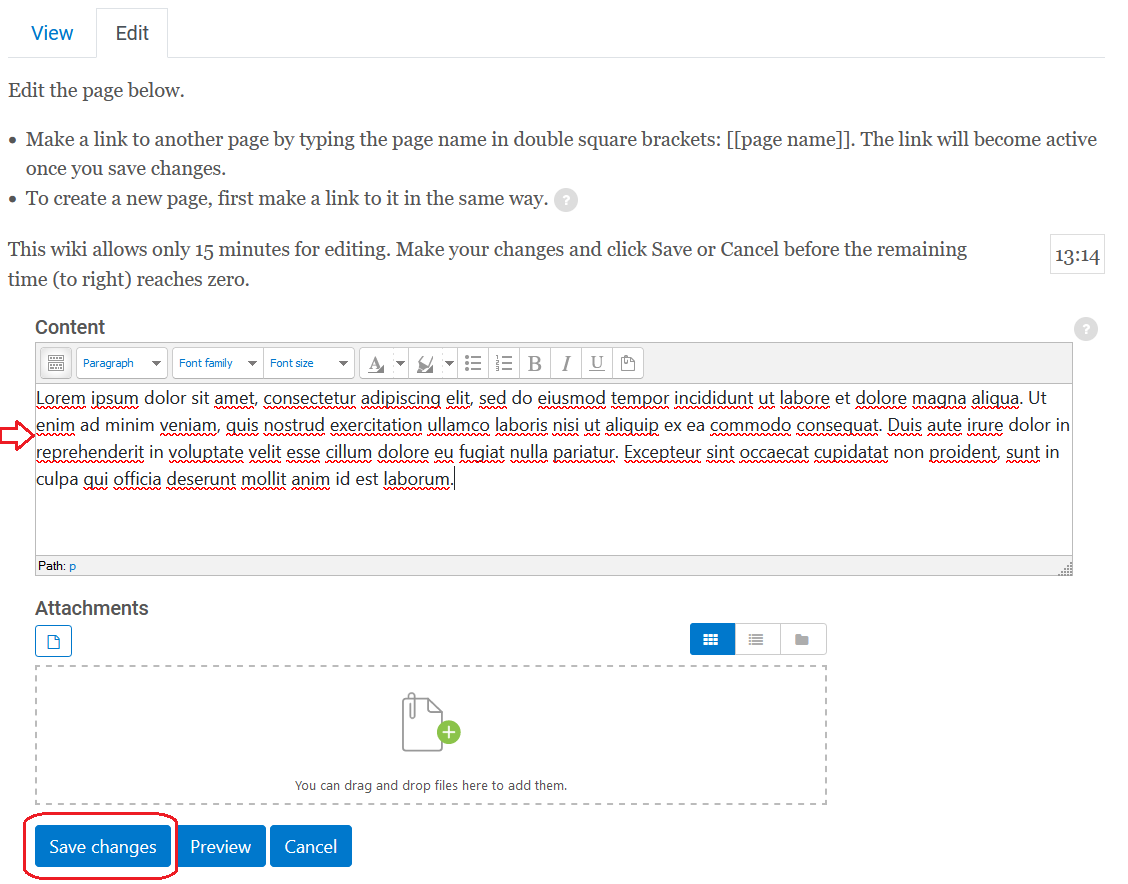
- When finished, click Save changes at the bottom.
While editing a page:
- Type the name of the new page in double square brackets: [[new page name]]
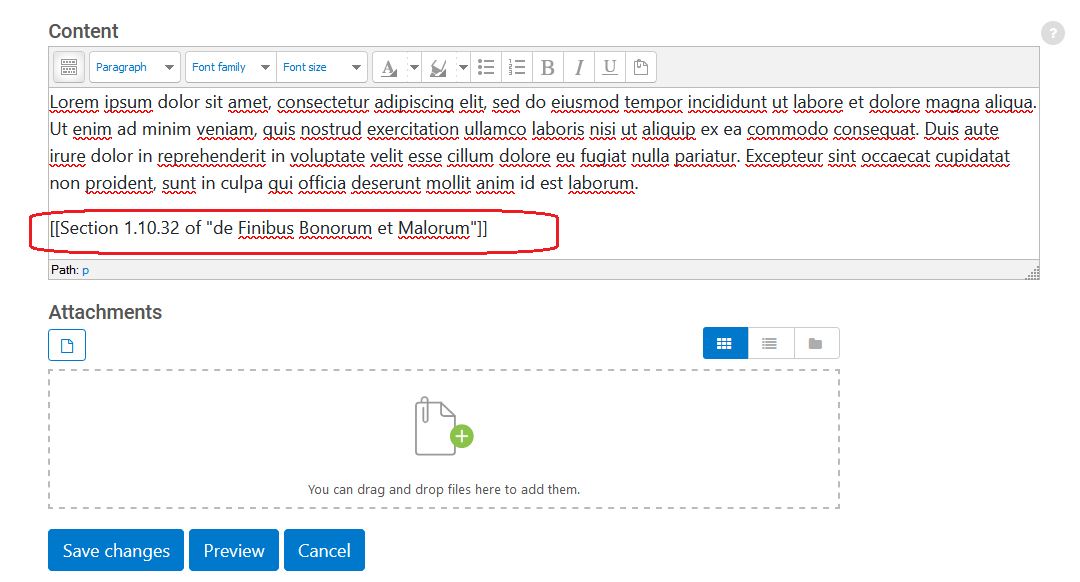
- Click Save changes at the bottom.
- The new page name will be a link. Click on the link to create the page and add content.
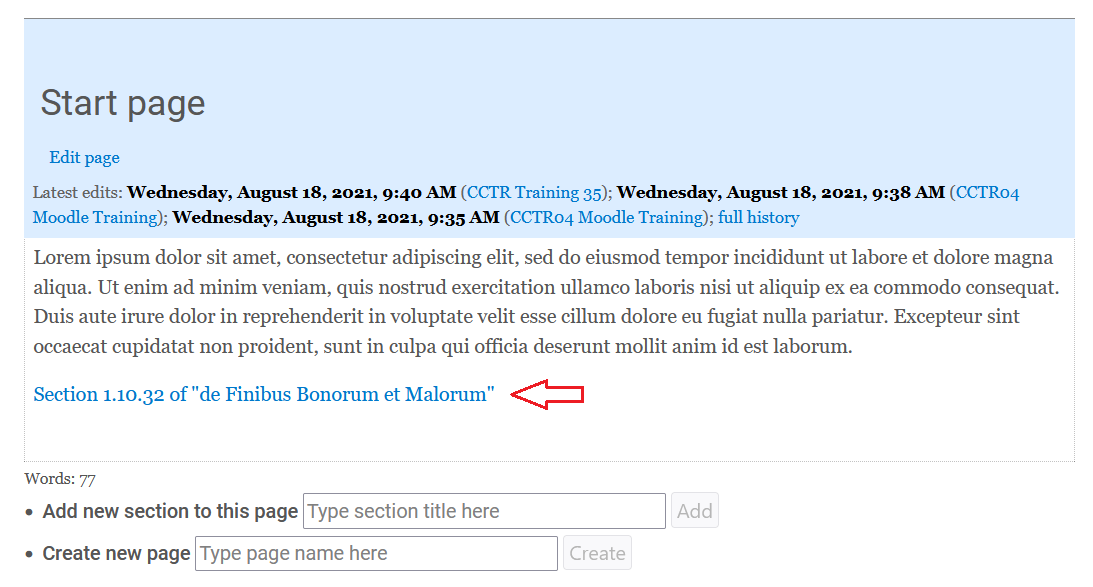
Adding Sections to a Page
There are two ways to add a section to a page: while viewing the page or while editing the page.
While viewing a page:
- At the bottom of the page, for “Add new section to this page” enter the name of the section. Click Add.
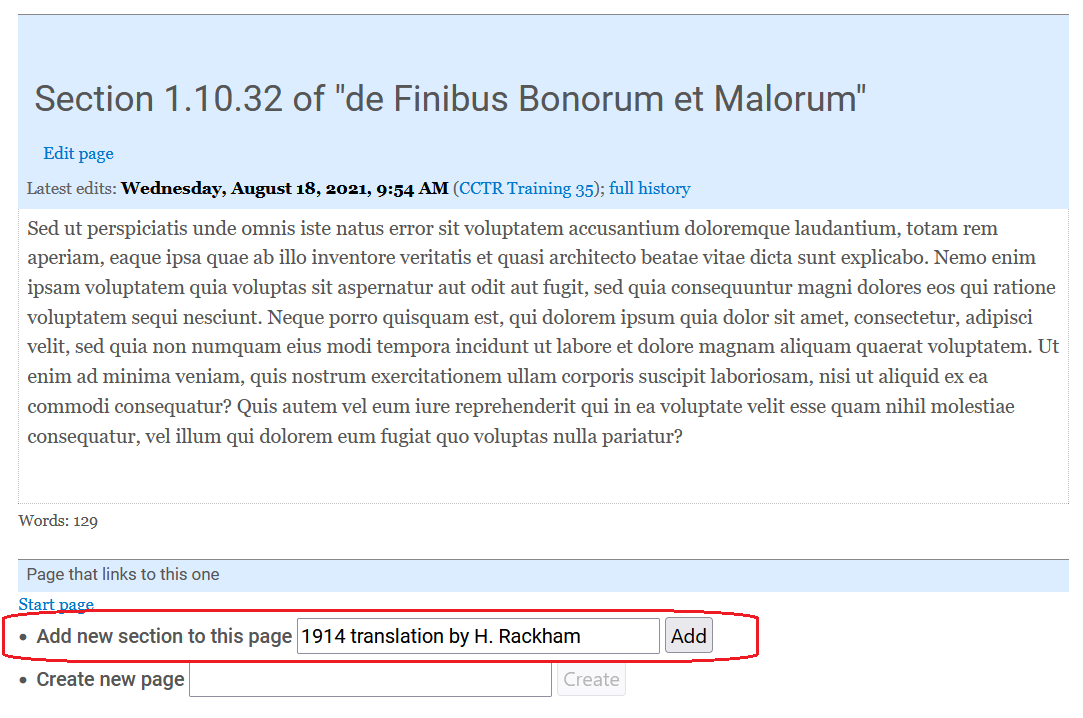
- Enter the content for the section. See our guide on the text editor toolbar for help adding text, images, formatting, etc. Add any attachments. Keep in mind your instructor might have enabled an editing time limit. If so, the timer will be above the Content box on the right. Make sure to save or cancel before time runs out.

- When finished, click Save changes at the bottom.
While editing a page:
- Highlight the text you want to make a new section name and from the format dropdown in the toolbar choose Heading 3.
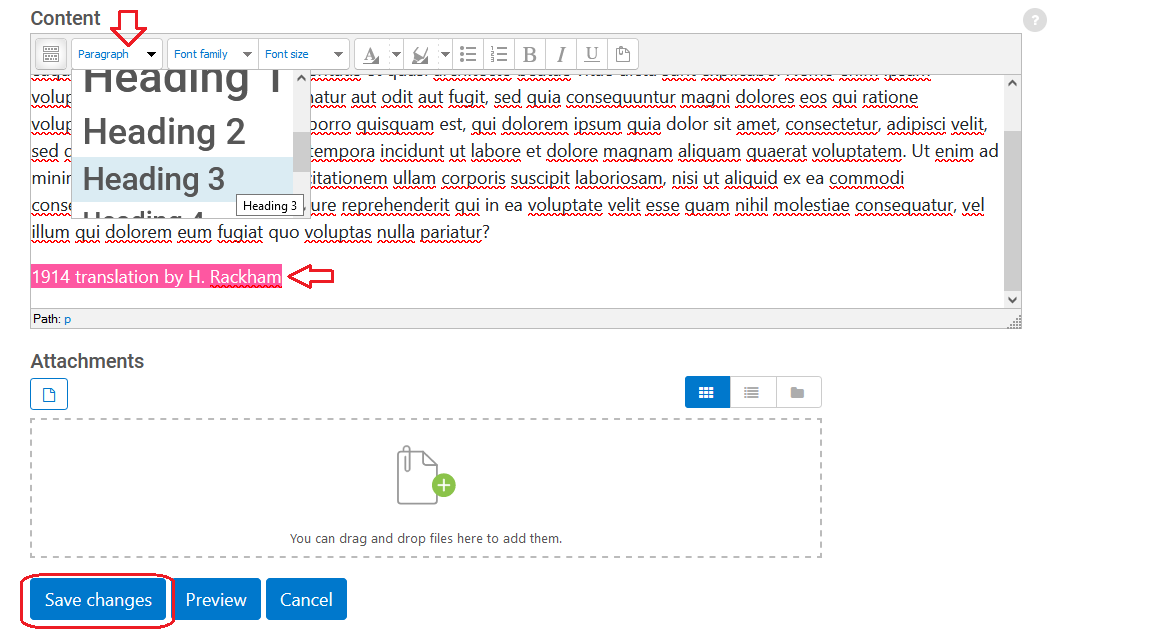
- When finished adding content below the section name, click Save changes at the bottom.
Editing Pages/Sections
NOTE: Only one person can be editing a page at a time.
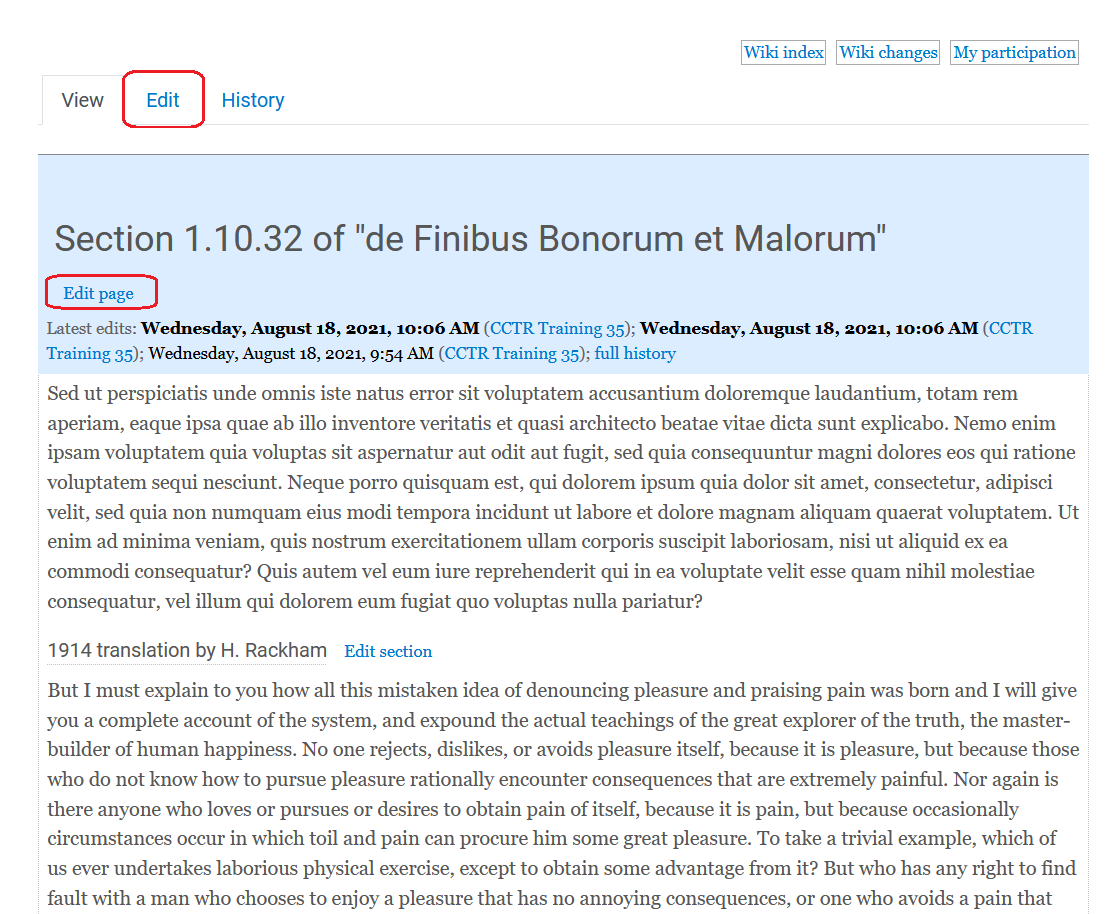
To edit a page, while viewing, click the Edit tab at the top, or "edit page" under the page name.
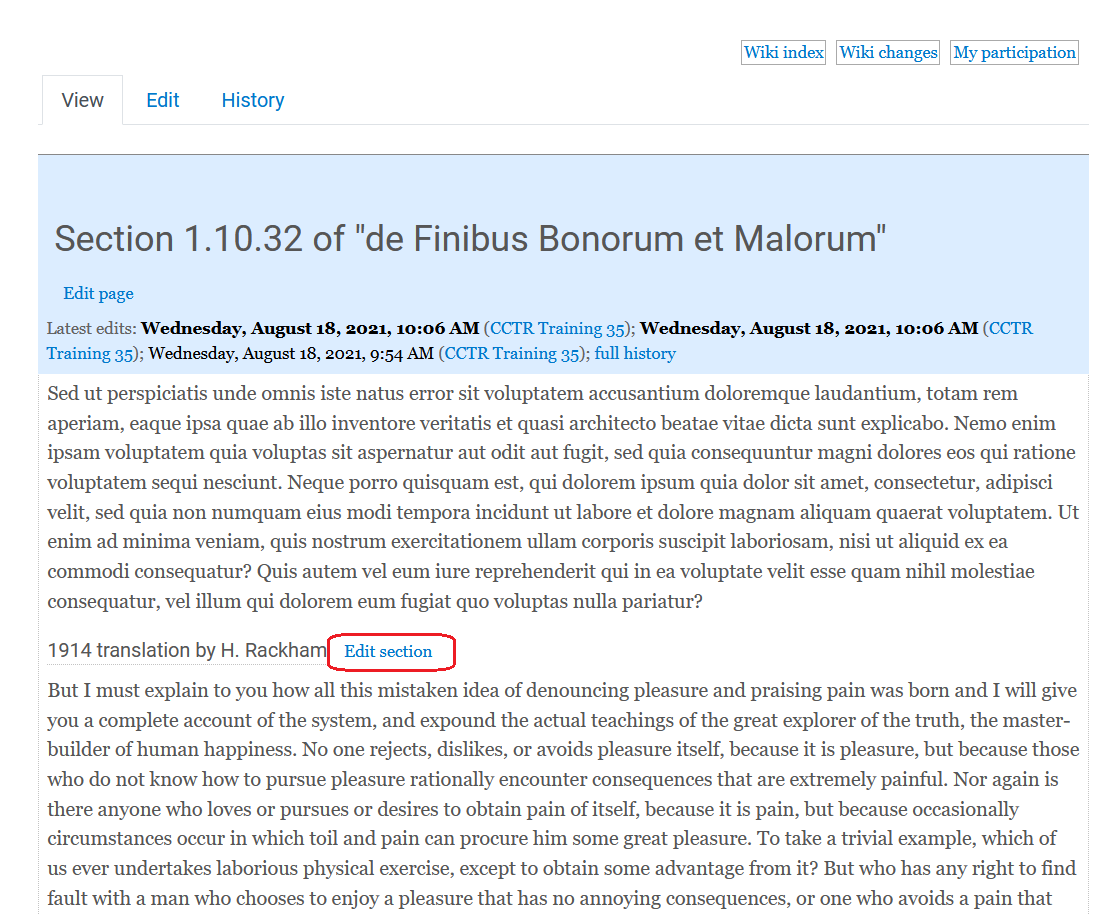
To edit just a section on a page and not the full page, while viewing the page click “Edit section” next to the section name.
See our guide on the text editor toolbar for help adding text, images, formatting, etc. Keep in mind your instructor might have enabled an editing time limit. If so, the timer will be above the Content box on the right when editing. Make sure to save or cancel before time runs out.
When finished editing a page or section, don’t forget to click Save changes.
Hiding Pages
Currently you cannot delete or rename a page. However, you can essentially hide a page.
- To hide a page, go to the parent page (the page that contains the link to the page you wish to hide).
- Edit the page and remove the link to the page you wish to hide. Don’t forget to save changes.
- Repeat for any page that links to the page you wish to hide.
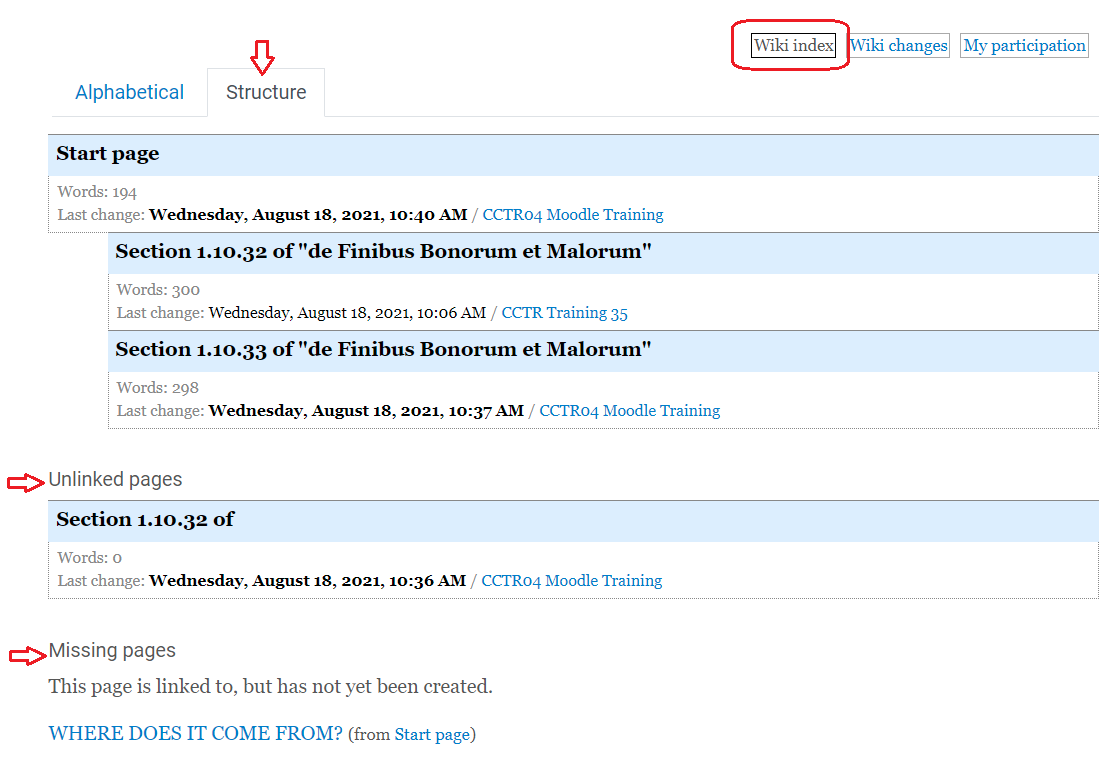
The page will then only be accessible from the Wiki index as an unlinked page.
History, Wiki Changes, and Wiki Index
The History, Wiki Changes, and Wiki Index can help you keep track of changes and quickly navigate within the Wiki.
History
To view the changes for a particular page, while viewing the page click the History tab.

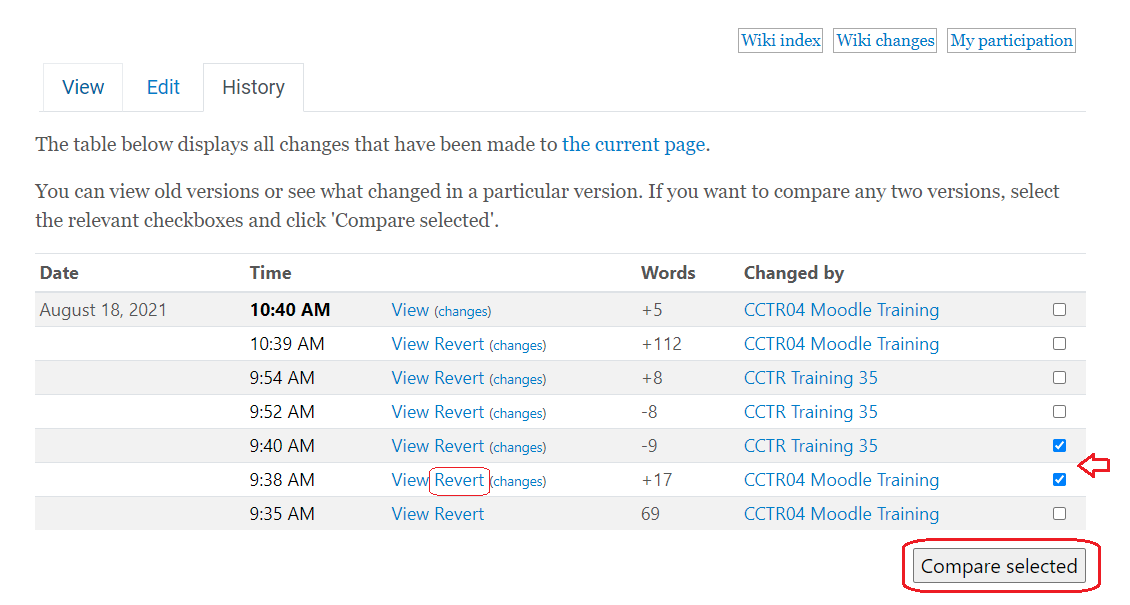
The table will display all changes made to that page, when it was changed, the number of words added or removed, and who made the changes. To compare two versions, select the check boxes for the versions and click “Compare versions” at the bottom. To revert the page to a past version, click Revert for that version.
Wiki Changes
Wiki Changes will list all changes to the entire Wiki. To access, click on Wiki Changes in the upper right of the page.

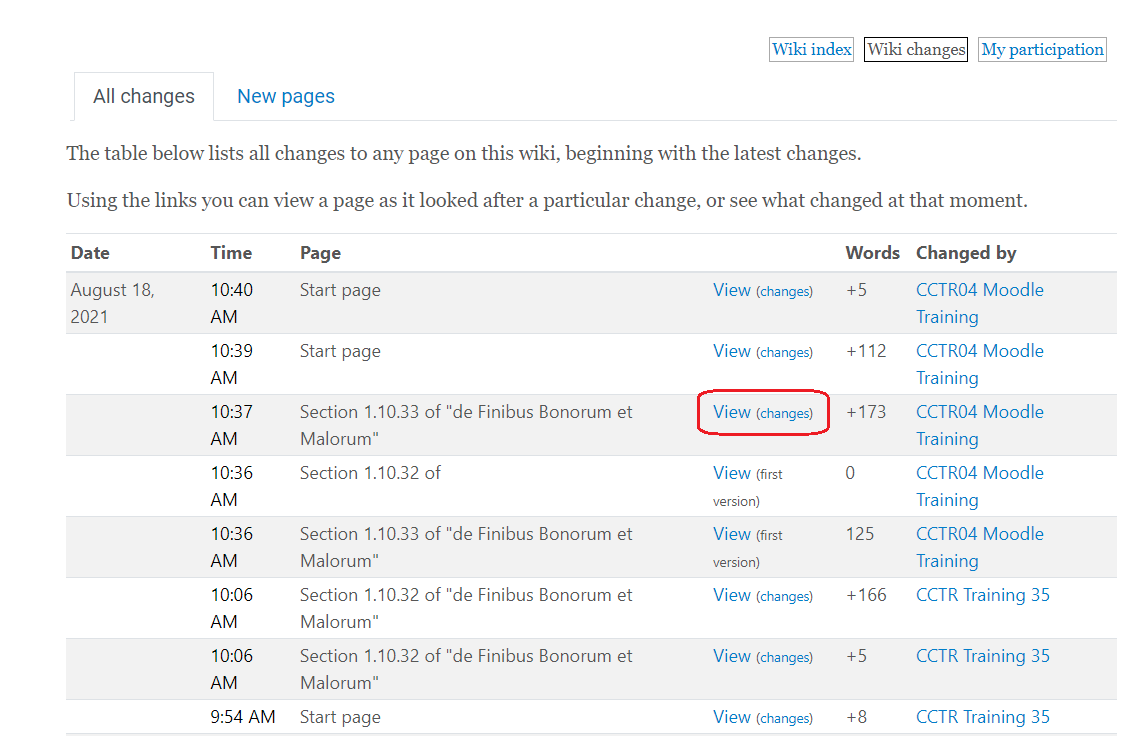
Within Wiki Changes, at the top you can choose to view All changes, or just when New pages were created. On All Changes, the table will display all changes made to the Wiki, when it was changed, the page changed, number of words added or removed, and who made the changes. Click View to look at the version, or click “changes” (in parenthesis) to see the version compare to the previous version.
Wiki Index
The Wiki Index lists all pages in the Wiki. At the top you have the choice to view the pages in Alphabetical order or by Structure. If you view by Structure, you will be able to see which pages are linked to each other. Note: If you have made links to pages, but have not yet created the pages, there will be a section near the bottom of the index called "Missing pages" which shows these links. There will also be a section for "Unlinked pages" if you have hidden a page (removed all links to it).
