
 myCSUSM


Download Mediasite Videos
After careful consideration and evaluation of our technological infrastructure, IITS has decided to retire Mediasite as our primary platform for managing and sharing multimedia content. In its place, the campus will transition to Microsoft SharePoint/OneDrive. Microsoft SharePoint/OneDrive offers a robust set of features and integrations that align closely with our evolving needs for content management, collaboration, and accessibility. See campus notification on February 21, 2024.
The transition from Mediasite to Microsoft SharePoint should begin immediately and is expected to be completed no later than September 1 to allow time for any troubleshooting. Mediasite does not have a migration tool for IITS to download and migrate videos. Individuals with videos in Mediasite will be responsible for downloading their videos and uploading them to their SharePoint/OneDrive. The contract with Mediasite ends in October 2024. Any videos not downloaded by October 1 will no longer be available.
UPDATE March 11, 2024
Video podcasts have been added as an option to download the complete video package. Use that option to download the mp4 video file for each presentation.
Instructions
The following links will jump you to specific information about this process.
- View what media you have in Mediasite
- Download your video(s)
- Upload the video(s) to SharePoint/OneDrive
- Share the video
View What Media You Have Stored in Mediasite
- Log into MyMediasite with your CSUSM credentials.
- In the MyMediasite portal, you will see all of your videos on the right side of the
screen. They are displayed in a YouTube-like series of thumbnail images with video
names.
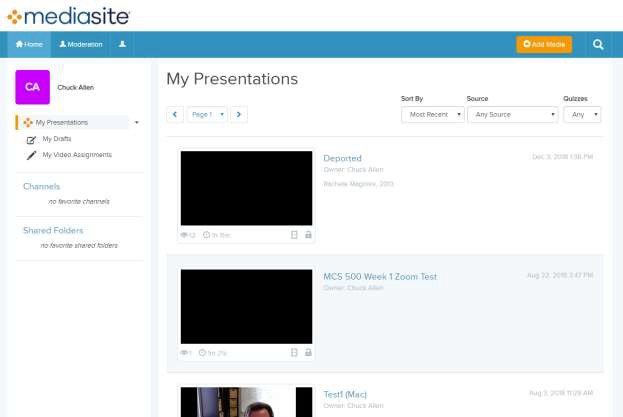
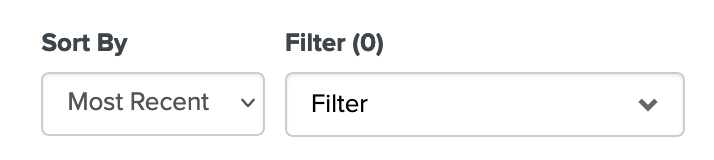
- Sort the videos by Most Recent, Oldest, A-Z, or Z-A.
- Take note of the video(s) you want to save and the video(s) you want to delete.
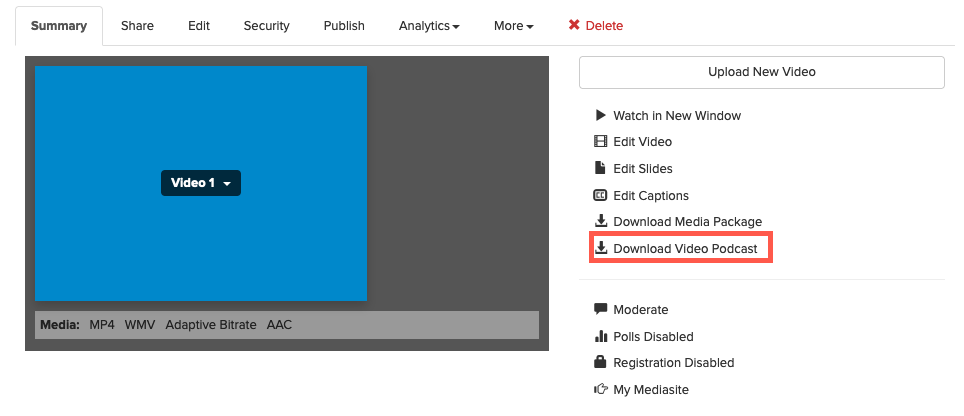
Download Video
- Click on the title of the video to access the download link.
- Look to the right of the video preview and click the Download Video Podcast link.
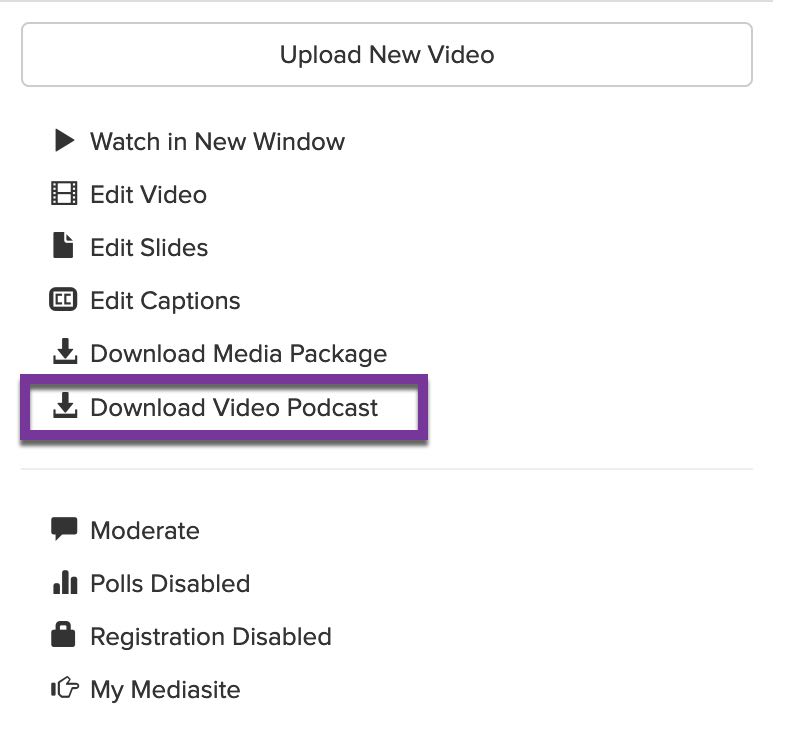
- The video file will be downloaded to your downloads folder, desktop, or folder you have specified for downloads.
- Double click the video file (ending in mp4) to make sure it plays correctly.
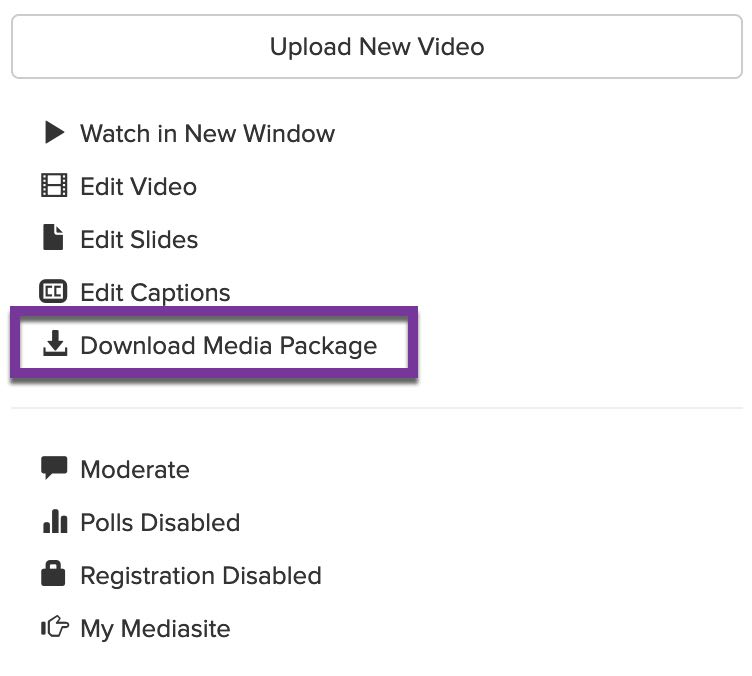
Download Media Package (optional)
- To download slides associated with some video recordings, you will need to choose the Download Media Package option. Look to right of the video preview and click the Download Media Package link.
- Locate the export.zip file in your downloads folder or desktop or other location where
you store downloaded files. Double click the zip file to unzip it so you can see the
contents. Double click the Content folder to open it to see the slides that are .jpg
or .png file types. The mp4 file could be video or audio depending on when and how
the video was created.
Note: This is not common for most video creators.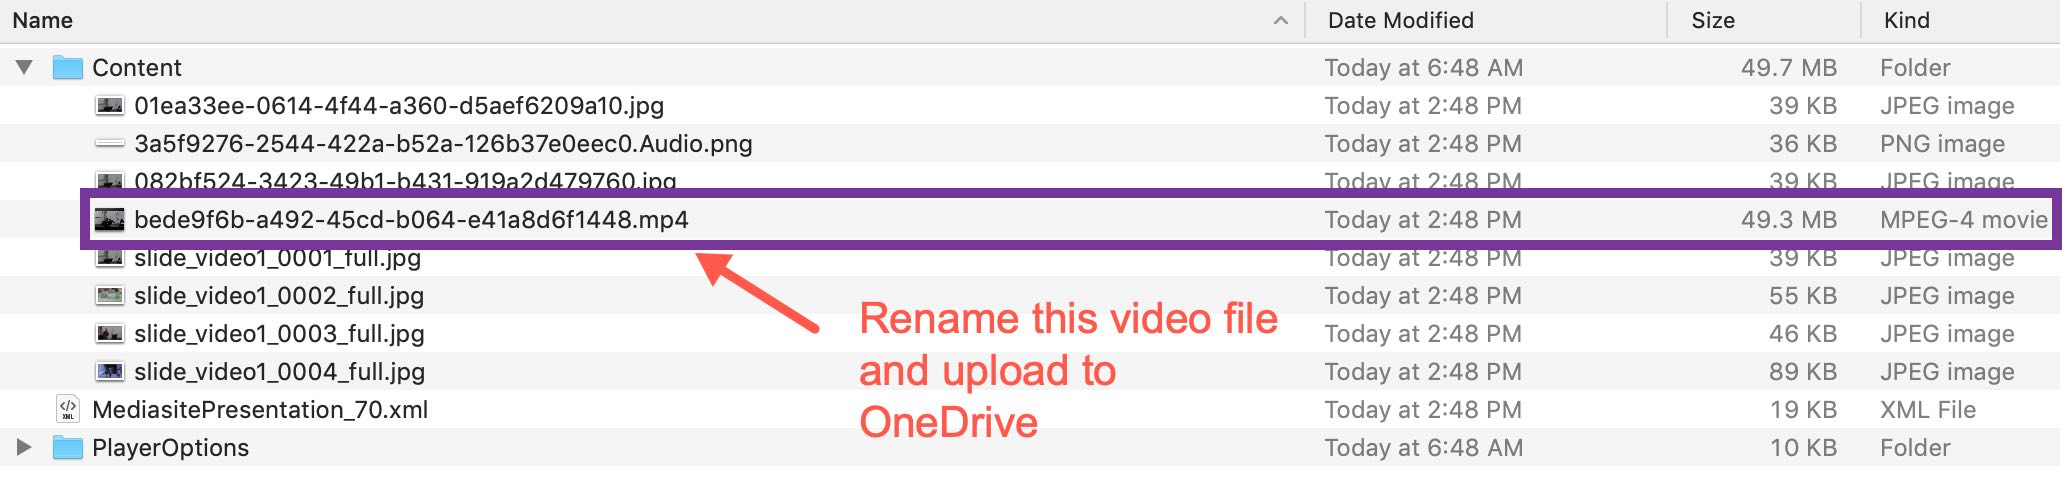
- If you decide to keep these files, change the name of the folder and video file to the name of the presentation.
Upload Video to OneDrive
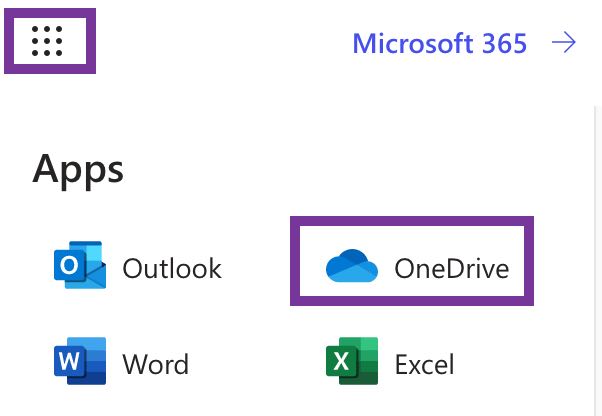
- Login to Office365 online using your CSUSM credentials.
- Select the app launcher icon on the upper left corner and choose OneDrive from the
app list.
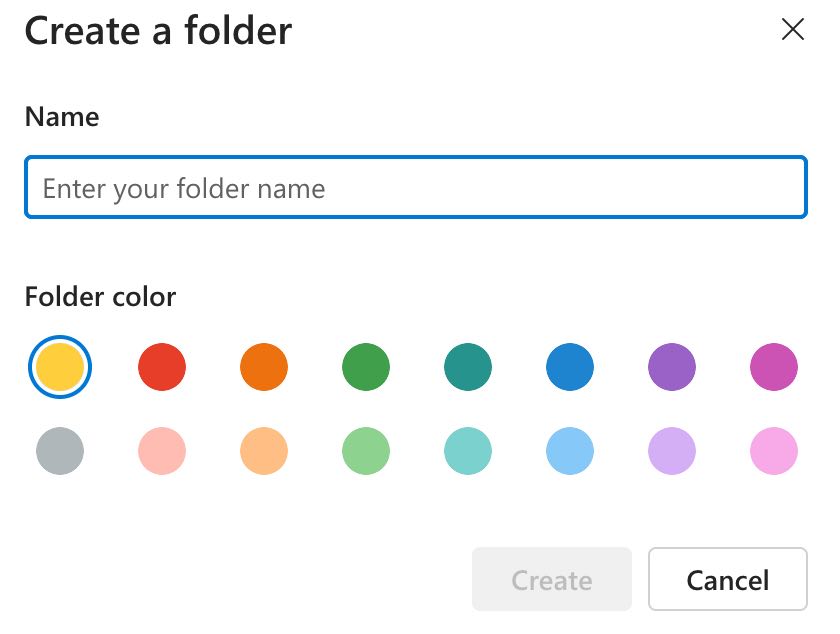
- Create a new folder by clicking on the Add new button on the upper left and choose
Folder from the options.
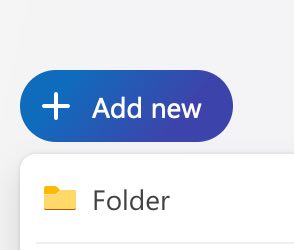
- Enter the name of the folder, choose a color (if desired), then click the Create button.
- Click on the folder link to open it.
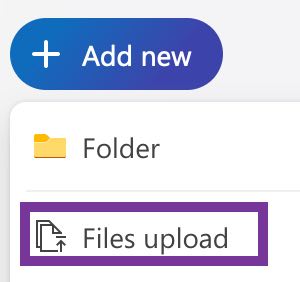
- Upload the video file from the Mediasite download folder by clicking on the Add new
button on the upper left and choose Files upload button.
- Locate the unzipped folder with the video and double click the video file.
- Double click the file in the folder to make sure it plays as expected.
Share the Video
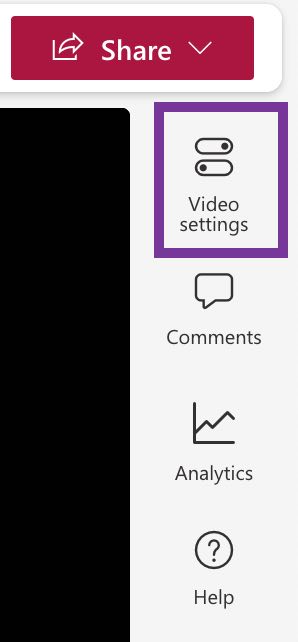
- Open the video by clicking on the video link.
- On the upper right side of the page check the video settings button.
- Select the > to the left of Transcript and captions and click the Generate button.
- Decide if you want to keep comments on or disable them by clicking on the button to
turn them off.
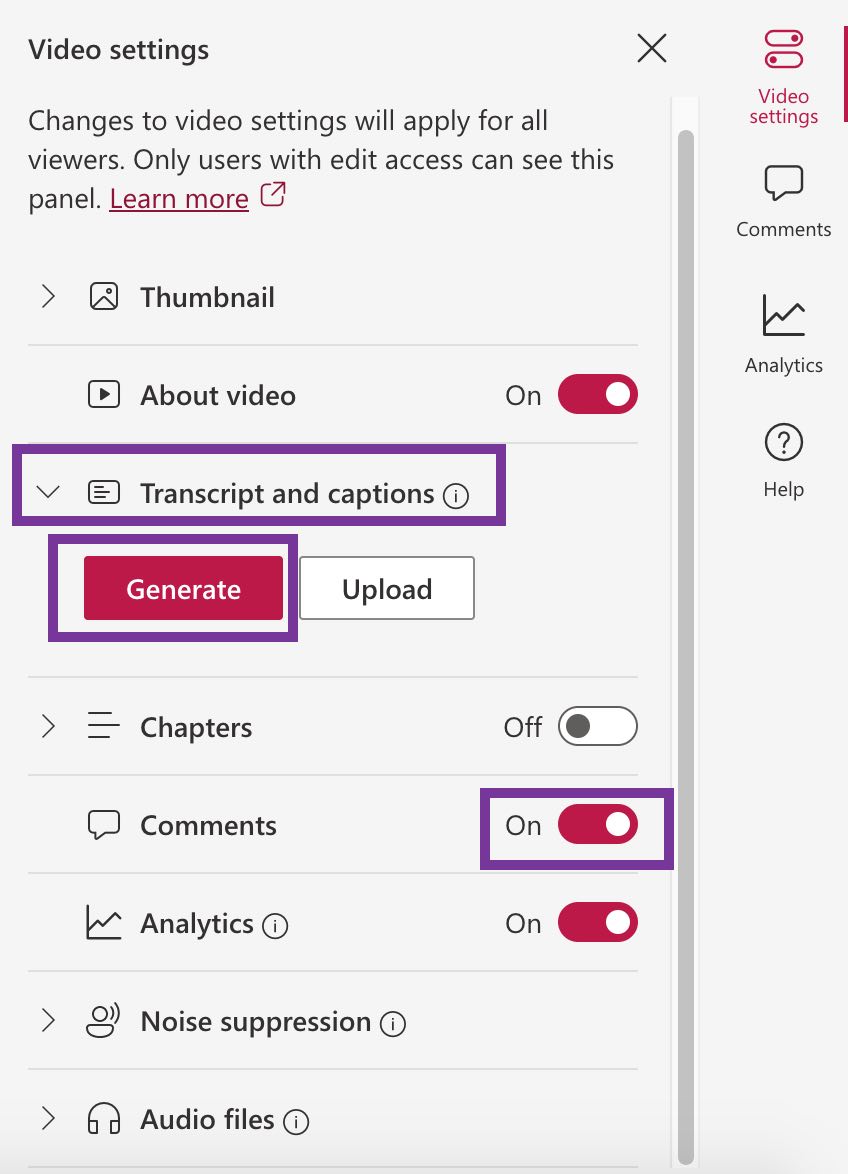
- Keep the analytics option turned on so you can collect data about views.
- In the upper right side of the page, click on the Share button to expand the options
and click on Share.
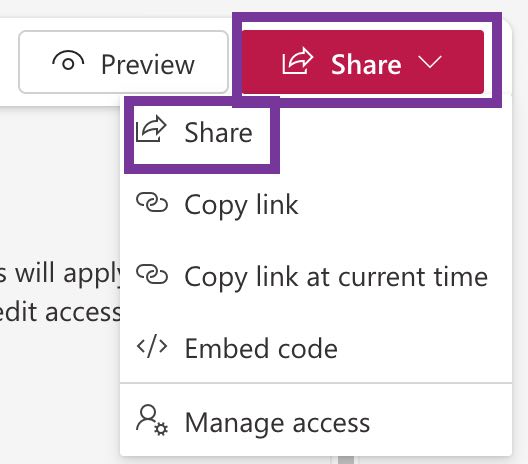
- In the pop-up window, determine if you want to make available for specific people,
available to only CSUSM accounts, or open to anyone with the link.
- For specific people, type their name or email address in the search box.

- Click the pencil icon to choose how the can engage with the video.
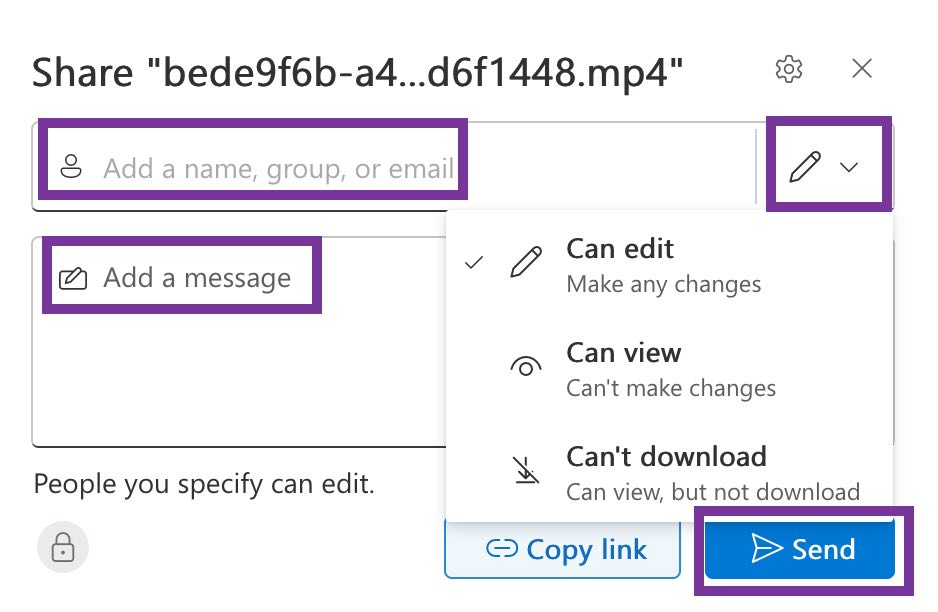
- Can edit
- Can view
- Can't download
- Type a message to the recipient(s)
- Click the Send button
- Note: You can also click the Copy link button to send the link in an email
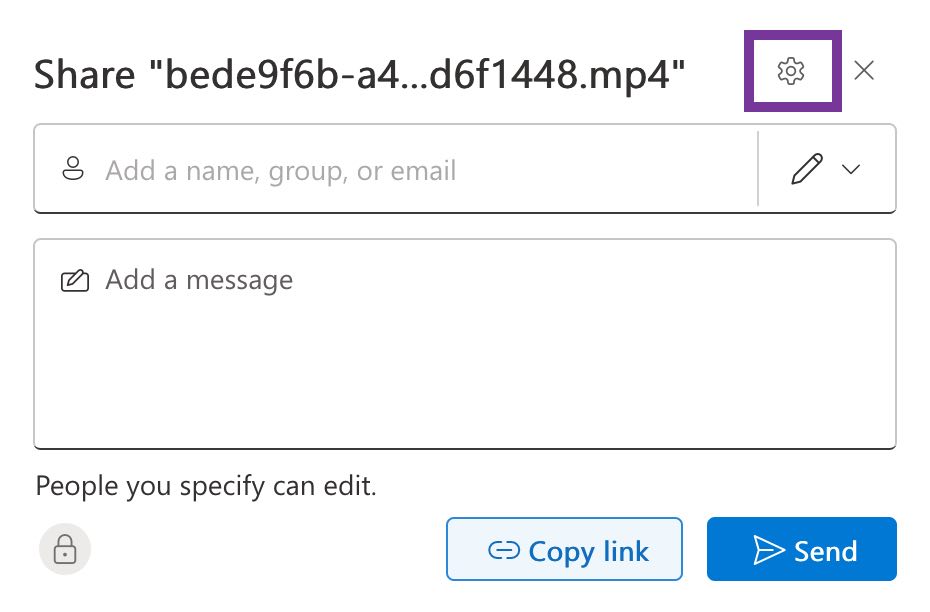
- For anyone in CSUSM, or anyone with the link, click on the gauge icon to the right
of the video title.
- To limit to CSUSM, choose the People in California State University San Marcos by clicking on the circle at the end of the row
- To make it public, choose Anyone by clicking on the circle at the end of the row
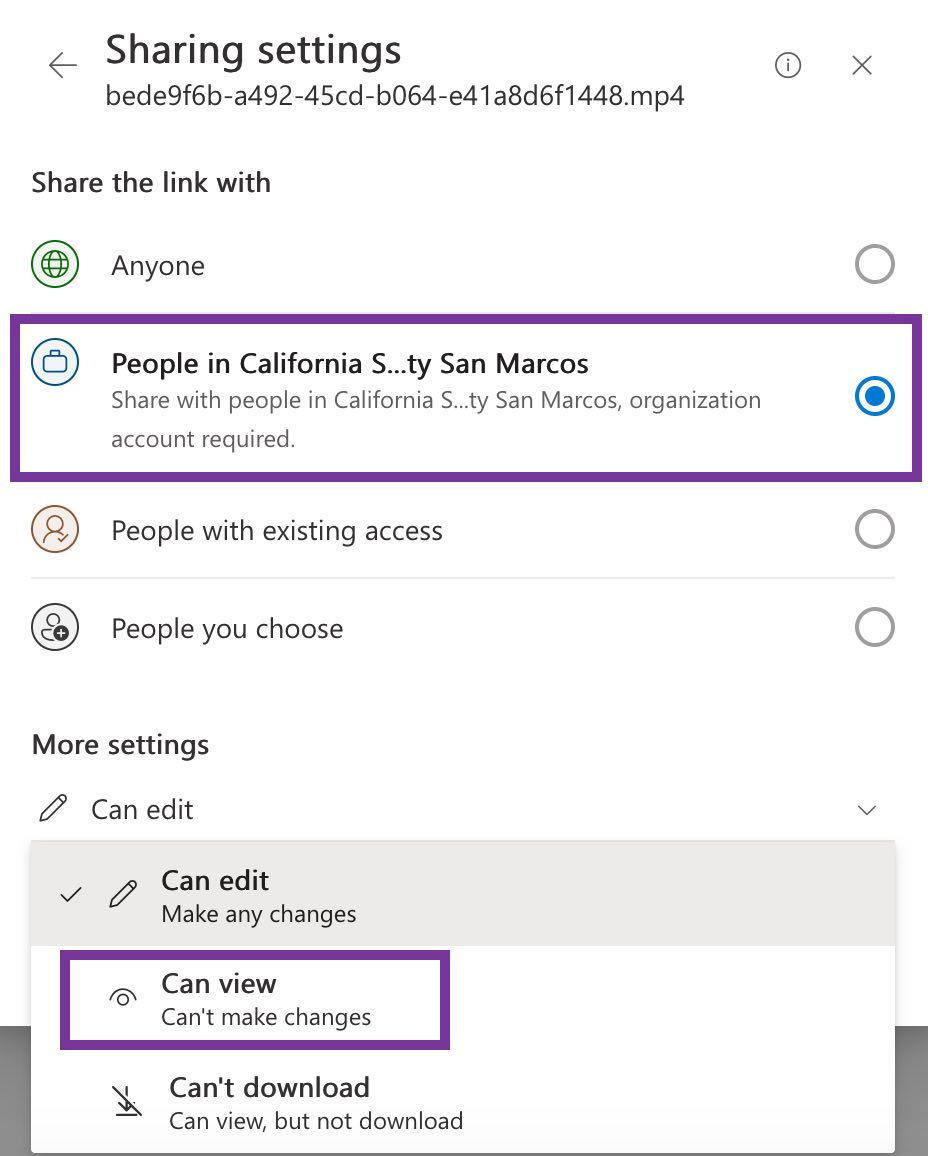
- Click the drop down arrow to the right of Can edit in the More settings section to
choose how the viewer can engage with the video.
- Can edit
- Can view
- Can't download
- Click on the Apply button and click the Copy link button.
- For specific people, type their name or email address in the search box.
- Email the link, add it to a website, or add to Cougar Courses.