 myCSUSM
How to Add Button Links on OU Campus
What is a Button link?
Similar to Descriptive links, Button links are clearly identified through their chosen name and bright blue background. This type of link is mainly used to attract the user to click on it and is usually placed at the end of entries.
Link Text Tips:
The following are some suggestions on how to create a descriptive link for your web page:
- Avoid using generic terms like “Click here” or “Here” - If used, please label with a Title specified in Step 5 to add specification to the link.
- Be specific: Try making links like: “July 2011, Summer Programs” Rather than just “Summer Programs”. This will prevent confusion for viewers if there are multiple links of similar topics, such as an archive of summer programs.
- Duplicate names should go to the same place: If more than one link on a page shares the same link text, all those links should point to the same site/file.
- Add identifying details: If two or more links refer to different site/file but share the same link text, distinguish the links by adding dates, details, or title attributes.
How to Add Button Links on OU Campus
Step 1:
Find the site/file you want to link.
Step 2:
On OU Campus Content Editor, highlight the text that you want to link and select the ![]() icon.
icon.
For images, simply click the image and select Insert/edit link.
Step 3:
A pop-up will open. You have two ways to link up a file, document, or page:
- Internal is linking a text that is a site/file on the OU Campus server.
- Examples of this might be a document you recently uploaded.
- External is linking a text by URL to a site that is outside of your OU Campus environment.
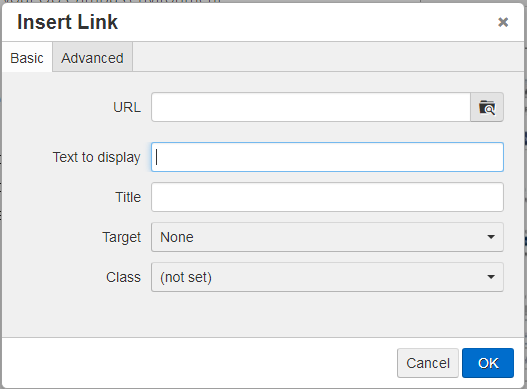
Step 4: Internal
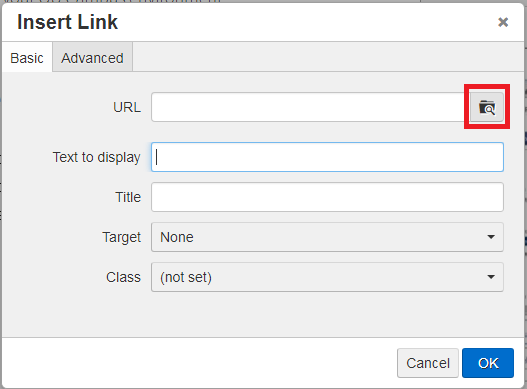
Select the Browse icon. A Internal link will open where you can look for the site/file that is on the OU Campus server to link it to the text. After selecting a site/file, a confirmation window will pop-up. Select OK.
Step 4: External
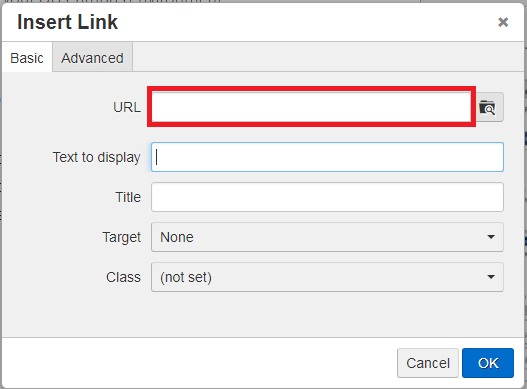
Copy and paste the URL to the URL field.
Step 5: For Internal and External links!
Add a link Title. Title is only necessary if two or more links refer to different site/file but share the same link text.
This title will show up if a user hovers over a link and is also reas by a screen reader.
Text to Display: If you want to modify the clickable wording on your link, type in a new phrase in this field

Step 6: Add the Custom Button Class to the link
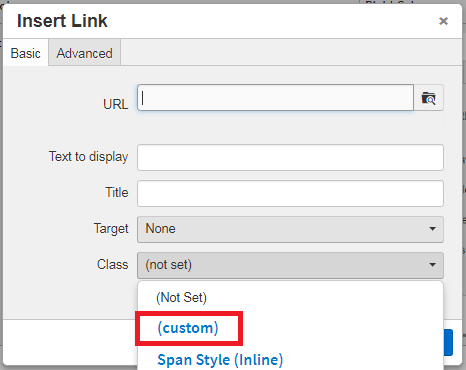
Select the Class drop down menu and select the "(custom)" tab.
Step 7: Add the Button Imput
There are TWO types of buttons:
Regular Buttons:
This button type has fixed dimenstions and is the most commonly used. Useful in most page layouts.
In order to use this button type, input "button" into the custom imput.
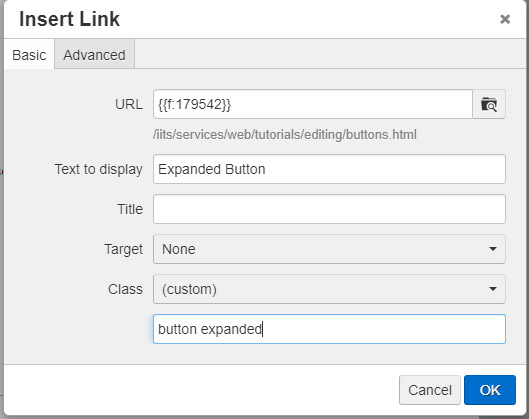
Expanded Buttons:
This button type will expand to the length of entry. Uncommonly used but still useful for certain desired page layouts.
In order to use this button type, input "button expanded" into the custom imput.

Step 8:
After adding a button link attribute, select the OK button. The button should now appear on your page.
Step 9:
Select the ![]() button at the top of the Content Editor to finalize your page.
button at the top of the Content Editor to finalize your page.


