
 myCSUSM


Creating Tables on OU Campus
Why use Tables?
Tables are extremely useful to convey and organize data and information within your
website.
Tables should not be used for a page's layout of content.
How to add in Tables
Step 1:
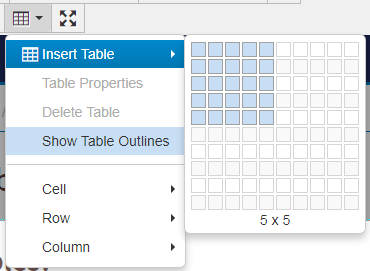
On the OU Campus Content Editor, select the ![]() icon from the top of the icon ribbon.
icon from the top of the icon ribbon.
Step 2:
An Insert table pop-up window will appear. Within this pop-up you can select the size desired for your table by hovering your mose over the provided grid structure.
Click within the grid structure to select a table's size. You can adjust size later on if needed.
Step 3:
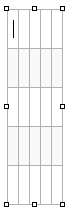
A table will be inserted and will look like a box with solid-line border.
Step 4:
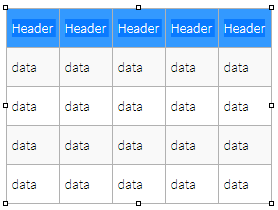
Add content to your table by selecting the appropriate table cell and filling the content in.
Step 5:
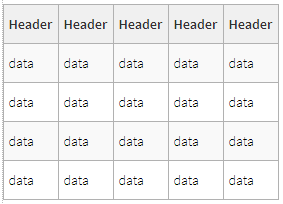
Mark your table’s categories with Table Headers.
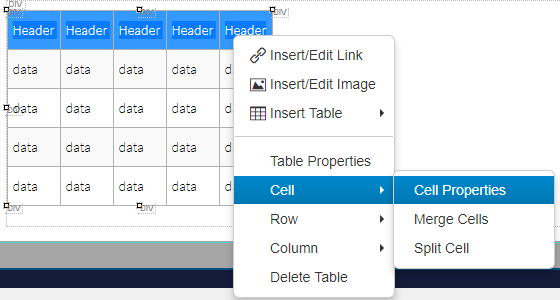
- To mark headers, simply highlight the table’s categories and right click.
- A small pop-up box will appear with the option Cell four from the bottom.
- Next, click Cell Properties.
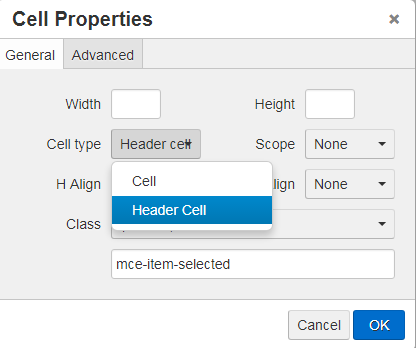
Step 6:
A new pop-up will appear.
- In the Cell Type drop down, select Header Cell.
- In the Scope drop down, select if your headers are a row, column, or grouping of rows/columns. This selection should reflect your table's content.
- Tip: Most commonly, tables will have a "Row" selection.
Step 7:
Without highlighting any of the table content - right click on the table.
- in the Table Properties pop-up window click on the Width field.
- In the Width field type in 100%. This will make your table 100% of the allotted screen size.
Do not add in a set pixel size in the Width field as this method may not render correctly on a mobile device.
Step 8:
Add the Table Title (Caption): In the Table properties pop-up window, select the "caption" check box. This will add in a row to the very top of the table where a short title can be typed that summarizes the table. This will auto format to look bold and will also be called out to non-visual users.
Step 9:
Click OK to save your changes. The selected table headers will appear slightly bolder than the regular table text.
Step 10:
Continue editing your page as needed.