
 myCSUSM


Enabling Self Enrollment in Community
Why Do This
Enabling self-enrollment allows users (students, faculty, staff, or external users) to enroll themselves in your Community container. Doing so can lead to fewer enrollment issues and less enrollment management for you. Not to worry, you have the ability to set an enrollment key so that not just anyone can access your container. You can even set group enrollment keys so that users who enroll with a specific key are automatically added to a designated group in the container.
If you enable self enrollment, we recommend you send your users the exact name of the container, the enrollment key (if set), and this help guide on Self Enrollment in Community.
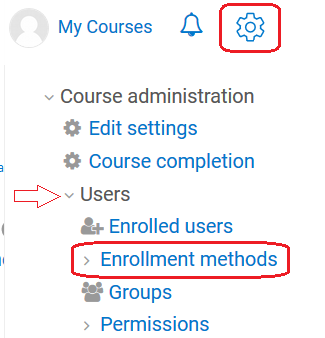
- While in your Community container, click on the gear in the upper right to open the Course Administration block and click on Users and then Enrollment methods.
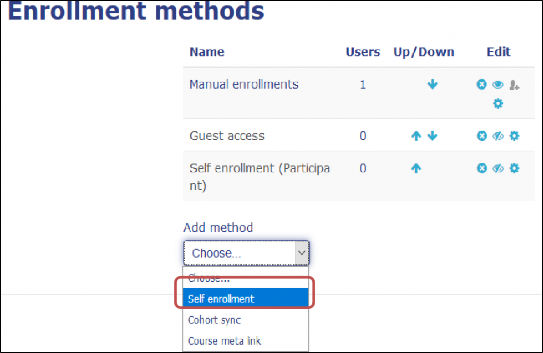
- From the Add method drop-down select Self enrollment.
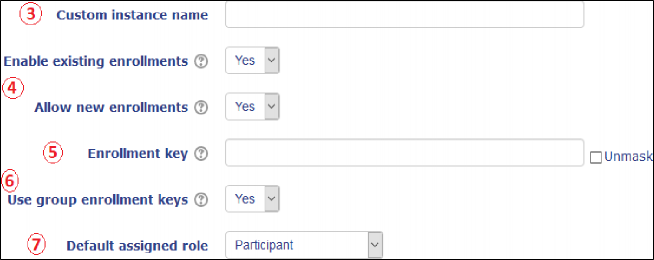
- Enter the Custom instance name for this self-enrollment method. You would only need a new method if you want to change the key or any other setting for future enrollments, or if you will have users with different roles. If you want users to be placed in designated groups when they enroll, you do not need to setup a different self-enrollment method for each group. In fact, only one self-enrollment instance can be using group enrollment keys at a time.
- Leave “Enable existing enrollments” and “Allow new enrollments” set to Yes.
- Enter the unique Enrollment key. Users will be required to enter this exact key in order to self-enroll.
- If you want a user to be placed into a designated group when they enroll, set “Use group enrollment keys” to Yes. After setting up this self-enrollment method, you will then need to go to the Groups area and set the unique key for each group (see “Setting Up Group Enrollment Keys” section after Step 14). Note: only one self-enrollment instance can be using group enrollment keys at a time.
- Next, set the Default assigned role, which determines what role a user is assigned when they enroll. The role determines what permissions the user has in the course (editing, viewing, submitting, etc.). Most likely you will be setting this to Participant (analogous to the student role in Cougar Courses).
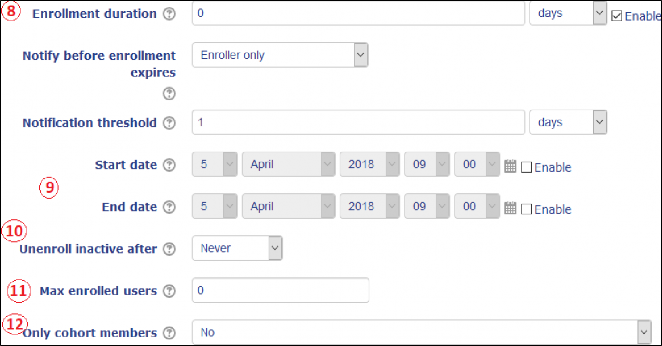
- Optional: If you choose, you can have a user’s enrollment in the container only last a certain duration (in weeks, hours, minutes, or seconds). The clock starts as soon as they enroll. If so, check the Enable box for Enrollment duration and enter the duration. Along with this, you can have a user (or yourself) notified when a user’s enrollment is about to expire. To do so, select who you wish to be notified from the “Notify before enrollment expires” dropdown. Then set when you would like the notification to be sent out in “Notification threshold.”
- Optional: If you enable a Start date and/or End date users will only be able to enroll themselves in the container during this time period. If not enabled, users can enroll themselves at any time.
- Optional: Use the “Unenroll inactive after” setting to have users automatically unenrolled after a period of inactivity in the course.
- Optional: “Max enrolled users” allows you to limit the number of users who can self-enroll. “0” means there is no limit.
- Leave “Only cohort members” set to No.
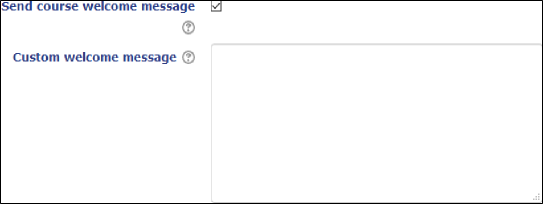
- Optional: If you want users to receive a welcome email after they enroll, check the box for Send course welcome message and enter your welcome message in the box for Custom welcome message. Click on the gray question mark to see what placeholders are available to use in the message (such as course name, user name, etc.).
- Finally, click Add method. Users can now self-enroll if the container is visible.

We recommend you send your users the exact name of the container, the enrollment key (if set), and this help guide on Self Enrollment in Community.
Setting Up Group Enrollment Keys
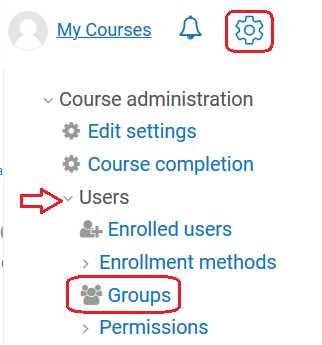
- While on the course homepage of your Community container, click on the gear in the upper right to open the Course Administration block and click on Users and then Groups.
- If you have not yet created groups, please see the help guide “Create Groups and Groupings.”
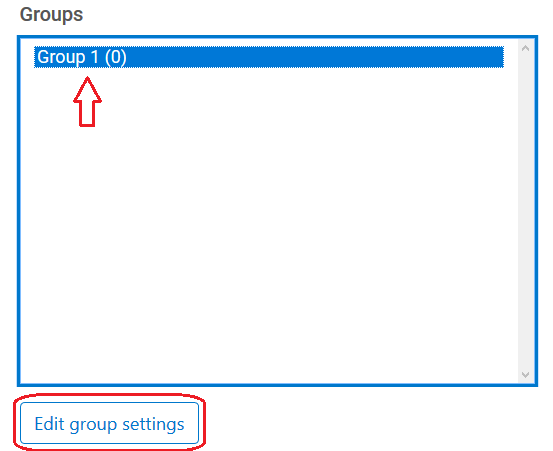
- Select the group you want to set an enrollment key for and click “Edit group settings.”
- Click the pencil under Enrollment Key to enter the unique enrollment key for this
group (click the eye icon to reveal the key to make sure you entered it correctly).

- Click Save changes. Now, when a user enters that unique key when they self-enroll, they will automatically be placed in this group.

- Repeat for each group.