
 myCSUSM


Web Authoring Guides
If you try these guides and still have a question or need more support, contact the team by using web@csusm.edu. We can usually provide a response by either email or teams within the day (often within the hour).
If you just need access to Omni CMS and do not require training, please have your department Web Content Owner email web@csusm.edu to request/grant your access. If you are unsure who this person is, email us and we can include them (it just takes a little longer).
Additional Guides: Profile Guide | Accessibility Guides
Omni CMS Training
We do not plan on offering live trainings at this time. Please watch the video of
our last recorded training session.
Video Recording of Training
Video Recording of Training
Page Contents
Account types and access requests
Content Owners
Each department (root level) web folder has one designated contact that we call the "Content Owner" for the site. This individual does not have to be a web author, but they can be. Typically, this individual is an administrator who has authority to make decisions on behalf of the department for website redesigns or approval/denial of web authoring requests to the department.
User Types in Omni CMS
At CSUSM, we use two types of roles for Omni CMS web authoring:
- Students: Student accounts generally are considered content contributors and they have minimal access to edit existing content, but not alter the structure of department websites. Students cannot add, move, copy, rename, or delete files.
- Employees: Staff/Faculty accounts can add/edit/remove content within department web folders.
Access Requests
Designated Content Owners for department websites may request to have new accounts added to the department access group by emailing web@csusm.edu. For student usernames, please specify if you want them added as "Students" or with elevated "Employees" access.
Most department group access is given at the main department folder (root level) so individuals can adjust any page within the department's website. We do have the option of restricting access to a lower, sub-folder, level upon request.
Toolbar/WYSIWYG Limitations
The WYSIWYG Editor has additionally been modified to limit some actions on a page (such as font resizing, text recoloring options, strike through, and the HTML editor). If more advanced options are needed on a page, please email your request to web@csusm.edu and the Web Team will see if it is appropriate to modify your page(s) for you.
Editing in Omni CMS - Common Activities
DUO Multi-factor Authentication
Before authoring on your first page per browsing session, you will be required to log into Omni CMS with the DUO multi-factor authentication step. Once you log in, it will remember you and you can then use the "Edit this Page" link in the footer for all subsequent page edits. This should remain persistent as long as your browser stays open for the day (it could expire after the day and require another DUO login). A new redirect was created to help you quickly get to this login -- https://www.csusm.edu/oucampus -- which will take you to the Omni CMS Dashboard (section at bottom).
Footer Link Access - "Edit this Page"
Following this method will bring you directly to the edit view of the page you were on and promotes fast and easy content updates.
- Navigate to your department web page on the live/published website (www.csusm.edu or faculty.csusm.edu).
- Scroll to the bottom of the page to the footer.
- Right click anywhere in the page’s footer that is not a link. On the far left-hand side of the page, an "Edit this Page" link will appear.
- Select the Edit this Page link.
- The page will load in the preview; select the
 button to edit your content.
Omni CMS Dashboard
The OU Dashboard method lets you navigate through the campus site structure to pages needing edits.
- Navigate to https://www.csusm.edu/oucampus (if first time during a session, it will have you log in first).
- You will be taken/redirected to your OU Dashboard.
- Select the
 tab in the blue bar and choose the "Pages" option.
 - Navigate to the site needing updating through the folder structure (the top-right gives a quick search/filter option).
- Once a page that needs updating has been located, select on the page in the file structure.
- The page will load in the preview; select the button to edit your content.
Page Check-in/out
What are checked out pages?
Omni CMS only allows one person at a time to edit page content. When a page or file is checked out to a user, no other users can enter the pages and make changes until the file has been checked back in. A Web Team administrator can override this and manually check pages back in that are checked out, but doing so will cancel any unsaved changes to the page.
Pages should be checked in as soon as possible to allow other users to edit the page
contents. Any time that the ![]() editing button is clicked the page stays checked out to that user until the user:
editing button is clicked the page stays checked out to that user until the user:
- Publishes the page
- Checks the page back into the system by clicking on the lit (yellow) light bulb
How do I check in checked out pages?
The easiest way to check in pages is to do the following:
- Log in to Omni CMS (this can be done from any page)
- Click the Dashboard button at the top of the page
- In the My Checked-Out Content box, click the
 icon(s).
 - Once the icon is clicked the page will be checked in and allow other users to make edits.
Admin Check In Policy
Web and Digital Content Strategies will automatically check in pages that are older than a two weeks (when we remember). This helps to reduce requests for unlocks when authors forget or leave the department.
Adding Headers to a Page
- Adding Headers to a Page
What is a Header/Heading?
Headers/Headings are built in resources that help viewers navigate through a webpage or document’s content.
Why should I add Headers?
Headers not only apply a visual style that alerts viewers as to the structure of a document (e.g. large bold text at the top of a page is the title, whereas smaller bolder text throughout a page are sections or subsections), but also tells non-visual users the structure of a page. The way that headers work is that they are coded to read out to a listener “Title – Welcome to LTWR 105” and helps with navigation and better understanding of different sections or topics.
Headers also save time on formatting documents and webpages since headers have a built in style via one click, rather than needing to click multiple font preferences to get the code/size/bold/underline preferred.
Which Header should I use?
Headers should be used in order based on the content that is trying to be communicated. It is very important that header-use remain consistant across the CSUSM website and headers should not be skipped!
- Heading 1 (auto-applied) - this is already applied for you and is the Page's title. Think of it like a book's title.
- Heading 2 - This is a large category of Heading 1. Think of it like a chapter in a book.
- Heading 3 - This is a sub-category of Heading 2. Think of it like a section within a chapter.
- Heading 4 - This is a sub-sub-category. Think of it like a sub-section within a chapter's section.
- Heading 5 - this is a sub-sub-sub-category.
- Heading 6 - This is a sub-sub-sub-category.
- Heading 5 - this is a sub-sub-sub-category.
- Heading 4 - This is a sub-sub-category. Think of it like a sub-section within a chapter's section.
- Heading 3 - This is a sub-category of Heading 2. Think of it like a section within a chapter.
- Heading 2 - This is a large category of Heading 1. Think of it like a chapter in a book.
How to Add Headers:
- Locate the page that you want to edit.
- The overview of the page will load. Select the tab that correlates with the area you want to edit.
- Type in your title or section name onto the page
- Highlight your title/topic in the text box and then select the arrow-down symbol on the “Paragraph” style dropdown. This dropdown menu will show all of the different styles you can add to the text.
- Select Heading 2 within the dropdown.
Please note: With the template provided, the Display Name/Title of the page is set as a Heading 1. Please use a Heading 2 or higher. - Now your custom text should now be larger and bold. The text is now a Heading 2.
- Select the
 button at the top of the Content Editor to save your changes.
- Heading 1 (auto-applied) - this is already applied for you and is the Page's title. Think of it like a book's title.
Adding Data Tables to a Page
- Adding Data Tables to a Page
Why use Tables?
Tables are extremely useful to convey and organize data and information within your website.
Tables should not be used for a page's layout of content.How to add in Tables
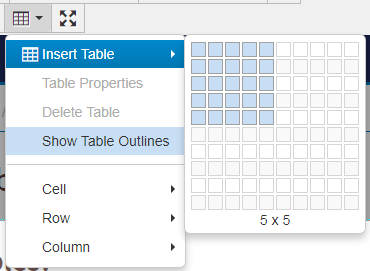
- On the Omni CMS Content Editor, select the
 icon from the top of the icon ribbon.
 -
An Insert table pop-up window will appear. Within this pop-up you can select the size desired for your table by hovering your mose over the provided grid structure. Click within the grid structure to select a table's size. You can adjust size later on if needed.
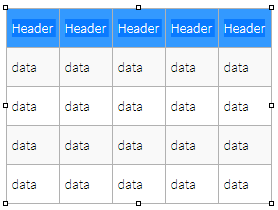
- A table will be inserted and will look like a box with solid-line border.
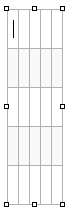
- Add content to your table by selecting the appropriate table cell and filling the content in.
-
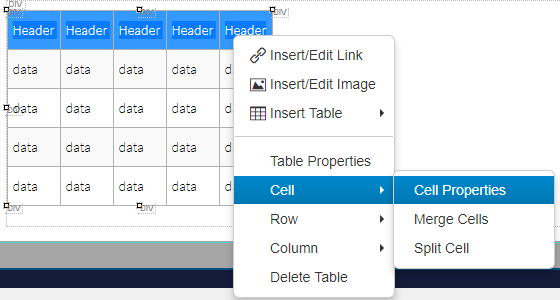
Mark your table’s categories with Table Headers.
- To mark headers, simply highlight the table’s categories and right click.
- A small pop-up box will appear with the option Cell four from the bottom.
- Next, click Cell Properties.
-
A new pop-up will appear.
- In the Cell Type drop down, select Header Cell.
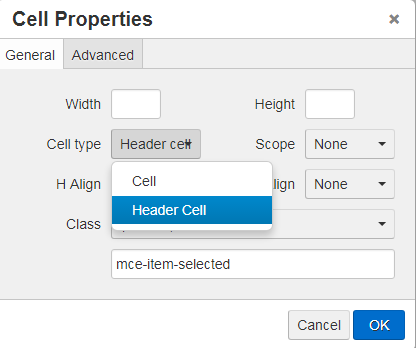
- In the Scope drop down, select if your headers are a row, column, or grouping of rows/columns. This selection should reflect your table's content.
- Tip: Most commonly, tables will have a "Row" selection.
- In the Cell Type drop down, select Header Cell.
- Without highlighting any of the table content - right click on the table.
- in the Table Properties pop-up window click on the Width field.
- In the Width field type in 100%. This will make your table 100% of the allotted screen size.
Do not add in a set pixel size in the Width field as this method may not render correctly on a mobile device.
- Add the Table Title (Caption): In the Table properties pop-up window, select the "caption" check box. This will add in a row to the very top of the table where a short title can be typed that summarizes the table. This will auto format to look bold and will also be called out to non-visual users.
- Click OK to save your changes. The selected table headers will appear slightly bolder than
the regular table text.
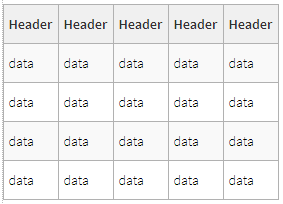
- Continue editing your page as needed.
- On the Omni CMS Content Editor, select the
Adding Images to a Page
- Adding Images to a Page
Before getting started:
You will need to upload your images to Omni CMS and then publish them out before embedding images onto a webpage.
Embedding Images
- Locate an image that you would like to insert into your web page. Once located, select
the
 icon from the page Edit WYSIWYG ribbon.
 -
A pop-up box will open. In the Source field, click the
 to search for an already existing image from within Omni CMS.
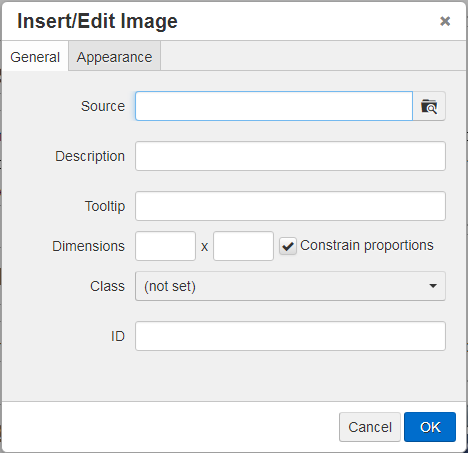
If you do not already have the image uploaded to Omni CMS: You can click and click the  button at the top.
- Use the file structure on the left to locate where the image should live.
- Use the right portion to browse select the image from your computer
- Click Start Upload when ready to upload the files to Omni CMS.
- The Source field will be filled in with an ID code that looks like {{f:#####}}. This is your image's ID that Omni CMS references for internal code. Do not alter this ID.
- In the Description add a short overview of what the image is. This is required! This description will be hidden to viewers unless using a screen reader, or have a bad internet connection where the image does not load.
- Click OK to insert the image to your page.
Please note that the image will not render if it has not been published out.
Why should I add in Description?
The Description helps non-visual users understand elements you may have added to your page and it is required by law that all content be accessible to all audiences. The Description is also helpful in case a computer’s browser or a device does not load all of the images on a page.
More Tips on Writing Descriptions:
To make sure the image has an appropriate alternative text, check the following:
- Description text should be short as possible while still conveying the meaning of the image! You do not need to list out colors or highly detailed descriptions of the image – simple summarize the idea behind the image.
- If image is conveying too much information such as newsletters or fliers then it should be uploaded as a PDF or DOC file -OR- recreated as web content.
- PDF files are required to be OCR’d and takes 3 button clicks to implement. For more information on how to do this, visit the Creating Accessible PDFs.
- Alt text should not say: “Image”, “.gif”, “.png”, “.jpeg”, "blah", list out the file name for the image, or list out the URL for where the images was originally hosted on.
- Locate an image that you would like to insert into your web page. Once located, select
the
Adding Links to a Page
- Adding Links to a Page
What is a descriptive link?
Descriptive links are links that are clearly identified through their chosen name and describes where the link directs to. Descriptive links should be written to stand-alone without reading the context of the sentence/content it is hosted in.
Try to make links: specific, sincere, substantial, and succinct!
Link Text Tips:
The following are some suggestions on how to create a descriptive link for your web page:
- Avoid using generic terms like “Click here” or “Here”
- Be specific: Try making links like: “July 2011, Summer Programs” Rather than just “Summer Programs”. This will prevent confusion for viewers if there are multiple links of similar topics, such as an archive of summer programs.
- Duplicate names should go to the same place: If more than one link on a page shares the same link text, all those links should point to the same site/file.
- Add identifying details: If two or more links refer to different site/file but share the same link text, distinguish the links by adding dates, details, or title attributes.
- Use the {{f:######}} link: For pages in Omni CMS a link set up like {{f:######}} is resistent to breaking if a file is renamed or moved.
How to Add Links on Omni CMS
- Find the site/file you want to link.
- On Omni CMS Content Editor, highlight the text that you want to link and select the
 icon. For images, simply click the image and select Insert/edit link.
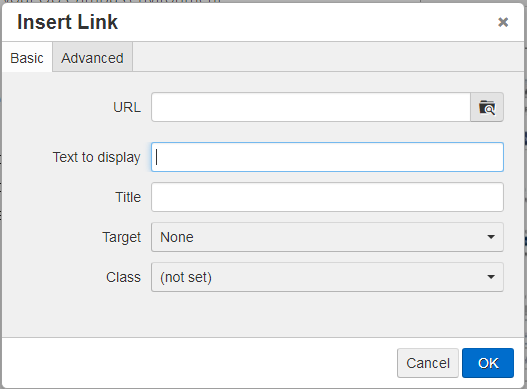
 -
A pop-up will open. You have two ways to link up a file, document, or page:
- Internal is linking a text that is a site/file on the Omni CMS server.
- Examples of this might be a document you recently uploaded.
- External is linking a text by URL to a site that is outside of your Omni CMS environment.
- Internal is linking a text that is a site/file on the Omni CMS server.
-
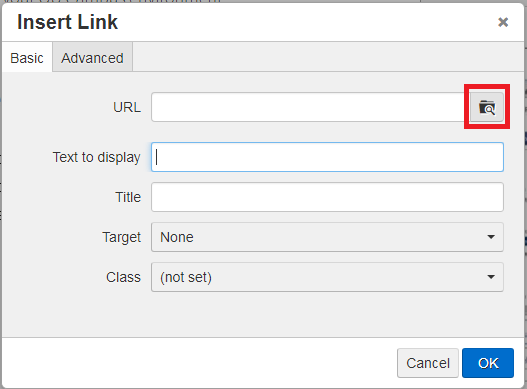
Internal:
-
Select the Browse icon. A Internal link will open where you can look for the site/file that is on the Omni CMS server to link it to the text. After selecting a site/file, a confirmation window will pop-up. Select OK.
-
Using this process your link should turn in to a link formatted like: {{f:######}} - this is basically Omni CMS's shorthand for that specific page/file and will be resistent to breaking if hte file/page is moved or renamed.
-
- External:
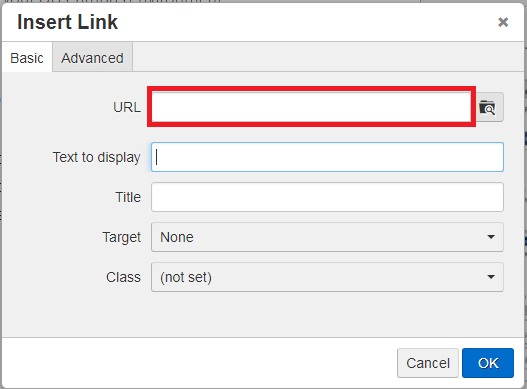
- Copy and paste the URL to the URL field.
- For Internal and External links!
-
Add a link Title. Title is only necessary if two or more links refer to different site/file but share the same link text.
-
This title will show up if a user hovers over a link and is also reas by a screen reader.
-
Text to Display: If you want to modify the clickable wording on your link, type in a new phrase in this field
-
- After adding a link title, select the OK button. The text is linked and highlighted blue.
- Select the button at the top of the Content Editor to finalize your page.
Adding Anchor Links to a Page
- Adding Anchor Links to a Page
What is an Anchor Link?
An anchor link is a link on a page that brings you to a specfic place on that page. Anchor Links can be used on the same page or at a different page as long as it is inserted correctly.
When do I use Anchor Links?
Anchor links can be helpful when you want to bring a user to a specific spot on a web page. They are useful for pages that contain long list of questions such as Frequently Asked Questions. This makes the content easier to navigate for both typical and screen reader users.
- Within Omni CMS, select the page that you want to edit.
- The overview of the page will load. Select the tab to edit a text area.
- Type the text that you want to link. Make sure to make your link text specific; if you do not know how to do so, please read the Omni CMS Guide: How to add descriptive links on Omni CMS, and continue.
- Find a location where you want to add the anchor of the link. Select the
 icon.
icon. -
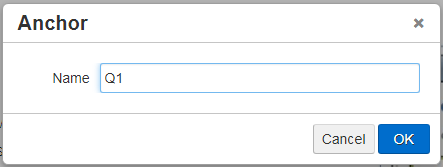
A pop up will open. At the Name field, insert a unique ID text (case-sensitive), for example "Q1". Then select the "OK" button. A small anchor icon should appear in the text area on the page.
- Now, highlight the text you previously added from Step 4 and select the highlighted icon.
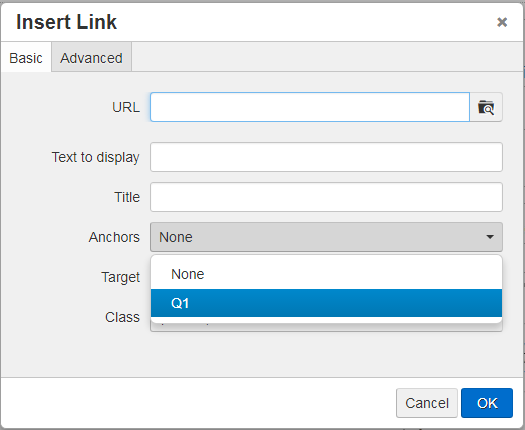
- An Insert Link pop up will open. At the Anchors section of the window, click the drop down and select the unique ID you added from Step 6, then select OK. Your text should appear blue when it is linked correctly.
- To add more anchor links, repeat the same step but with a different ID text.
- Select the button at the bottom of the Content Editor to finalize your page.
Adding Button Links to a Page
- Adding Button Links to a Page
What is a Button link?
Similar to descriptive links, Button links are clearly identified through their chosen name and bright blue background. This type of link is mainly used to attract the user to click on it and is usually placed at the end of entries.
Link Text Tips:
The following are some suggestions on how to create a descriptive link for your web page:
- Avoid using generic terms like “Click here” or “Here” - If used, please label with a Title specified in Step 5 to add specification to the link.
- Be specific: Try making links like: “July 2011, Summer Programs” Rather than just “Summer Programs”. This will prevent confusion for viewers if there are multiple links of similar topics, such as an archive of summer programs.
- Duplicate names should go to the same place: If more than one link on a page shares the same link text, all those links should point to the same site/file.
- Add identifying details: If two or more links refer to different site/file but share the same link text, distinguish the links by adding dates, details, or title attributes.
How to Add Button Links on Omni CMS
- Find the site/file you want to link.
- On Omni CMS Content Editor, highlight the text that you want to link and select the icon. For images, simply click the image and select Insert/edit link.
- A pop-up will open. You have two ways to link up a file, document, or page:
- Internal is linking a text that is a site/file on the Omni CMS server.
- Examples of this might be a document you recently uploaded.
- External is linking a text by URL to a site that is outside of your Omni CMS environment.
- Internal:
Select the Browse icon. A Insert link pop-up will open where you can look for the site/file that is on the Omni CMS server to link it to the text. After selecting a site/file, a confirmation window will pop-up. Select OK. - External:
- Copy and paste the URL to the URL field.
- For Internal and External links!
- Add a link Title. Title is only necessary if two or more links refer to different site/file but share the same link text.
- This title will show up if a user hovers over a link and is also reas by a screen reader.
- Text to Display: If you want to modify the clickable wording on your link, type in a new phrase in this field
- Add the Custom Button Class to the link:
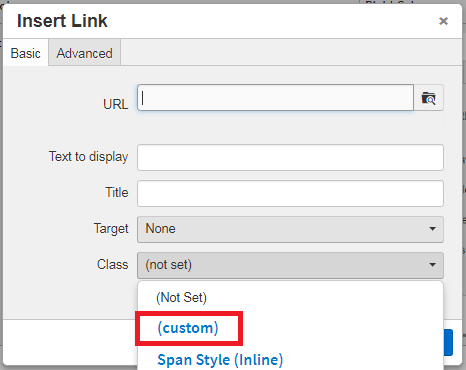
- Select the Class drop down menu and select the "(custom)" tab.
- Add the Button Input
- There are TWO types of buttons:
Regular Buttons:
Regular Button
This button type has fixed dimenstions and is the most commonly used. Useful in most page layouts.
In order to use this button type, input "button" into the custom imput.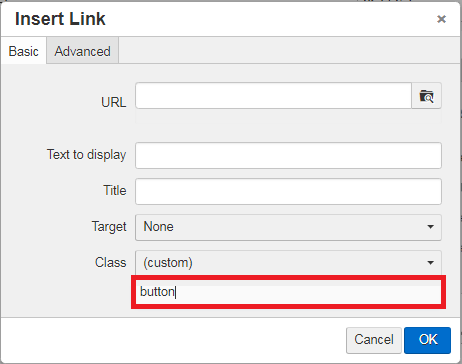
Expanded Buttons:
Expanded ButtonThis button type will expand to the length of entry. Uncommonly used but still useful for certain desired page layouts.
In order to use this button type, input "button expanded" into the custom imput.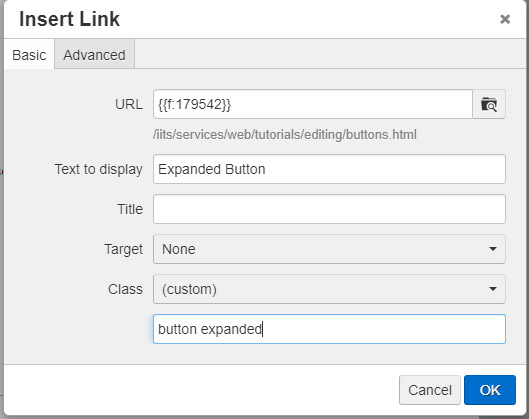
- There are TWO types of buttons:
- After adding a button link attribute, select the OK button. The button should now appear on your page.
- Select the button at the top of the Content Editor to finalize your page.
Creating new pages and sections
Create a Page or Section
- Create a Page or Section
To create a new page in Omni CMS follow the following steps:
- Log into Omni CMS with your campus Single Sign On.
- Navigate to the area you would like to add in a new page.
This should look like: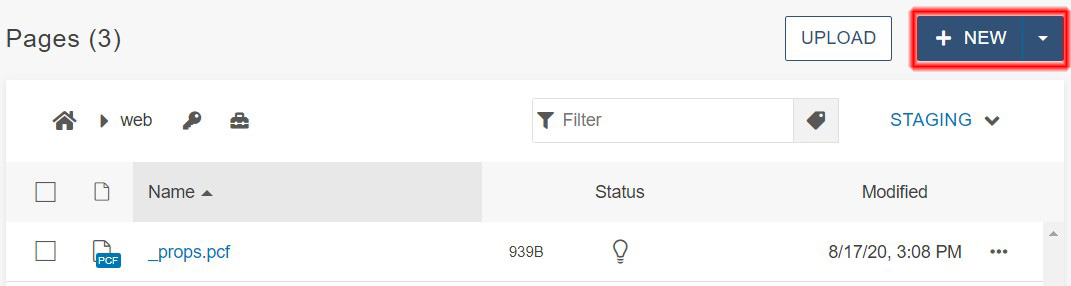
- Click
 at the top of the page.
 - A pop-up will appear.
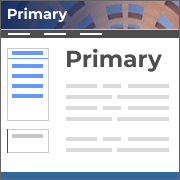
Select the new page type needed:- Folder - This is to help keep your files organized and is not for pages! Folders are just a shell for content to reside inand is typically used for images or documents.
- New Primary Page - This creates a new page that goes inside of an already established folder.
- New Redirect - This will allow you to create a redirect from a page to another page.
- New Section - If you need to create a brand new section/folder for pages. This option will create a _props.pcf and index.pcf page inside of a new folder.
The most common selections made in Omni CMS are New Primary page and New Section
- Fill in the page type pop-up. Fill in:
- Page Title - this will fill in the Heading 1/Title on your page.
- Filename - this will form your page's URL.
This area will not let you save if spaces, special characters, or upper case letters are used in the file name.
Please note: Once a page has been created your filename should never say "untitled". You will need to rename the file if it says "untitled.pcf" - Folder Name - if in the New Section template.
- Click
 to create your page.
Please note: Omni CMS does not know when you are done editing a page and when to make it live/when to list it in your site's navigation. You will need to re-publish the _includes/_nav.pcf file to have your newly added page show up in the navigation.
- Log into Omni CMS with your campus Single Sign On.
Creating a Redirect
- Creating a Redirect
What is a Redirect?
The "New Redirect" is used to send web traffic from one page to another automatically. This is primarily to reroute old bookmarked links or old search results but can be used to create new, short web addresses for publication.
When to use a direct?
The Web Team can preform large scale redirects for cases like moving entire sites, whole folders of files, and merging sites together. For single page redirects we offer a self service option outlined below.
Best uses for the self service redirect:
- creating a short URL for publications
- fixing a bad or renamed link
How to Make a Redirect in Omni CMS
Before creating a redirect in Omni CMS, users will need to determine where the redirect starts and where the redirect will lead.
For this guide we will be using the example of redirecting
- from: https://www.csusm.edu/site/from-folder/index.html
- to: https://www.csusm.edu/site/to-folder/index.html
- Log in to Omni CMS and navigate to the site area, or sub-folder, where you want to
place your new redirect.
For this example one would navigate to the site's root level (https://www.csusm.edu/site). - Click the button at the top of the screen.
- In the pop-up menu select New Redirect.
- In the New Redirect pop-up menu fill in the following:
- Folder Name: This will be the from-folder location.
For our example, the Folder Name will be from-folder
This will poreform the action just like when creating a New Section where a folder is created with the defualt three files withing (_nav.inc, _props.inc, and index.pcf). - Section Title: Type in the page's title. This will often match the final destination page title.
- Add Navigation Item: click No, unless you would like this link added to your navigation (will use section title).
- Destination: Paste in the web address you would like to redirect to. This should be a full URL (https://www.csusm.edu/site/to-folder/index.html).
- Folder Name: This will be the from-folder location.
- Click
- Your redirect will be created and the preview will show the destination page (this
can be a little confusing as you will not be editing that destination page from this
view).
 this index.pcf page and test out your new redirect.
How to Edit a Redirect
If you need to update your destinatnion web address
- Go to the index.pcf within the from-folder.
- Check the page out (just above the toolbar).
- Click
 .
. - In the Destination field, update the link.
- Click

- Click to push your page out to the live site.
Need Assistance?
If you are trying to create a redirect from a site area that you do not have access to you will need to request a redirect to be put into place by the Web Team. Email requests to: web@csusm.edu for assistance.
File management - organization, uploads, and recycling
Adding Files/Images to Omni CMS
- Adding Files/Images to Omni CMS
There are a few extra steps necessary before hosting documents (pdf, word, powerpoint, etc) online. View the Accessibility Guides to learn how to process your documents or fill out the Accessibility Drop Box Form.
Adding Images and Documents to Omni CMS
Text Guide:
- Select in top bar and then Pages in the drop down.
- In the main content area the site folders will show.
- Locate the folder of the site you need to add files to.
- Select the sub-folder (such as “documents” or “images”) that you want to add to.
- Select the
 button and
  your file(s) to the pop-up window.
 - Select
 when ready.
 - Click to publish your document to the live web. (You may need to hover over the file name
to see the Publish option).
Important: Make sure file name has no spaces, capitalization, or special characters. Rename the file if needed.
Visual Guides:
*Note: These videos use an older version so they look slightly different but the process is essentially the same.
File Upload FAQs
- My file will not allow me to upload it due to file size restrictions.
This is being caused by deleting your file’s file extension (examples: .pdf, .doc, .png, .jpg, etc) in the Omni CMS rename process.
There are two ways to fix this error:
- Option one – Modifying the file name in Omni CMS:
When renaming your file the entire name will be highlighted in Omni CMS – rather than hitting delete, or the backspace button, or typing right away, click into the field.
Highlight and replace just the uppercase letters of your file. Change the file to be all lowercase letters with no spaces and be sure the the .pdf is still included on the file.
- Option two – modifying the name to be all lower case with no spaces on your computer:
Before uploading the file to Omni CMS, change the file’s name to all lowercase letters with no spaces. Save your file's name and then upload the file to Omni CMS.
Your issue should be resolved once the file’s name is all lower case, has no spaces, and the file extension is listed.
- Option one – Modifying the file name in Omni CMS:
- I don't see the Upload button.Student accounts by default are limited to only editing page content. Learn more about Omni CMS user types and how to be moved up to a higher permission.
Archives and Living Documents
The web is not intended to be a place for archiving old content. If your department needs to keep an archive of content, contact web@csusm.edu for suggestions on the best hosting place. A living document is a document that updates on a regular basis and keeps the same generically named URL so that other pages referencing it does not get a broken link when the document is changed out.
- Bad file names: "holiday-calendar-2016.pdf" and then uploading a second document "holiday-calendar-2017.pdf" to your page.
- Good file names: Generic names like "calendar.pdf"
How to Update Files to a Newer Version
- Navigate to the folder that will hold your files (this most likely will be an "images" or "documents" folder in Omni CMS).
- Click on the folder so you can see the contents within the folder.
- Click the button.
- Check the Overwrite Existing check box.
- For images: click the Edit and Upload Image radio button
- Drag and drop or button to add your file.
- A preview of your new file will load.
- Click
- A pop up will show to double check that you are publishing to the correct folder.
Click
 to confirm the updates.
 - A preview of your file will load.
- the updated file.
File Types Allowed on Omni CMS
The following files are allowed on Omni CMS:
- Word Docs (.doc, .docx)
- PowerPoint (.ppt)
- Excel (.xls, .xlsx, .xlsm, .xlt, .xml, .csv)
- Adobe Acrobat Pro (.pdf)
- Images (.gif, .png, .jpg, .jpeg)
- Zipped Folders (.zip)
- Videos
- Youtube: Captioned Youtube videos are the only allowed video snippet type at this time. To add a video to a page, the Youtube Snippet must be used.
- Mediasite: Captioned Mediasite videos can be embedded using the iframe snippet.
If you need to upload a file that is currently not allowed please email the Web Team at: web@csusm.edu with your file type request.
- Select
Recycling (or Deleting) Content
- Recycling (or Deleting) Content
If you are an Editor in Omni CMS you can recycle items within the areas that you are able to edit. This moves the selected content to the Recycle Bin (under the Content tab). This is removed from the site (both staging and the live production site) but can be restored if desired.
Recycling Files:
Recycling will remove the file from the staging server and permanently delete any derivative files from the production server. The file will then reside in the Recycle Bin until it is either restored or permanently deleted.
- Navigate to the item you would like the recycle (this will be a page or a file uploaded but cannot be a folder).
- Click the checkbox next to the item's name (can select multiple items this way) -OR- hover over the listing and click File.
- Click Move to Recycle Bin.
- The item will be moved to the Recycle Bin.
- You will need to manually remove the item from your site's navigation as this is not an automated process.
Restoring Recycled Items
- Click Content from the bar at the top of the page.
- Click Recycle Bin.
- Click the three dots to the right of the item you want to restore and select
 . Your item will be put back where it came from in Omni CMS.
Visual Guide:
*Note: This video uses an older version so the visuals will be slightly different, but the procedure is still similar.
Deleting Folders:
Editors cannot delete folders. If you need a folder deleted please contact web@csusm.edu
Deleted items cannot be restored by the Web Team.Please Note: If a folder is deleted that has content inside of it, that content will be permanently deleted with the folder.
Page Versioning and Restoring
- Page Versioning and Restoring
Every time a page is published, a snapshot of that page’s content will be saved to Omni CMS.
Reverting to Previous Versions
- You can revert back to older page versions by checking out the page and then clicking the Versions tab.
Note: In order to access the versions tab, the page must be checked out to you.
- Once you are within the Versions tab, hover over the page version you wish to revert to.
If you have multiple versions and are unsure of the content within the pages, you can preview the page by higlighting the View icon, then selecting the Page button. - When you found the version you wish to use, click on the Revert button to place that version into staging.

- Go to the Preview tab to overview the reverted page.
- Select Publish to push out the reversion to the live site.
Visual Guide:
*Note: This video uses an older version so the visuals will be slightly different, but the procedure is still similar.
- You can revert back to older page versions by checking out the page
Snippets, components, and assets
Overview
Snippets are an important part of Omni CMS due their ability to render and stylize content. Have a captioned YouTube video you want to render on to a page? Want to create a directory of faculty members? Want to create two columns of content instead of having one long page? Snippets will help you do that!
- How to add Layout Snippets to your pages
Implement mobile-friendly page layout by using Snippets.
Layouts and Snippet Video
How to use the Layout Snippets:
- Go to the page you would like to edit.
- Edit your page by clicking
- Click where you would like to add in layouting. Hit the Enter key to have a nice blank area to work in.
- Click the
 icon in the toolbar at the top of the page.
 - In the pop-up, click the selection you want to add.
- Layout Options are:
- 2 columns - Even: a 50/50 split of your page
- 2 columns - Large Left: a 70/30 split
- 2 columns - Large Right: a 30/70 split
- 3 columns - three equally sized columns
- Layout Options are:
- Click

- A table will appear on your page. Paste or type in the content you want to add to
the white “content here” cells. Leave all of the other cells alone.
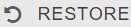
- Here is an example of what a table may look like:
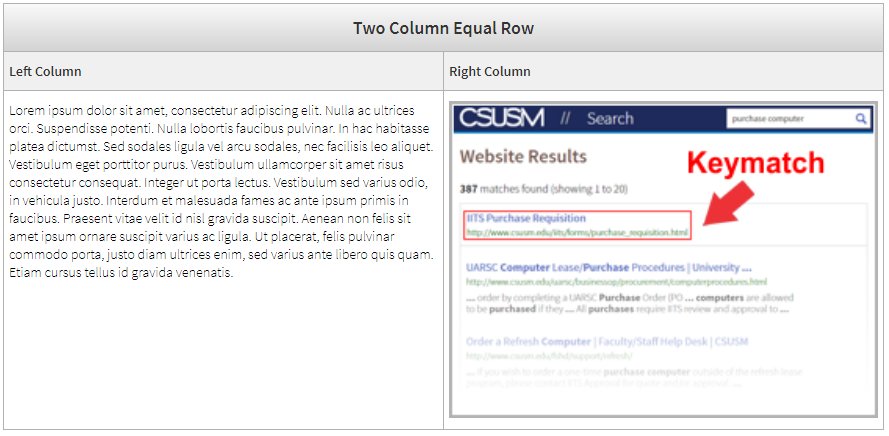
- Here is an example of what a table may look like:
- When your content is ready, click the icon to preview it. Your page will dynamically alter your content and put it into
the desired layout you created.
- Here is an example of how the above table transforms onto a page:
Lorem ipsum dolor sit amet, consectetur adipiscing elit. Nulla ac ultrices orci. Suspendisse potenti. Nulla lobortis faucibus pulvinar. In hac habitasse platea dictumst. Sed sodales ligula vel arcu sodales, nec facilisis leo aliquet. Vestibulum eget porttitor purus. Vestibulum ullamcorper sit amet risus consectetur consequat. Integer ut porta lectus. Vestibulum sed varius odio, in vehicula justo. Interdum et malesuada fames ac ante ipsum primis in faucibus. Praesent vitae velit id nisl gravida suscipit. Aenean non felis sit amet ipsum ornare suscipit varius ac ligula. Ut placerat, felis pulvinar commodo porta, justo diam ultrices enim, sed varius ante libero quis quam. Etiam cursus tellus id gravida venenatis.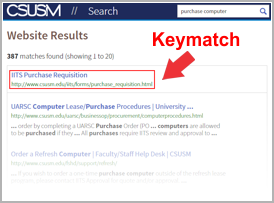
FAQ
- How many layout snippets can I use?You can add as many as you would like.
- I want to add a lot of layout Snippets - is there a faster way to add to my page?Many user prefer the drag-and-drop option from the
 area at the top, right of Omni CMS. Click Snippets to get a drop down of the options and drag and drop them to where you want on the
page.
area at the top, right of Omni CMS. Click Snippets to get a drop down of the options and drag and drop them to where you want on the
page. - Can I add other snippets or tables into the layout snippet?
Yes, you can nest any content inside of a layout snippet including Youtube embeds, Wufoo forms, text, images, more layout snippets, or tables.
Please do not use snippets within snippets excessively as your page may not render correctly in certain use cases.
- Embedding a Wufoo Form to a Page
- Log into Wufoo and locate the form that needs to be embedded
- Legacy Wufoo Format: Select the
 button next to the form's title (Third option from the left).
New Wufoo Format: Select the "Share Form" symbol on the form that you chose (Second option from the left).
 - In the Permanent Link box, copy the URL.
- Go to Omni CMS and select the page that the form needs to be embedded on.
- Edit the page by clicking the button.
- Click in the Toolbar (second row, on the right).
- A "Choose Snippet" pop-up box will appear.
- On the left column click the Wufoo option. On the Right column a preview will show up.
- Click the button to inject the snippet to your page.
- A table will appear on your page wherever your cursor was.
- Paste the URL into the Enter Wufoo URL here cell.
Your table should look something like: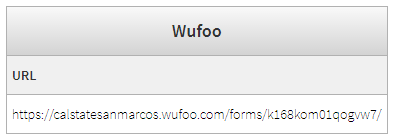
- Click (first icon in the ribbon). Your form will render as "Fill out my online form" when
in the page Preview.
- When published out, your form will render the entire form within the page.
- Embedding videos
General Video Rules:
- Make sure the video has been captioned accurately.
Captions should include speaker names, punctuation and grammar, and sounds. - Avoid making “slideshow” videos that have text displayed on the screen with music as the audio - these are not accessible
for non-visual users!
- Video should be optional to watch - do not hide important content/need to knows in a video.
Caption Requirements
Before adding a video to your page, videos legally must be:
- Accurate: Captions must match the spoken words in the dialogue and convey background noises and other sounds to the fullest extent possible with punctuation.
- Synchronous: Captions must coincide with their corresponding spoken words and sounds to the greatest extent possible and must be displayed on the screen at a speed that can be read by viewers. Captions should display with no more than two lines of text at a time, have no more than 30 or 31 characters per line and have no more than 3 seconds delay from the audio.
- Complete: Captions must run from the beginning to the end of the program to the fullest extent possible.
- Properly placed: Captions should not block other important visual content on the screen, overlap one another or run off the edge of the video screen.
Fill out the Captioning Request Form if captions are not already implemented. There is no cost to your department for having your video captioned.
Adding a Video to Your Page
- Navigate to the page that is intended to host the Youtube video.
- Select to begin editing content area.
- Click to the area on your page that you would like to add a Youtube video.
- In the toolbar, click the (second row, near the right) -OR- the on the top-right of your page to open the side bar. Click the Snippets header to expand.
- Your page will grey out and a pop-up will be displayed. Select YouTube from the "Choose Snippet" pop-up menu.
- A small preview of your snippet will be displayed. Click to insert your selected snippet to the page.
- The snippet will be added to your page. It will look like a table:
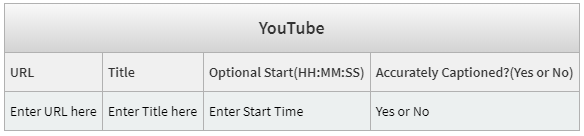
- Fill in the table provided with the URL of the Youtube video, the Title of the video, an optional start time, and if the video is Accurately Captioned.
- Click in the toolbar to save your changes.
- Once saved, the Youtube video snippet will transform from a table into an interactable
video.
- the page to apply the video to the live site.
FAQs:
- My video is not showing up on my page and am receiving an error message. Why?
There are two error messages that can appear when embedding a youtube video:
- Captions: Your video needs accurate captions before being publicly posted online. Please use the Captioning Request Form to request captions and then post your video online once done.
- No Title: Your video needs a valid title in the title field. "Title" or the default text are not acceptable titles for Youtube and may cause the error.
- What happens if I say my video is captioned but it isn't really?
The Web Team can pull logs of page edits. If you post a video that is not captioned and mark it as accurately captioned you will recieve an accessibility warning email and may also have your web editing access revoked.
Captioning is provided free to campus through the Captioning Request Form and must have the captions applied before the video is added to a site.
- How do I resize my Youtube video?
By defualt all videos will expand to fit the content area they are given.
If you want to resize your video to be smaller you will need to nest the Youtube snippet inside of any of the layout snippets.
- Make sure the video has been captioned accurately.
- Adding Social Media
Social Media Considerations
Before adding a social media snippet to your page be sure to look over the Social Media Accessibility guidelines. Any social media channels that is posted on a CSUSM webpage is expected to be accessible for all users.
How to Add Social Media to Your Page
- Navigate to the page that is intended to host the Social Media snippet.
- Select to begin editing content area.
- Click to the area on your page that you would like to add a Social Media snippet.
- In the toolbar, click the (second row, near the right) -OR- the on the top-right of your page to open the side bar. Click the Snippets header to expand.
- Select Social from the Snippets menu.
- The snippet will be added to your page. It will look like a table:

- Fill in the table provided with the Department Name and the URL of the social Media account you want to add.
- Click in the toolbar to save your changes.
- Once saved, the Social Media snippet will transform from a table into a page element
and look something like:

If desired: Page editors will need to manually add in an appropriate heading to the page to introduce the Social Media snippet. Headings are not required and are based on the content being communicated. - the page to apply the social media to the live site.
- Adding iFrames
Need to embed an approved third-party product to your page? The iFrame Snippet can assist
- Navigate to the page that is intended to host the iFrame snippet.
- Select to begin editing content area.
- Click to the area on your page that you would like to add an iFrame snippet.
- In the toolbar, click the (second row, near the right) -OR- the on the top-right of your page to open the side bar. Click the Snippets header to expand.
- Select iFrame from the Snippets menu.
- The snippet will be added to your page. It will look like a table:

- Fill in the table provided with the iFrame URL and the Title of the third party product you want to add.
Optional: Add in a height number to set the height of your iFrame. The default selection is 500 pixels.- Click in the toolbar to save your changes.
- Once saved, the iFrame snippet will transform from a table into a page element.
- the page to apply the iFrame to the live site.
- Click
Approved iFrame Products:
- Google Calendar
- Green Rope Forms
- Mediasite
Attempting to add a non-approved product will result in a red error message on your page preview in Omni CMS. The error message and iFrame element will not publish to the live site.
If you need to add a product that is not listed above, please contact web@csusm.edu so we can do a full security and accessibility review and evaluate the product.
Please note: Products may be rejected from being added to the website if the product does not pass the evaluation criteria. - Adding Accordions
Looking to add an expandable element on your page, possible for an FAQ? The Accordion Snippet can assist.
- Navigate to the page that is intended to host the accordion snippet.
- Select to begin editing content area.
- Click to the area on your page that you would like to add an iFrame snippet.
- In the toolbar, click the (second row, near the right) -OR- the on the top-right of your page to open the side bar. Click the Snippets header to expand.
- Select Accordion from the Snippets menu.
- The snippet will be added to your page. It will look like a table:
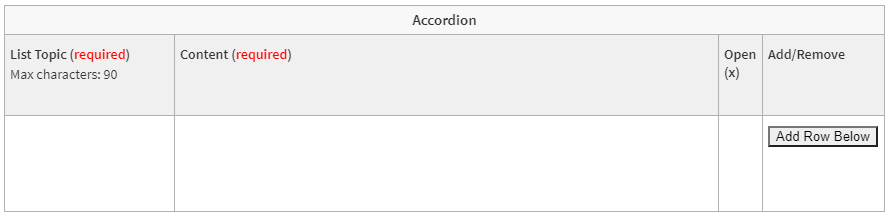
- Fill in the table provided with the List Topic and the Content you want to add.
- Enter x in column Open (x) if that specific accordion element should be open (active) when the page loads.
- Click Add Row Below if you would like to add additional items to the accordion list.
- Click in the toolbar to save your changes.
- Once saved, the Accordion snippet will transform from a table into a page element.
- the page to apply the Accordion to the live site.
Rendered Example of the Accordion Snippet
- This is List Topic #1This is the content that is displayed.
- List Topic #2Another content example.
- Page Sliders
What is a Slider?
A slider is a feature box that rotates different slides/images on a loop. This content typically is a high level overview of some sort of advertisement or important timely information.
Appropriate Slider Use
- Timely information - such as an advertisement for an upcoming event
- Concisely worded content - Some text should be present but should be minimal
- Visually interesting content that is compelling for a user to interact with it
- All slides are sized exactly the same
- Slide content can be found elsewhere on the site
Inappropriate Slider Use
- Image galleries
- Event flyers or extremely text-heavy content
- All slides are sized differently
- Unique content is only posted in the slider and cannot be found elsewhere on the site
Slider Limitations
Sliders are typically not an effective way to communicate information! Typical web usage shows that web viewers interacting with your page will not interact with a slider and will typically miss all information posted after the first slide.
I still would like a slider - How do I create one?
Sites can have sliders on their homepage but sliders must be initiated by the Web Team. Once a slider is created, your department can manage it from that point on.
If you have any slider content examples the group will evaluate the slider content and determine if a slider is an effective method of communicating the content:
- If it is, the Web Team creates the slider for you and you can manage its content from that point on (the Web Team sends over instructions).
- If the request is denied, the Web Team will typically will suggest up better solutions on how to feature the content you are wanting to put on your page.
Email at least two examples of the content you would like to have featured in a slider to web@csusm.edu.
Already Created Slider FAQ
- When uploading a slide image, I get a small loading icon and the image is not uploaded.
Your file is too large. Image files on Omni CMS are allowed to be a max size of 5 MB. This size was selected to provide fast download times on the viewer's end.
Try resizing your image and reuploading it.
- Highlight Cards
What is a Highlight Card?
A highlight card is a clickable page element that combines a required image, title, link, and optional supporting text. Highlight cards should only be used when organizing clickable page content that is equivalent in nature and will not be approved if the request is strictly for visually organizing content on a page.
Highlight cards look like:
Images on highlight cards should be the same ratio (2:3 or 3:4 recommended) AND the optional supporting text area should be consistently used across cards (i.e.; All cards have some short supporting text -OR- all cards have no supporting text).How do I get a Highlight Card?
This snippet is currently Web Team only. Once a Highlight Card has been added to a page however, regular content editors can modify the snippet as needed.
Highlight Cards FAQ
- My Card is giving an Error Message - why?Check to see if there is a space or non-breaking space before the image. This extra character will cause an error.
- My Cards render - but do not have the hover effect. Why is that?Check to see if your image has a link associated with it. If so, break the hyperlink on the image and republish the page.
- My Card is giving an Error Message - why?
- Interactive Datatable
What is a Datatable Snippet?
Categorize/organize, filter, sort and search medium to large data sets in table format.
How to Use a Datatable Snippet:
- Open the page and click the area where the Datatable is supposed to be placed.
- Click the -OR- the (top-right of your page) to open the gadget side bar. Click the Snippets header to expand.
- Select Datatable from the Snippets menu.
- A table with display options will be added to your page:
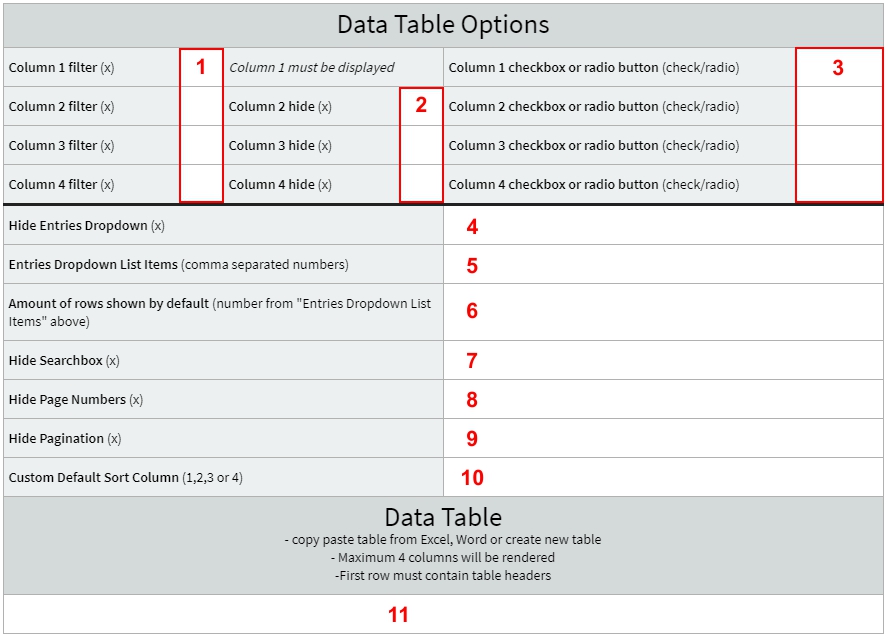
- Set your table's options:
- Section 1: Enter x for each column that will be used as a filter; this is shown as Zone A in the table below.
- Section 2: Enter x for each column that needs to be hidden.
- Section 3: Enter radio (default) or check for each filtered column.
This determines the type of filter, radio buttons (one filter at a time) and check boxes (multiple filters simultaneously). - Section 4: Enter x if the Entries Dropdown (shown as Zone B in the table below) should be hidden.
- Section 5: Enter custom numbers for the Entries Dropdown (default = 10,25,50, All); this is shown as Zone B in the table below.
- Section 6: Enter number of rows shown when table is loaded (default = All).
- Section 7: Enter x to hide searchbox; this is shown as Zone C in the table below.
- Section 8: Enter x to hide page numbers; this is shown as Zone D in the table below.
- Section 9: Enter x to hide pagination; this is shown as Zone E in the table below.
- Section 10: Enter column number to sort by (1,2,3 or 4). Use a negative number to reverse the sort order.
- Section 11: Either copy/paste an existing table from Excel or Word or create a new HTML table in
OU
- Maximum 4 columns can be used.
- Each column can be used for filtering, sorting and searching.
- The first row always serves as the table header.
- Click in the toolbar to save your changes.
- Once saved, the snippet will display your table data with all the chosen options
Example datatable: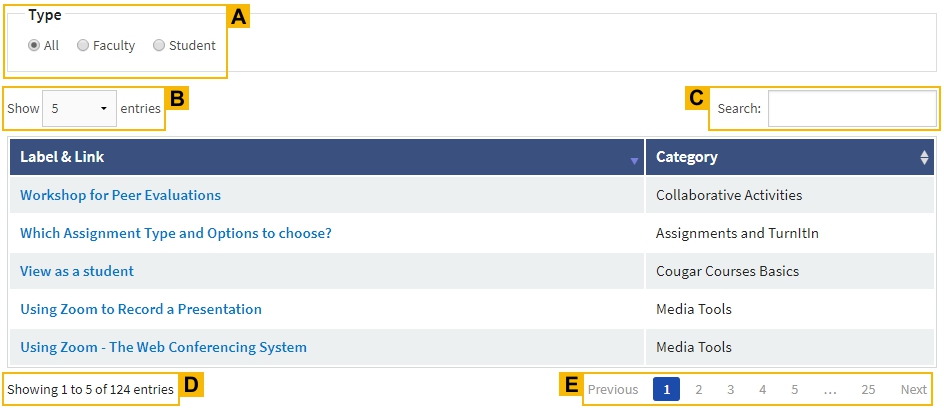
 the page to apply the changes to the live site.
Currently only one datatable snippet can be used on a page.
- Directory and Profile Cards
What is a Directory Snippet?
A directory snippet renders in two different views: Lists or Cards
How to Add/Edit a Directory Snippet:
5/14/18 Update: The Directory Snippet does not work in Internet Explorer. Please use FireFox or Chrome to add or modify rows in the directory. The Web Team is looking into fixing this issue but recommend another browser during the wait.
- Navigate to the page that is intended to host the Directory Snippet.
- Select to begin editing content area.
- Click to the area on your page that you would like to add a directory.
- In the toolbar, click the (second row, near the right) -OR- the on the top-right of your page to open the side
bar. Click the Snippets header to expand.
- Select Directory from the Snippets menu.
- The snippet will be added to your page. It will look like a large table:
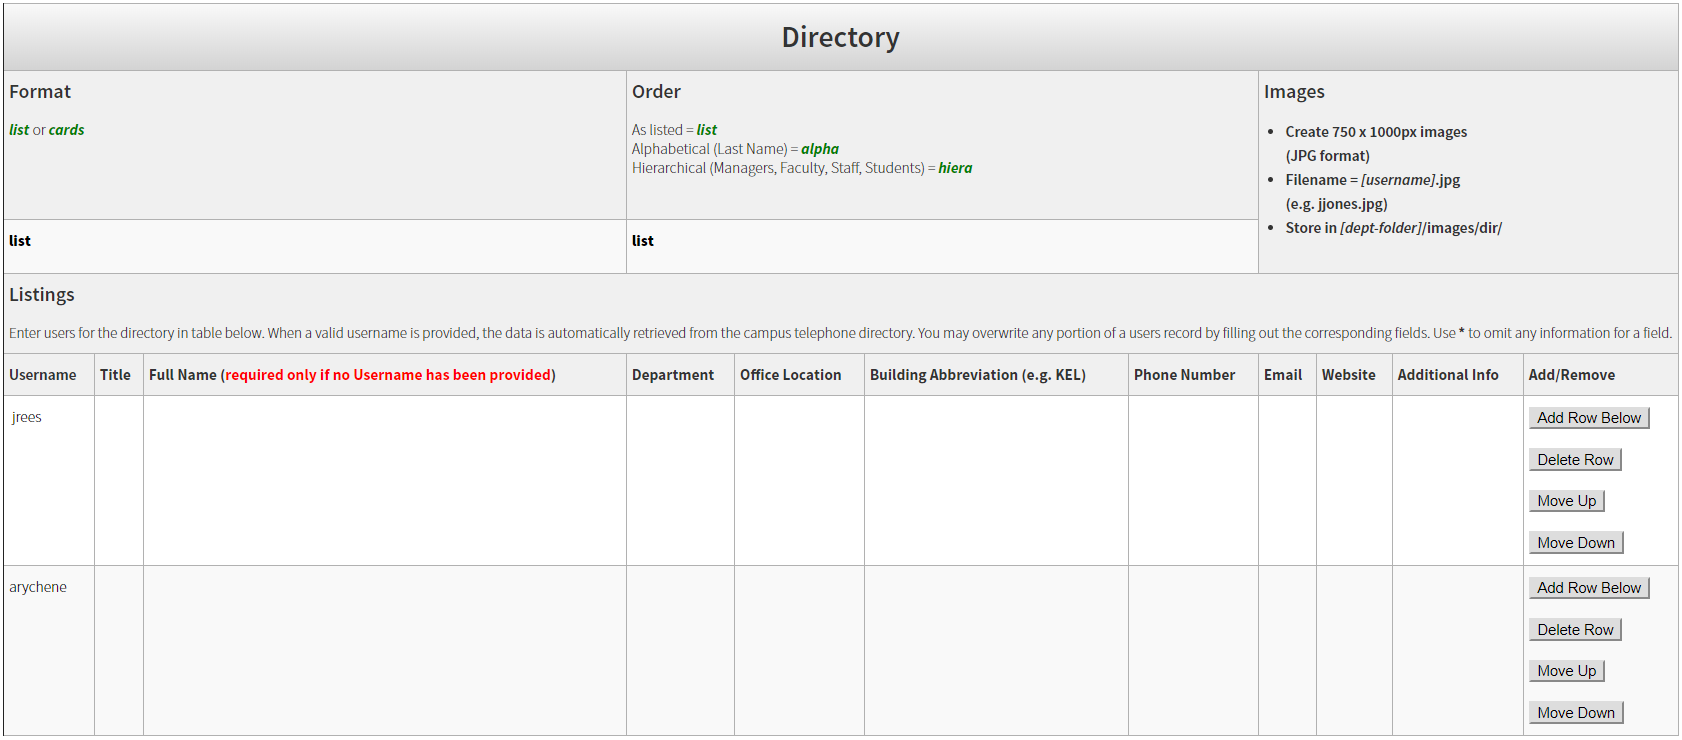
- Fill in the table provided with the Format desired, Order of items to be listed, and Username of the individual(s) to be listed on the directory.
The Username will pull in directory information automatically for each user. If you would like to override any of the content, you can fill in the columns on the table.
You can use a * symbol to hide auto-added content on a listing. Use a ^ symbol to add a line break to lenghty entries.
Images: You will need to publish your images before having them render in the directory. Images must be uploaded to a sub-folder, named "dir", inside of a folder named "images" within your site's main images folder and each image must match the user's username exactly. If no username is provided, the image must match the user's email (not including the domain). - Click in the toolbar to save your changes.
- Once saved, the Directory snippet will transform from a table into the directory view selected.
- the page to apply the directory to the live site.
If you already have a directory snippet on your page It will not render in the page preview - this is normal. It will show up on your site if the content is filled in on publish.
Building Abbreviations List:
Building Abbreviation for Directory Snippet Academic Hall ACD Academic Success Center ACS Administrative Building ADM Arts Building ARTS 435 E. Carmel Street CARMEL Center for Children & Families CCF M. Gordon Clarke Fieldhouse CFH University Commons COM Central Plant Building CPB Extended Learning Building ELB Viasat Engineering Pavillion VEP Kellogg Library KEL Markstein Hall MARK McMahan House MCM Public Safety Building PSB QUAD QUAD Social and Behavioral Science Building SBSB The Sports Center SC Science Hall 1 SCI1 Science Hall 2 SCI2 Student Health and Counseling Services SHCS Student Health and Counseling Services' SHCSB San Marcos Care Center SMACC Temecula Site TEME University Hall UNIV University Services Building USB University Student Union USU University Village Apartments UVA Epstein Family Veterans Center VET

Navigation - side and top menu management
Editing Navigation
- Editing Navigation
Our campus navigation menus only display 4 levels of navigation.
This looks like:
- /Top level seen at homepage (Level 1)
- /category - folder (Level 2)
- /sub-category - sub-folder (Level 3)
- /sub-sub-category folder (Level 4)
- /sub-category - sub-folder (Level 3)
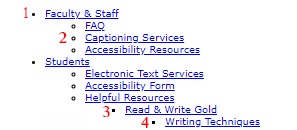
Caution: If you have a sub-sub-sub-category (5th level) folder your navigation won't display properly.
Updating a Site's Navigation
- Once finished adding files or pages (see Adding Files to OU guide and/or Adding Pages to OU guide) navigate to the _includes folder at the Site level (Level 1). Then, select on the _nav.pcf file and use the green "Edit Navigation" button.
- Type in the item(s) that need to be added to the navigation and link them as a regular hyperlink.
Indent the bulleted list entry to correspond with the sub level of the folder.
Important: Make sure that all items shown in the navigation are spelled correctly and are linked in a bulleted list. Unlinked text or text outside of the bulleted list is not allowed and would break your menu display. - Click the button in the WYSIWYG editor – this will save your changes as a development draft.
- Click if the edits are ready to go live.
Deleting Items from a Navigation:
- Navigate to the _includes folder at the Site level (Level 1) and select the _nav.pcf file in Omni CMS. Use the green "Edit Navigation" button.
- Delete the bulleted item(s) from the list.
- Click the button in the WYSIWYG editor – this will save your changes as a development draft.
- Click if the edits are ready to go live.
Need help?
If you are having difficulties with any edits on your page(s), suspect a process is taking too long, or encounter an issue not covered in this guide, please contact web@csusm.edu
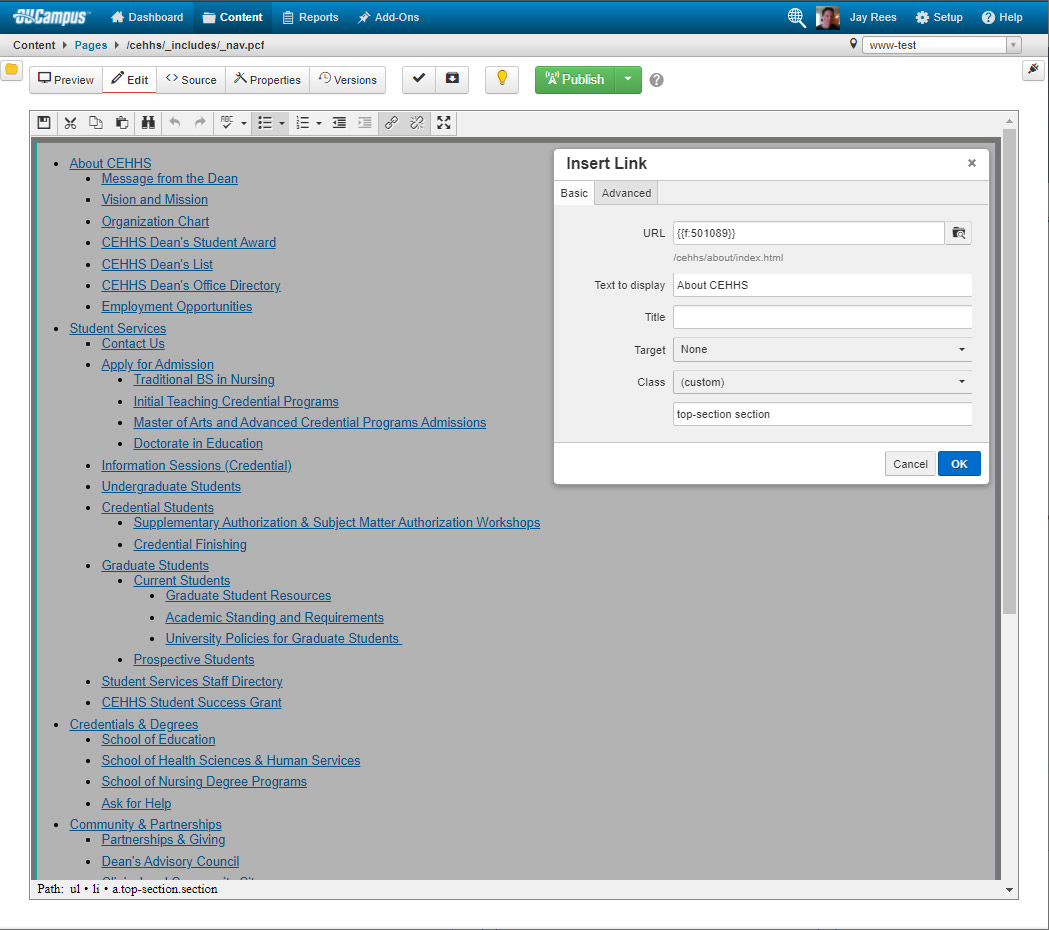
Top Navigation (only some sites)
- Top Navigation (only some sites)
If your department website uses the top horizontal navigation bar (enabled by the Web Team), there are a few more edit options to maintain the navigation structure. You still edit the same _includes/_nav.pcf file as a bulleted list, but there are some style classes to use on links.
Top Sections
Site level (Level 1) items that you want to show in the top bar need to have "top-section section" as a custom class on the link, and the link itself either goes to a folder index.pcf page or can be empty by using a "#" symbol.
Note that items can remain at Site level (Level 1) and not receive this class if you want them to show up in a left-hand navigation but not take up the space in the top bar (this is common for items like "For Faculty/Staff" or "Events").
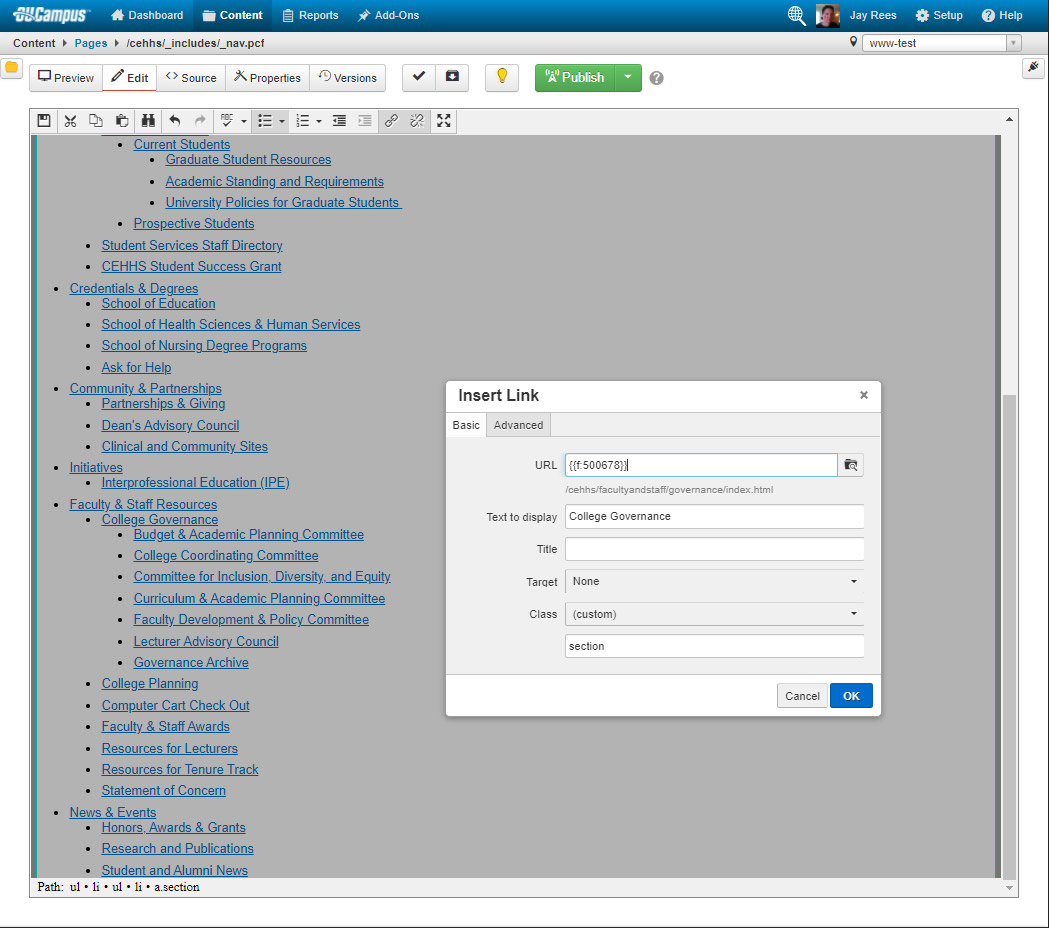
Sub Sections
Large/Distinct sections within a top section might warrant their own stand-alone navigation view in the left-hand navigation so they don't get lost in a large menu structure. These are typically at the Site level (Level 2) indent but can be at a lower level. A typical case might be for a structure like "Degree Options" (a top-section section) that contains "Graduate Programs" and "Undergraduate Programs" (these are level 2 sub-sections) which can receive a class of "section".
Properties - contact block, page and site properties
Contact Block, Breadcrumbs, and Organization Banner
- Contact Block, Breadcrumbs, and Organization Banner
The department-wide or folder-level changes are performed on the _props.pcf files found automatically in content folders. Note, this is not for page-level properties.
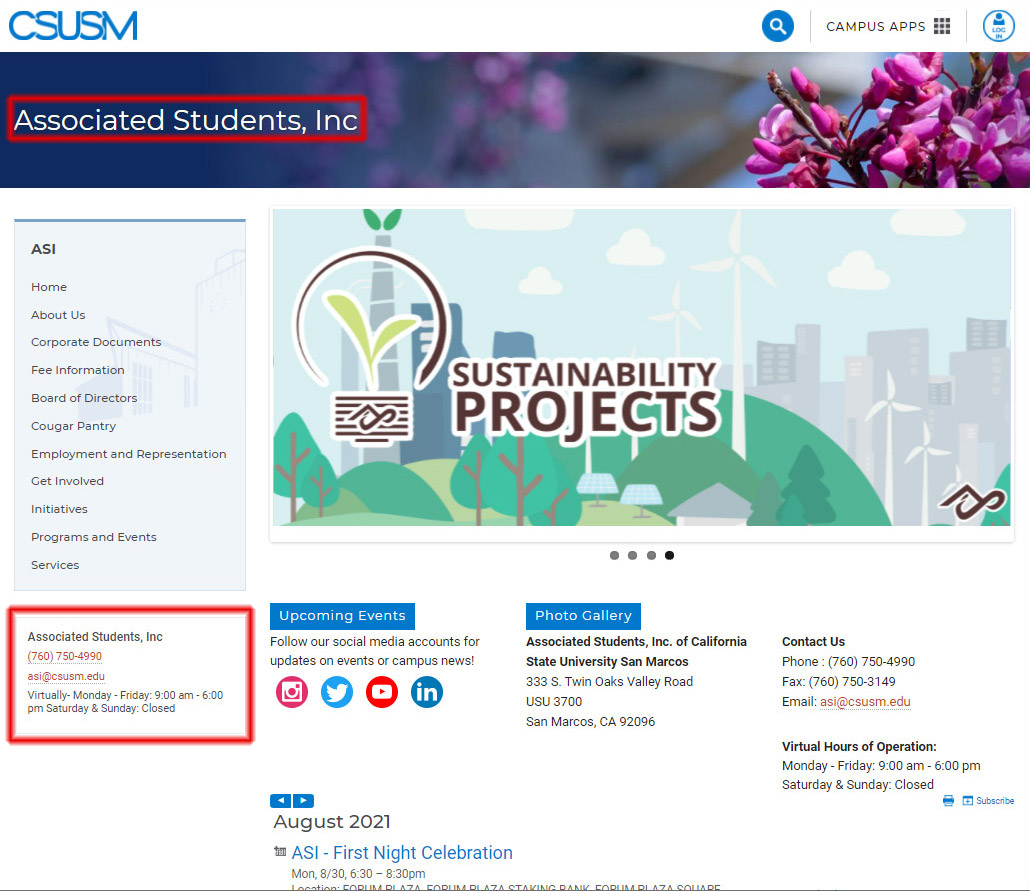
Contact Us Block and Organization Banner
The left-hand "Contact Us" block (under the navigation menu) is updated from fields in the central _props.pcf file. This same file also controls the top banner text that displays across your site. Most departments will only need to edit the single _props.pcf file in their root folder, but you do have the option to override this content at a lower level if you need different "Contact Us" information for special sections (folders) of your site.
Editing the _props.pcf file
- Log into Omni CMS by going directly to Omni CMS and logging in with your campus credentials.
- You will be taken to your OU Dashboard.
- Select the tab in the blue bar and then "Pages" to see the table view of folders and files.
- Navigate to the site/folder needing updating through the folder structure.
- In the root level of your directory there will be a _props.pcf file.
- Use the light bulb to check out the _props.pcf file.
- Select the "Properties" option for the page.
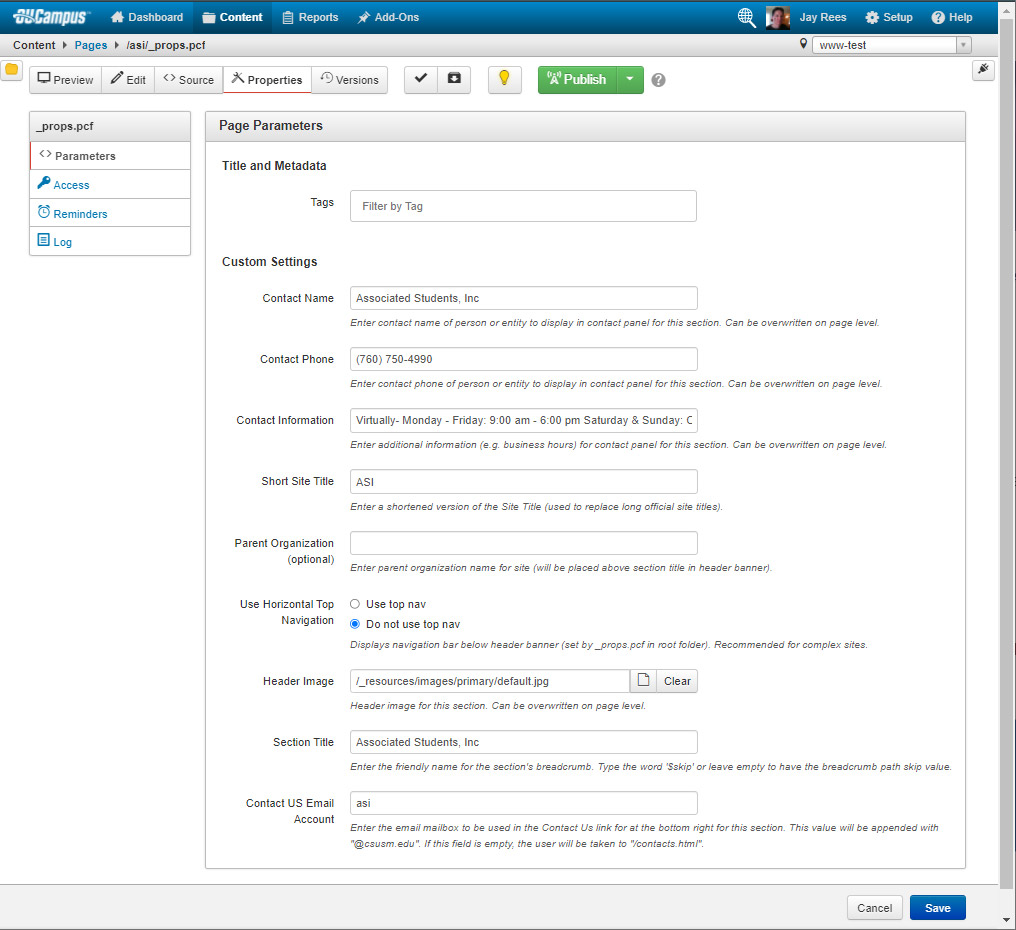
- Make your site edits as needed.
Contact Name (ex: Associated Students, Inc)
Enter contact name of person or entity to display in contact panel for this section. Can be overwritten on page level.*
Contact Phone (ex: (760) 750-4990)
Enter contact phone of person or entity to display in contact panel for this section. Can be overwritten on page level.*
Contact Information (ex: Monday - Friday: 9:00am - 6:00pm Saturday & Sunday: Closed)
Enter additional information (e.g. business hours) for contact panel for this section. Can be overwritten on page level.*
Short Site Title (ex: ASI)
Enter a shortened version of the Site Title (used to replace long official site titles).
Parent Organization (optional) (ex: Student Affairs)
Enter parent organization name for site (will be placed above section title in header banner).
ADMIN ONLY:
The Web Team sets these fields after special consultation. Your navigation file needs adjustments before it can produce the top/horizontal navigation. The top banner image is not intended for department-level changes. This option will only be changed for special cases and by consultation with the Office of Communications.
* to hide information from a lower level, use an asterix (*)
Use Horizontal Top Navigation
Displays navigation bar below header banner (set by _props.pcf in root folder). Recommended for complex sites.
Header Image
/_resources/images/primary/default.jpg
Header image for this section. Can be overwritten on page level.
Section Title (ex: Associated Students, Inc)
Enter the friendly name for the section's breadcrumb. Type the word '$skip' or leave empty to have the breadcrumb path skip value.
Contact US Email Account (ex: asi)
Enter the email mailbox to be used in the Contact Us link. This value will be appended with "@csusm.edu" unless you provide a full email address with another domain. Lower-level folders have their own _props.pcf files that may override the central settings in cascading fashion, so you may need to edit those additional _props.pcf files and republish those folders. - Select the button in the WYSIWYG editor – this will save your changes and you can then check
the page back in with the ligh bulb .
- Publish the /site/_includes/_contacts.pcf file: In the site's root folder you will find an _includes folder with a _contacts.pcf file (Example: /asi/_includes/_contacts.pcf). You don't need to edit the file, just publish it so it can find all of your _props.pcf file edits. This publish updates the Contact Us block for all your pages based on their folder level and any overriding (cascading) _props.pcf changes. Thus, if you see different content on a lower-level page than your intended root _props.pcf update, you may need to edit the lower-level folder _props.pcf file and republish this /site/_includes/_contacts.pcf file again.
Updating Page Display Name
- Updating Page Display Name
Updating the Page's Display Name (Main Page Title)
To update page display names you would do the following:
- Go to the page you would like to edit.
- Click the button to edit the page.
- Click (just above the toolbar).
- In the Title, Page Heading, and Breadcrumb fields update listed phrases as needed.
- Title – is the name of your tab in your browser.
- Page Heading is the Heading 1 that shows on the page.
- Breadcrumb is the small navigational listing at the top of your page.
If you did not click the button in the above step, you will not see the Title, Page Heading, or Breadcrumb
options.
- Click
- Click to push your page out to the live site.
- Go to the page you would like to edit.
Design Principals - best practices and search optimization
Search Engine Optimization (SEO)
- Search Engine Optimization (SEO)
Why SEO Is Important
SEO is important because it helps search engines understand your website and its content, as well as identify whether it is relevant to a searcher’s query.
As search engines become more sophisticated, there is a greater focus toward relevance and semantics in search engine results pages (SERPs).
Google, with its plethora of complex algorithms, is now much better at:
- Understanding what users are actually searching for when they type a query.
- Delivering search results that meet user intent (informational, shopping, navigational).
Adapting to this development is essential, and you can do it by ensuring that your website and its content are well-optimized according to the latest best practices.
With the seven factors below you can improve the general visibility of your pages in search engines:
1. Content
Remember that you’re writing content for people – therefore that content must be high-quality, substantial, and relevant.
Also remember:
- Answer questions users might search for
- Build target keywords into copy but don't overuse (might be considered spam)
- Keep content fresh, retire old content
2. Title
The title tag, an HTML tag that exists in the head section of each webpage, provides an initial cue or context as to what the topical subject matter is of the respective page it is on.
It is featured prominently in the search engine results pages (typically used as the clickable link) as well as in the browser window.
The title tag by itself has little impact on organic rankings, this why it’s sometimes overlooked.
That said, missing, duplicate, and poorly written title tags can all negatively impact your SEO results, so make sure you’re optimizing for this element.
3. META description
Since the early days of SEO, meta descriptions have been an important optimization point.
Meta descriptions, meta tags that provide a description of what the page is about, are often displayed in the SERPs underneath the title of the page.
While Google maintains that meta descriptions don’t help with rankings, there is anecdotal evidence that indirect attributes of better descriptions do help.
Optimizing meta description correctly can help improve:
- Click-through rate (CTR)
- Perception of the quality of the result
- Perception of what your website offers all change
4. Header Tags
Header tags are HTML elements (H1-H6) used to identify headings and subheadings within your content from other types of text (e.g., paragraph text).
They can indirectly impact your rankings by:
- Making your content easier and more enjoyable for visitors to read
- Providing keyword-rich context about your content for the search engines
5. Images
Adding images is a good way to make your webpages more appealing. But not all images are created equal – some can even slow down your website.
Optimizing images properly will help you make the most of a valuable SEO asset.
Image optimization has many advantages, such as:
- Additional ranking opportunities (show up on Google Image Search)
- Better user experience
- Faster page load times
Images shouldn’t be an afterthought. Make sure to incorporate images that support your content and use descriptive titles and alt text.
6. Links
Building links is one of the many tactics used in search engine optimization (SEO) because links are a signal to Google that your site is a quality resource worthy of citation. Therefore, sites with more backlinks tend to earn higher rankings.
External links you add can assist search engines in determining the usefulness and quality of your pages. High-quality pages usually link to other high-quality pages; thus, search engines will look at your content favorably, helping you rank higher.
7. Filename
The filename should be descriptive, include applicable keywords and use hyphens instead of spaces to separate words. Keep your filenames to under five to six words.
Accessibility Design Tips
- Accessibility Design Tips
Want to make a beautiful and successful website? Follow our web best practice tips to create the most responsive and accessible site content possible.
Tip 1: Avoid Using Fliers
Instead of putting an image of a flier on your site - try making a web version of that content! Use visual elements of that flier and make a custom image that is interesting and engaging to users and then type out your flyer's content directly on the page.
There are risks to having fliers on your site! If you leave your flier as an image:
- it likely is not accessible to non-visual users and is not legally allowed on the site!
- You may get an accessibility warning about content, risk having content removed, or lose site editing access due to continued inaccessible content being put on your site.
- it most likely will not be able to be read by visual users on a cell phone due to the image being scaled down to fit on a small screen.
- and the viewer has loading issues (broken file link was used, slow wifi, etc) a viewer would miss all of the image's content that wasn't captured in the alternative text.
Tip 2: Avoid Generic Phrases like "Click Here"
Instead of using a generic phrase like "here" or "click here" make sure the linked text is a unique phrase on your page.
Why? Having a generically named link has a heavier cognitive load for all user types. Users typically like to skim pages to find an answer that they are looking for; generic link names slow readers down and adds a level of frustration.
- it likely is not accessible to non-visual users and is not legally allowed on the site!
Troubleshooting Common Issues
Session Timeout -- Error, Too Many Redirects
If you we able to log in and author pages before and then later you encounter a error where it gives a message like "Error, too many redirects" or "Session timeout" this is because your authentication connection between DUO and Omni CMS has expired.
Unfortunately, you cannot just reload the page to get the login, you have to either close the entire web browser and relaunch (thus getting a new session), OR you can open a new window with "incognito" mode (which also uses a different session).
Unable to see the "New" button or get to "Page Properties/Parameters"
If you are unable to see all the features in our guides or that a coworker has, it could be that your access level is set to the "Student" level instead of "Employee". See Account types in this guide and options for having those settings changed upon request.